• Steel Soldiers now has a few new forums, read more about it at: New Munitions Forums!

  • Microsoft MSN, Live, Hotmail, Outlook email users may not be receiving emails. We are working to resolve this issue. Please add support@steelsoldiers.com to your trusted contacts.


What have you done to your CUCV today/lately - Part 2

fitz

Member
268
13
18
Location
Mass
Dana 60 death wobble repair parts/prices.
Spicer bushings & springs $38 at a local driveshaft shop.
Drag link $103 {Napa)
Tie rod $218 ((Napa)
Steering stabilizer $32 (Napa)
$400 well spent. This truck had a little shimmy to the front end when I bought it last year. When I recently installed some Rough Country HD 2" front springs the shimmy turned into the death wobble. Glad its fixed.
 

Recovry4x4

LLM/Member 785
Super Moderator
Steel Soldiers Supporter
34,014
1,814
113
Location
GA Mountains
Had a no start from cold on the ambulance the other day. The wait light didn't go off at all and no sound from the relay. Switched cards and had the same issue so I returned to the experimental card. Yesterday I replaced the glow plug relay from my stock and she fired right up. The tropical heat must play a roll, had to replace th he one on the M1008 a while back as well. Nice to keep a stock.
 

cucvrus

Well-known member
11,279
9,619
113
Location
Jonestown Pennsylvania
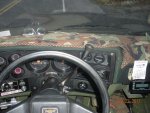
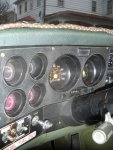
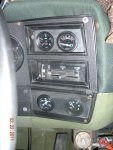
The gauges I used were the standard size 2 1/32" - 2 1/16". I put the oil pressure and the water temp in the radio close out area. And the same size tach in the vacant area to the left side of the OEM volt meter. You may already know this but the useless diagnostic connector on the CUCV can be removed and you can use the bracket that held the connector and the harness as a gauge holder it works perfect. I have put an hour meter in that holder on several units. The M1009 radio bracket is also a useful place to mount gauges. You can do so with out a great deal of hole cutting by back spacing the cover away from the dash pad slightly. If I could figure out the picture posting procedure I would show you the radio closeout installed. PM and I will send them to you. Maybe you could post them for me. If you don't mind. i tried on Friday for 1 hour and gave up. I am used to just copy and paste.
 

cucvrus

Well-known member
11,279
9,619
113
Location
Jonestown Pennsylvania
Replacing the OEM rubber bushings on the stabilizer bar, springs and shackles is a must do to the full line of CUCV's at this point in time. The OEM rubber has outlived it effectiveness and the Poly ones are easy to install and will last much longer. I did take notice to a harder bump when these were installed but not much. The poly don't absorb the bump like the rubber once did. Out with the Rubber in with the poly. This is a nice dirty stinky job that can be completed completeld in 1 day. With a good oxy/ace torch set. Heat is the key to get the stubborn bolts and rubbers out. Very stinky and dirty. But it will clean up well and gives you the opportunity to paint each piece and the frame as you re-assemble. Do 1 corner at a time. Be patient and replace the bolts if they look crappy. Bolts are cheaper then doing a poor job and having to redo it. I used grade 8 bolts washers and nuts. Good Luck
 

Streamline

Active member
Steel Soldiers Supporter
544
107
43
Location
Comer, Ga.
I found out recently that the seal between the roof and cap on our truck is leaking water when it rains. I found rust through spots under and behind the driver and passenger side seats of the truck! I've started working on these parts this week! After im done with these repairs I will spray in a rubberized seal through the entire floor area of truck!
 

Attachments

Last edited:

Mainsail

Well-known member
Steel Soldiers Supporter
1,423
1,440
113
Location
Puget Sound, WA
I found out recently that the seal between the roof and cap on our truck.
?

I found out recently that the seal between the roof and cap on our truck is residing in Oz with Dorothy and Toto.
I found out recently that the seal between the roof and cap on our truck is actually made of cheaper walrus.
I found out recently that the seal between the roof and cap on our truck is designed to let water in.
I found out recently that the seal between the roof and cap on our truck is really just another navy poser.
I found out recently that the seal between the roof and cap on our truck cannot balance a ball on his nose, it's glued on.

;-)
 

gpzTurbo

New member
17
0
0
Location
Moorestown, NJ
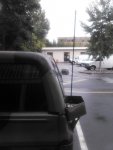
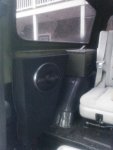
I finished the stereo with a Firestik 3ft fm antenna and 6x9's in front of the wheel wells. I was going to use the ammo cans but made enclosures instead (with a little help from a friend).

NCM_0378.jpg NCM_0380.jpg
 
Last edited:

Keith_J

Well-known member
3,657
1,313
113
Location
Schertz TX
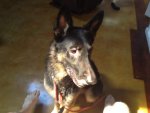
I brought home my new dog in the 1031. 3yo GSD male. Turned on the AC and he sat the entire way. Now he is glued to my side. Going to make him my EOD bomb sniffer
 

Attachments

cucvrus

Well-known member
11,279
9,619
113
Location
Jonestown Pennsylvania
What I done to a CUCV in te past 24 hours

I removed The entire rear bumper and hitch assembly and replaced the OEM steel draw bar that attaches the pintle mount to the frame at the bottom. After 30 years the steel tubing was pretty much carbon. I drilled all attaching points to 1/2" and used grade 8 stainless plated nut bolts and washers to attach everything to the new drawbar. I used grade 8 3/8 to attach the pintle mount to the rear bumper flange. While I was back there I removed the rear body mount bolts and the cushion holder brackets and eliminated them. They are a good source for rust and usually just fall to pieces when you remove the outside bumper braces that are bolted to them. Makes it a real bear to reinstall the bumper braces. I opted to use the stainless coated 1/2" bolts there also. it does a cleaner job and is somewhat stronger. I chose 1/2" because I have tons of these from other DOD jobs in the past. They also make a nice job. Most times I throw all the bolts away on any job and use new fasteners with neverseize. It make the whole job look better. The trailer plug is the ticket. I used a burr tool on my die grinder and just sized it a bit bigger for that OEM look and fit. I retained the OEM plug to the main harness. I wish I was smart enough to post pictures but can not figure that out for the life of me. Oh well I can PM the pictures to you if you like. But that would require me to have your email address. Maybe I should just stop and let it at that. Just to clear it up I did install new body mount bolts and replaced the non exsistent steel/rubber cushions with new ones I made up. The rubber was still there the steel not so much. I have an interesting M1028 coming in this week that don't run and hasn't since the guy converted it to 12 volt and cut a box of relays and other connections out of the wiring harness. I will keep you all posted. JOY. I had that truck for 2 years and it never missed a beat. Bingo. Genius gets ahold of it and he changes everything. No Run No Go.
 

cucvrus

Well-known member
11,279
9,619
113
Location
Jonestown Pennsylvania
I removed an electric fuel pump and all the poor wiring from a guys M1008 truck. I returned the truck to the OEM pump and removed the push button GP and returned to OEM. All it needed was the circuit card and harness. Put one one in it from a donor CUCV. Replaced the neutral safety switch on the steering column to eliminate the toogle switch for the backup lamps. His was not there. Bought this truck like that. Removed 3 miles of wiring from the under dash area and put a volt meter into it. Replaced all the cluster lamps and cleaned the gauges. Replace the blower switch and pigtail. New switch and knob and used harness. As on many the switch was melted and had only 2 speeds. Poor contact and bad ground I suspect. When I turned the fan on high 3 families of mice lost their homes. R&R heater box and remove nests and 30 years of crud. Replaced heater core and blower motor with Auto zone lifetime parts. Defroster vents had a pile of nesting in them also. That is why GM used the sound proofing on the firewall inside. Mice need home too. Well that was removed also at this time. The horn was the icing on the cake. R&R steering wheel cup brush the steering wheel center and replace the contacts and holder. Someone put it together without the contact and spring in place put a piece of tubing with a spring in instead. That is fixed and all OEM again. They even had the horn button taped on the back because they did noy have the metal ring clocked right. Well inside is good now under the hood. That will be another story . Unless you don't want to hear more. All in all 4 hours of my life well spent. 6 if the owner would have helped me.
 

cucvrus

Well-known member
11,279
9,619
113
Location
Jonestown Pennsylvania
Well my opinion is that if you buy a CUC/V or any older vehicle you should at least have a little mechanical knowledge or a lot of money. This guy has the money and don't mind spending it. He was hosed by several local garages with this truck and saw me at a truck stop driving my M1009 and ask if I was familar with them. And that is how it all started. He paid $250. to have the electric fuel pump put on and then more money to another guy for the push botton glow plugs. He saw mine all stock and wanted his like it. Well his first visit and he left happy and it starts and runs as intended. No vibrating pump everytime the key is turned on. I will see him again next week and start under the hood. Wrong wiper motor and airhorns are washer pumps not 1 pump 2 pumps. with 4 washer nozzles what a mess. Both inner fenders are going by the scrap pile and the bungee straps holding the batteries in side post batteries at that. What a mess. Side post batteries with post adapters on them. Looking for trouble.
 
Top
AdBlock Detected

We get it, advertisements are annoying!

Sure, ad-blocking software does a great job at blocking ads, but it also blocks useful features of our website like our supporting vendors. Their ads help keep Steel Soldiers going. Please consider disabling your ad blockers for the site. Thanks!

I've Disabled AdBlock
No Thanks