• Steel Soldiers now has a few new forums, read more about it at: New Munitions Forums!

  • Microsoft MSN, Live, Hotmail, Outlook email users may not be receiving emails. We are working to resolve this issue. Please add support@steelsoldiers.com to your trusted contacts.


FLU419 SEE HMMH HME Owners group

Quick question for the group, for those of you who have completely blown out your fuel system between tank and IP: How many pumps of the primer pump will it take to refill the lines, strainer, lift pump, etc from the tank, assuming I have a sealed system without any blockages? Or will the hand-primer even prime that section? I know it will pump fuel downstream, for bleeding, but will it create enough of a vacuum to pull fuel through empty lines all the way from the tank? Or should I just turn the starter a few seconds and hope the lift pump does the job?
 

General Hood

Member
712
2
18
Location
Fort Towson, OK
Quick question for the group, for those of you who have completely blown out your fuel system between tank and IP: How many pumps of the primer pump will it take to refill the lines, strainer, lift pump, etc from the tank, assuming I have a sealed system without any blockages? Or will the hand-primer even prime that section? I know it will pump fuel downstream, for bleeding, but will it create enough of a vacuum to pull fuel through empty lines all the way from the tank? Or should I just turn the starter a few seconds and hope the lift pump does the job?
I pumped my primer till my hand got numb, then decided to replace the primer itself, then it only took a couple minutes of priming to get the system free of air. The primers are fairly inexpensive. New primer was able to pump fuel from the tank thru the bleeders. Keep us updated on your progress
 

911joeblow

Active member
507
68
28
Location
Utah
Has anybody considered a simple 24V bendix pump? I think it is silly we have to do this priming thing all the time. You could just hook it up to a momentary button, push it for 5 secs then start her up?
 

The FLU farm

Well-known member
Steel Soldiers Supporter
3,288
1,218
113
Location
The actual midwest, NM.
Using the new style primer pump it came with, I've probably spent some five minutes at a time, pumping as fast as I can, using alternating hands.
That's what inspired me to plumb in the electric pump.
Then again, I'm facing the same issue you are so that should not be the norm. I sure hope to find some sort of blockage between the strainer and the filters. Anything to avoid having to remove the tank to get to the pickup tube...which may have pin holes in it.

One thing I haven't tried yet, but which would be easy enough to do, is to pressurize the tank and find out if there's decent flow up to the filters that way.
 

The FLU farm

Well-known member
Steel Soldiers Supporter
3,288
1,218
113
Location
The actual midwest, NM.
Has anybody considered a simple 24V bendix pump? I think it is silly we have to do this priming thing all the time. You could just hook it up to a momentary button, push it for 5 secs then start her up?
I'm using a 12-Volt pump for the troubleshooting. Once (if) I solve the problem(s), it can be used on something else.
When things work correctly, as is the case with my original SEE, and the HMMH, there's no need for priming. Even after sitting for a month or so, they fire right up. They usually also have between 30 and 60 psi in the air system.
I wouldn't mind having to prime and bleed a FLU every time it gets started after a hiatus...if it wasn't for the ****ed hood. On the parts SEE it hasn't been latched since I got it, but it's still a pain to have to slide it far enough to the left to get to the bleeders. If it wasn't for the brutal UV here, I'd leave it off.
Whoever it was that suggested a 2-piece hood needs to make one and let us know how it worked out. Or maybe I should just cut an access hole above the filters?
 

911joeblow

Active member
507
68
28
Location
Utah
I think the stainers have a lot of possible air leaks too. A simple plastic see through filter in its place would solve that too. They are $1 each so just change them when they look dirty.

I am planning on a fuel system review this summer when I get done with all the HMMWV projects I am doing. I also want to make a replacement downpipe without the restriction in it and perhaps turn up the fuel a bit and re-time it also. I think there is some more power in these that is untapped.
 

The FLU farm

Well-known member
Steel Soldiers Supporter
3,288
1,218
113
Location
The actual midwest, NM.
I've had problems with getting the strainer to seal properly. That's one reason I like the pressurized method of trouble shooting. It's easy to see fuel coming out, not so much seeing air going in.
I kinda like the stock strainer, though. It looks right, is probably good at trapping water, and is most helpful when priming the system (I fill the cup before starting the bleeding procedure, which speeds things up a lot).
 

911joeblow

Active member
507
68
28
Location
Utah
I've had problems with getting the strainer to seal properly. That's one reason I like the pressurized method of trouble shooting. It's easy to see fuel coming out, not so much seeing air going in.
I kinda like the stock strainer, though. It looks right, is probably good at trapping water, and is most helpful when priming the system (I fill the cup before starting the bleeding procedure, which speeds things up a lot).
I just hate having to take it apart when a see through would be quick and clean.
 

The FLU farm

Well-known member
Steel Soldiers Supporter
3,288
1,218
113
Location
The actual midwest, NM.
Cut a slot in the cup, or drill a series of small holes in it, then cover them with lexan or something similar. See-through convenience combined with the qualities of the strainer.
Not saying that a regular, clear filter would be a bad idea, but I'd add one before the strainer, and likely also before the valve, rather than in place of the strainer.
 

Speedwoble

Well-known member
606
296
63
Location
New Holland, PA
Mine had a disposable filter in place of the strainer. It plugged and starved me of power. Just remember, the strainer is a coarse clean before things get to the filter.
After plumbing back in the strainer, replacing the filters, and replacing a bunch of the fuel line with clear line from Belmetric, I had a hard time starting it. Couldn't find anything wrong with the strainer, and no leaks from it(It is the lowest point in the system, so if it leaked air, it would leak fuel). So I checked the fuel filters and although I had tightened them with fresh copper washers and fresh hollow bolts. I loosened the bolts, spun the washers a few times, and tightened them down more. That was the last time I had to prime it.
Like FLU farm, mine will start even after sitting for weeks with a momentary press of the starter. The easiest diesel I have ever had.

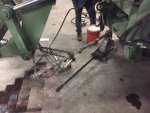
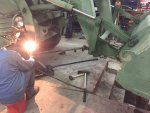
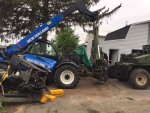
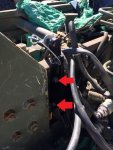
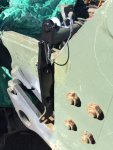
I have been busy with other tasks. I removed the loader. I had to use a torch to heat the bolts and use the loader hydraulics because the 1" impact couldn't get the 1 1/4" bolt loose.image3 (2).JPGimage2 (2).JPG


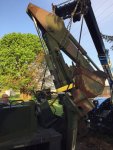
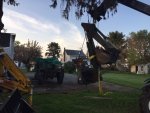
got a bunch of parts plated, and yesterday I removed the backhoe off Mog #1 and today I removed the backhoe from Mog #2. BH #1 will go on Mog #2 as the cylinders leak less. Since #1 was not running, it was removed from the upright position, not resting in the 3 point position. #2 had leaked out all the fluid and I did not want to give it fresh fluid to leak out, so it was removed from the same position. I will let you know how the reinstall goes...image2 (1).JPGimage3 (1).JPGimage1 (1).JPG


A couple of answers to questions asked:
Can you drive without the loader on? Yes, as long as the backhoe is stowed, I did not notice any poor handling with the loader off. In fact I preferred it. Back end squats a little bit, but not bad. Note, I am not running the Michelin 12.5R20's. I am running Sand Trail 12.5R20's on drum brake wheels with 1.5" extra offset.

Weight of the unimog without the loader or backhoe is 9740lbs!
LF 2940 RF 2865
LR 1920 RR 2025
I don't know the weight of the backhoe or loader alone, yet. {edit: I got those weights: https://www.steelsoldiers.com/threads/flu419-see-hmmh-hme-owners-group.115476/post-2017346 }
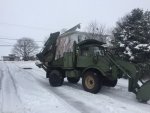
image4 (2).JPG


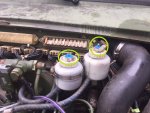
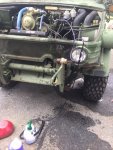
BLEED YOUR BRAKES! Mine worked fine, but the master cylinder caps had cracks and despite the hood being on, water had contaminated the system.image7.JPG These caps (0004315433) off a 1969 Mercedes 250 fit: http://www.ebay.com/itm/360972485654 but obviously get rid of the low fluid alert and will improperly mark the system for DOT4. I used a sharpie to Black out the Dot4 on the new caps.
How to bleed the brakes: I ended up making a pressure bleeder that I hooked to the bleeder screws on the master cylinder. http://www.ibmwr.org/ktech/pressure-bleeder/bleeder.shtml Much faster than pumping the pedal, or a vacuum bleeder. image1 (2).JPG I bought a gallon of the proper DOT5 off ebay and bleed until I saw fresh purple fluid. The stuff in there was nasty.image9.JPGimage8.JPG


Whether to tilt the cab, or remove it. Tilting the cab is not an easy job, but neither is removing the cab. However, if you tilt it, you don't have to bleed the brake system afterwards. So tilt it.

How to attach the cab tilt brackets I sell. Remove the cab shock absorbers at the front of the cab and loosen the rubber cab mounts. Remove the rear cab mounts and jack up the back of the cab ~2". Slip a piece of 2x4 between the rear cab mount and frame. Then remove the front cab mount and use a pry bar to lift the front of the cab. If you skip the 2x4 under the rear cab mounts, you risk the rear window hitting the backhoe latch and breaking. You will see two nuts welded to an angled piece of metal on each side where the front cab mounts were. image6.JPG Bolt the tilt brackets to these angled plates.
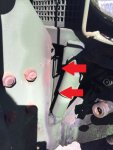
Left Side:image4 (1).JPG
Right Side: image5.JPG
For thorough instructions, refer to the manual. Use a 2x4 cut to length to wedge the cab so it can't fall on you while you are working under the tilted cab.
 
Last edited:

The FLU farm

Well-known member
Steel Soldiers Supporter
3,288
1,218
113
Location
The actual midwest, NM.
Wow, that was a crapload of good, interesting, and useful info, speedwoble!

The only FLU related happening I have to share is that I made a (temporary) drive-thru for feeding the FLUs. Since the HMMH was used to move the already full 200-gallon tank from its previous home on a trailer, it was treated to being the first (non-paying, of course) customer.
The only downside from fueling from this setup was that the strainer in the tank can't keep up with a 15-gpm pump. Oh well, it's no big deal to pull the strainer out of the way...sure beats carrying and holding 5-gallon cans.DSCN0366[1].jpgDSCN0369[1].jpg
 
Bleeding brakes: probably the first thing I do, once I get her running again.

So, I replaced the fuel line between strainer and lift pump, including the return line between engine block and Tee fitting. That last small section seemed pretty suspect, spinning fairly easily on its banjo's barbs. I used peakbagger's method of cutting the original plastic line just past the barbs, slipping on 3/8" diesel-rated line from Napa, and affixing with hose clamps. Then I tried to prime the system, but the hand pump didn't seem to be doing much, even after a couple hundred pumps (yes, I counted). Instead, I went the positive pressure route, and rigged up a bike pump to the fuel tank vent. That delivered fuel to the lift pump like a charm. No leaks evident at this point.

In retrospect, I didn't have any fittings cracked, so where did the air that had been in the lines go? I went on to prime the rest of it, hoping to use the hand pump. I cracked the first filter bleed screw and gave it about 100 pumps. Nada. At first I thought that maybe I was still filling the filter cup, since I hadn't topped them off when I replaced the filters, so I dropped the first filter. The top was still dry, so no fuel had come up yet.

Next, I cracked the hand pump and pressurized the system from the fuel tank again. I got fuel to leak out without much pressure. I tightened the hand pump and removed the bolt next to it on the lift pump. Both the small plunger and spring were in place, as expected. I gave the hand pump a push and was rewarded with a burp of fuel. OK, so that tells me that the hand pump is working, and fuel is not blocked from crossing the lift pump cylinder.

I put that bolt back in place, then removed the fuel line connecting the lift pump and filter housing. I gave the hand pump another push, and fuel spit out the downstream opening...ok, so far, so good. I blew out the removed short fuel line. No dirt or obstruction of any kind. One thing I DID notice though, was that the hollow bolt connecting the line to the lift pump contained a small ball bearing, held against the flow of fuel with a spring. It looks like a backflow prevention valve. The TM does not describe or show anything like this. The head of the bolt has an obvious plug where the spring and ball were inserted. The TM only shows a plain bolt head in the drawings. Also, one of the copper gasket rings was missing.

There were no obstructions in the filter housing, but someone had attempted to repair a leak at the banjo with an external application of silicone sealant.

I put everything back together, and again attempted to prime that short segment of line with the hand pump. Again, no luck. When I exercised the backflow prevention valve, it wasn't sticky, and the spring did not seem very strong. I did not think this was preventing priming, but maybe?? I pressurized the system from the tank again, and was rewarded with a leak from the filter housing banjo...where I had removed the silicone.

Well, at least it got primed. I am sure I need to replace all of those copper gaskets. I am also wondering whether I got a bad-out-of-the-box primer pump.

More to follow.
 
Last edited:

The FLU farm

Well-known member
Steel Soldiers Supporter
3,288
1,218
113
Location
The actual midwest, NM.
Instead, I went the positive pressure route, and rigged up a bike pump to the fuel tank vent. That delivered fuel to the lift pump like a charm.
Glad to hear that even a bike pump did well. I'll go for something more meaningful, if for no other reason because I don't have any boat or bike stuff.
You should be able to anneal the copper gaskets you have, by the way.
 
After dinner I checked the bolt head on the intake side of the lift pump and found a regular bolt head...i.e. without any evidence of non-return valve internals, like there are in the bolt on the output side, which has an obvious plug in the head. The thing is, the parts manual gives the same PN for both.

Hmmmm.
 

FLUmmoxed

New member
1
0
1
Location
Langley, WA
New FLU

Hi all,
I'm joining this group of FLU 419 owners as I had mine delivered 2 weeks ago after "winning" one at the Texas auction. Before taking the plunge I did several months research including reading threads like this. I was looking for a tractor device to help out on our 40 acre farm operation. It has pasture and forest, a couple of ponds, an old gothic arched barn. We plan to manage sheep, cows, poultry as well as do some crops on terraces. It has rolling hills. We also plan on building several residences to house our offspring's families. That means making roads, digging trenches and foundations, hoisting beams, etc. The FLU seemed like a good alternative to the standard farm tractor and at half the price, twice the weight and thrice the power. And I'm a hobbyist Mercedes car mechanic x 45 years.
So I got a non-running example. The auction pictures looked good to me, not too much damage or too many missing parts. I was willing to take the risk. One thing I noticed from the pictures was that the engine was painted black and the exhaust manifold still had black paint on it-not burned off. I was thinking this could be a new "crate" engine. The inspector's report was pretty useless as nothing could be tested, but it did say the engine turned when they attempted their jump start. It had four inflated tires and spare, so it could at least roll. I had it shipped on a trailer 2500 miles.
Since arrival I have had about 2 full days available for inspection and repairs. I got it running after charging up the batteries and replacing the rubber portion of the 2 cracked fuels lines at the tank. When nothing happened when I pressed the starter button, I followed the trouble shooting guide and cleaned up the K1 and K2 relays from their corrosion. After cranking for a minute to get the oil pressure up I released the throttle and it fired up with minimum smoke or rattles. Nice.
But there is still more to do. The pictures nor the inspector's report indicated the writing on the driver's door: "no clutch". The clutch does not disengage. The pedal goes down about half way before meeting firm resistance. It must be a rusted clutch disk. I can still drive it around by starting it in gear. And I've made a few attempts of running it against an immovable object, a large pile of sand. But the rear wheel just starts spinning in the somewhat wet ground. I have been unable to activate the 4 wheel drive or lock the differentials. The selector switch rotates and various hissings and spurts can be heard.
So the good, the bad and some questions for you all.
Good:
Brand new engine with Injection pump, alternator, starter and airpump.
Many new parts: air regulators, hydraulic hoses, cables, rubber mounts. Clutch slave and master cylinder, the brake master cylinder and booster look new, too. The front loader has a 2001 date.
No rats!!!! Lights and most gauges work.
2 new appearing (dated 2009) huge AGM batteries that charge up to 100% after 2 days of gentle 6 amp charging.
It runs, front loader works fine, Brakes are great, including hand brake, air system comes up to pressure and does not leak.
Bad:
Frozen clutch
Unable to activate 4 wheel drive or differential locks
No keys, hood release tool or electric main switch key. No chainsaw (but all the other hydraulic tools and bits are there).
The charging light stays on (the alternator does not seem to be charging as there is no boost in the voltage with the engine running) and the tachometer does not work.
Questions:
Any advice from those with experience on the best way to free up the clutch?
How do I get the 4 wheel drive to work and know that it is engaged-the manual is not too clear from what I have gleaned so far?
Any recommendations for a modern, safe hydraulic chainsaw?
 

Speedwoble

Well-known member
606
296
63
Location
New Holland, PA
After dinner I checked the bolt head on the intake side of the lift pump and found a regular bolt head...i.e. without any evidence of non-return valve internals, like there are in the bolt on the output side, which has an obvious plug in the head. The thing is, the parts manual gives the same PN for both.

Hmmmm.
When I got my injector pump rebuilt, the shop was insistent that the bolt with the check valve be installed in the correct location. I will look at mine and see which position it was.
 

General Hood

Member
712
2
18
Location
Fort Towson, OK
Hi all,
I'm joining this group of FLU 419 owners as I had mine delivered 2 weeks ago after "winning" one at the Texas auction. Before taking the plunge I did several months research including reading threads like this. I was looking for a tractor device to help out on our 40 acre farm operation. It has pasture and forest, a couple of ponds, an old gothic arched barn. We plan to manage sheep, cows, poultry as well as do some crops on terraces. It has rolling hills. We also plan on building several residences to house our offspring's families. That means making roads, digging trenches and foundations, hoisting beams, etc. The FLU seemed like a good alternative to the standard farm tractor and at half the price, twice the weight and thrice the power. And I'm a hobbyist Mercedes car mechanic x 45 years.
So I got a non-running example. The auction pictures looked good to me, not too much damage or too many missing parts. I was willing to take the risk. One thing I noticed from the pictures was that the engine was painted black and the exhaust manifold still had black paint on it-not burned off. I was thinking this could be a new "crate" engine. The inspector's report was pretty useless as nothing could be tested, but it did say the engine turned when they attempted their jump start. It had four inflated tires and spare, so it could at least roll. I had it shipped on a trailer 2500 miles.
Since arrival I have had about 2 full days available for inspection and repairs. I got it running after charging up the batteries and replacing the rubber portion of the 2 cracked fuels lines at the tank. When nothing happened when I pressed the starter button, I followed the trouble shooting guide and cleaned up the K1 and K2 relays from their corrosion. After cranking for a minute to get the oil pressure up I released the throttle and it fired up with minimum smoke or rattles. Nice.
But there is still more to do. The pictures nor the inspector's report indicated the writing on the driver's door: "no clutch". The clutch does not disengage. The pedal goes down about half way before meeting firm resistance. It must be a rusted clutch disk. I can still drive it around by starting it in gear. And I've made a few attempts of running it against an immovable object, a large pile of sand. But the rear wheel just starts spinning in the somewhat wet ground. I have been unable to activate the 4 wheel drive or lock the differentials. The selector switch rotates and various hissings and spurts can be heard.
So the good, the bad and some questions for you all.
Good:
Brand new engine with Injection pump, alternator, starter and airpump.
Many new parts: air regulators, hydraulic hoses, cables, rubber mounts. Clutch slave and master cylinder, the brake master cylinder and booster look new, too. The front loader has a 2001 date.
No rats!!!! Lights and most gauges work.
2 new appearing (dated 2009) huge AGM batteries that charge up to 100% after 2 days of gentle 6 amp charging.
It runs, front loader works fine, Brakes are great, including hand brake, air system comes up to pressure and does not leak.
Bad:
Frozen clutch
Unable to activate 4 wheel drive or differential locks
No keys, hood release tool or electric main switch key. No chainsaw (but all the other hydraulic tools and bits are there).
The charging light stays on (the alternator does not seem to be charging as there is no boost in the voltage with the engine running) and the tachometer does not work.
Questions:
Any advice from those with experience on the best way to free up the clutch?
How do I get the 4 wheel drive to work and know that it is engaged-the manual is not too clear from what I have gleaned so far?
Any recommendations for a modern, safe hydraulic chainsaw?
Welcome to the madness from SE Oklahoma
 
Top
AdBlock Detected

We get it, advertisements are annoying!

Sure, ad-blocking software does a great job at blocking ads, but it also blocks useful features of our website like our supporting vendors. Their ads help keep Steel Soldiers going. Please consider disabling your ad blockers for the site. Thanks!

I've Disabled AdBlock
No Thanks