Can you share what materials -lights/switches/cabling/housings
you used?
Looks very clean & oe.
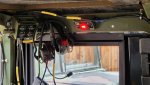
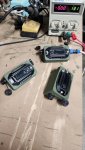
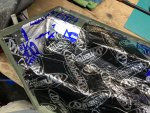
Those lights are a home brew. I got my parts off of amazon and 3D printed the housing. I wanted a water resistant, broad voltage input multi color and a push button on off (with memory) so that I can have them all on one color and then use the front switch to turn them all on-off and maintain the same color.
Note that I was not going for full on mil ruggedness, but commercial appearance. (I get the parts are chicom, but that is a choice I chose to accept)
1)RGB white UTV dome light (POVTOR) - very simple, potted electronics, with color memory (oh and they only work on 9-18vDC, They are bright. I used defusing filters on the drivers light to reduce the overall brightness. I blew 3 of them on 24before I realized they were not functional on 24v (works great on one battery - the company replaced the parts and are supposed to update their website to reflect 9-18vDC)
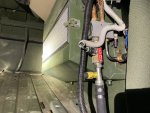
2) IP67 connectors, 2pin panel mount 13mm waterproof power connector, (SZJELEN)
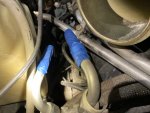
3) 12gage (red-blk) copper power cable, Plenum outdoor rated
4) 1/4in braided PET sleeving, black, 100ft. works great in engine compartments for organizing cabling (brand: alex tech)
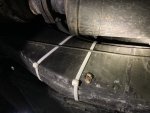
5) Stainless cable clamps (3/8 for the power, and 5/8 for combined vic3 highway and power cable, (Lokman brand)
6) Running the power cable under and around the engine area, I wrapped the braided cable with Tesa adhesive wiring loom cloth tape (tesa 5160
")
- this is great tape for wrapping cabling and is engine room and heat rated.
7) 10amp inline fuse located in the battery box and wired to the positive red wire.
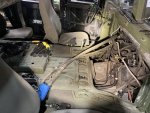
I got the switch panel from federal military parts. It works. Not perfect, but nothing is. Do not buy their version of interior lights. The pictures they use do not match the incredibly cheap lights and there are no instructions, or even interest - I called them.
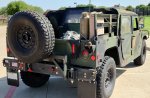
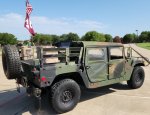
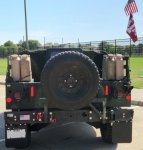
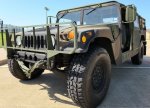
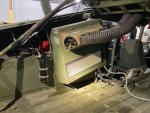
9) I designed my own light enclosure based upon the light view and dimensions. I printed it using a 3D printer with PA-CF for use in exterior, high heat environment. if you want the STL, I can provide it for you to do with it whatever you want. This is a gen one design and I found it good enough, but I would expect others to improve on it. It incorporates a single mount hole with an 1/4-20 lock nut glued to the inside. So one hole and bolt it in. The two part enclosure allows me to replace the light without having to remove the box.
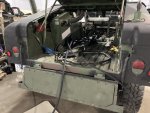
10) I mounted each light, then built the cables. Not a hard process but it did take time to do. For the side lights, I painted the enclosures green to match the interior cab color. for the two mounted to the back hatch left them black.
Now I have plenty of interior light availability, and it does look appropriate as long as you are trying to match mil for mil. For me, it is good enough.
I can answer any questions on the mount and wiring.


 170.1 KB Views: 61
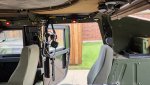 182.3 KB Views: 60
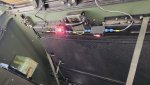 207.1 KB Views: 62
 182.6 KB Views: 58
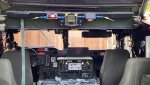


")