Latest addition/improvement: LED headlights!
After having one headlamp burn out from letting the hood drop too hard, I decided to look at LED headlights again. Last time, just earlier this year, they were still a bit pricey for my taste. I see that the price is steadily coming down, be it slightly. Depending on availability, one can end up spending as much as $50 each for 24V halogen headlamps. In my experience, when you have a headlamp burned out, you are obliged to replace it ASAP, so buying a set of 24V halogen lamps and paying for shipping during a low period of availability can run as high as $115. I have found them cheaper, but I had the luxury of being able to search around and wait a few weeks for availability to improve, as I was still doing "new to me" maintenance and not running her on-road yet.
This past weekend, having burned out my headlight Friday night, I found a seller on "the auction site" that had one of the site's periodic 15% off sale periods going, and this seller was already one that had decent prices to begin with, so I decided to pull the trigger on a set of 7" Jeep Wrangler retrofit lamps. These LED lamps can handle 10-24VDC input, so I wasn't worried about the effects of my 24V system. There are military style 24VDC headlamps available, but they are priced at or above $250 in my experience.
I wonder if people realize this: LED lighting can often accept a wide range of input power, because the electronic power supply inside (commonly called a "driver") is capable of managing input power with its built-in intelligence. Analog incandescent lamps pass all the input power to the filament, meaning a 12VDC lamp installed in one of our vehicles will burn brighter and burn out in short order. LED lamps in contrast are more forgiving due to their driver's capabilities. Of course, putting electronics in high-shock, vibration and damp conditions have their own risks. Electronic ballasts and drivers are being used outdoors long enough now that these issues can be mitigated more effectively. Since my LED replacements are marketed to Harleys and Jeeps, both high vibration vehicles or driving situations, I felt somewhat reassured that they would stand up to use in a HMMWV.
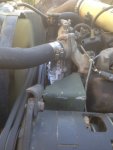
Anyway, the replacement lamps came (in two days!) with a standard Halogen lamp plug, so I had to adapt them to Packard connectors. I have a set of DIY connectors from Erik's MilSurp, but I also have some 24V incandescent lamps that were "out of work", so I just cut off the connectors from my halogen lamps. I left the wire ends a bit longer on the one that wasn't burned out, in case I ever need it. Cannibalizing the military 24V headlamps also meant they had wiring label number tags on them too.
I used spade connectors to connect to the halogen plug on the LED lamps for now, so that I can test them without cutting the wires to splice to the Packards and thus void the warranty.
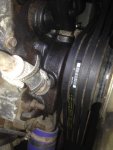
Installation was easy except that the anti-flicker box on the leads of the LED lamp, along with the Halogen connector AND my splices was a lot to cram into the headlight cavity. It just managed to fit, but the real trick was that the LED lamp is thicker at the rim than the halogens. This gave me some delay as I tried to get all three screws from the trim ring into the threads in the mount. I managed it, and they seem OK.
The brightness of the high-chromaticity light is really something! I aimed the headlights as far down as I could, to help avoid blinding incoming drivers. Once I get some time in full darkness, I will reverify the aiming for possible further adjustment.
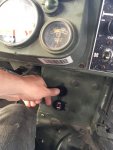
Two oddities: 1) the high beam indicator lamp in the instrument cluster is always on now, regardless of the headlamp setting, and 2) when swapping out the one broken halogen for the first LED lamp and energizing the mismatched lights, the halogen didn't hardly glow at all, and the LED seemed to be lighting up all the individual LEDs instead of just the middle or outer rows (it's the three row style). When I put in the second LED lamp, both lamps glowed the same and lit up properly in high/low.
I suspect this has something to do with differences in power draw between LED and Halogen.
This pair cost
under half what the 24V LED headlamp assemblies advertised for our MVs sell for. The seller had substantial positive feedback and they are rated for up to 24V input power, so I figured I'd give them a try. They also noted good ingress protection (i.e. water resistance) and given that they are marketed to the 4x4 Jeep crowd logically they should be tough.
I'll report back if anything untoward happens, but I sure like them so far.
If someone wants to look at a set, since I can't (shouldn't) post links, one may search for Turbo SII (that's sii capitalized) on the Auction site or on Amazon. They sell on both, and they ship with the same policy, i.e. two days drop shipped out of Louisville KY by UPS. I'd check both sites to see which is cheaper. I saved $3 using the Auction site, but it varies as each site has sales and other incentives.
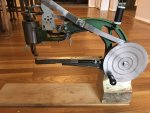
I should also mention that these lamps also have two rows of small LEDs above and below the larger ones in the face. These can be wired up (see the small male spaded yellow wire in the picture) to function as daytime running lights or to blink with the turn signals. I just taped that up for now.
Bulldogger
![IMG_2860[1].jpg](https://www.steelsoldiers.com/data/attachments/447/447088-5a95d35baf3e64dbab3b497ecd57c85a.jpg "IMG_2860[1].jpg")
![IMG_2862[1].jpg](https://www.steelsoldiers.com/data/attachments/447/447089-a689b97ef85c29f35efa2a29e513081f.jpg "IMG_2862[1].jpg")
![IMG_2863[1].jpg](https://www.steelsoldiers.com/data/attachments/447/447090-f868d77fe7bb332ac866f8830e6c18e9.jpg "IMG_2863[1].jpg")
![IMG_2864[1].jpg](https://www.steelsoldiers.com/data/attachments/447/447091-6155fd0448e8a3ec0f5b3f85e175a48c.jpg "IMG_2864[1].jpg")


 50 KB Views: 49
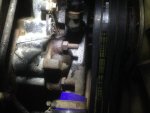 44.6 KB Views: 45
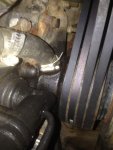 43.7 KB Views: 63
 44.8 KB Views: 44
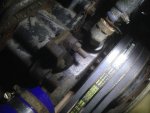 53.3 KB Views: 59
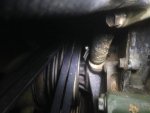 36.8 KB Views: 57
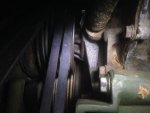 37.4 KB Views: 57
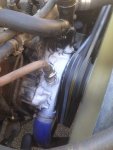
")


![IMG_2784[1].jpg](https://www.steelsoldiers.com/data/attachments/446/446929-cab4d5937162817628813d649cb33de4.jpg "IMG_2784[1].jpg")