• Steel Soldiers now has a few new forums, read more about it at: New Munitions Forums!

  • Microsoft MSN, Live, Hotmail, Outlook email users may not be receiving emails. We are working to resolve this issue. Please add support@steelsoldiers.com to your trusted contacts.


M998 HMMWV Rebuild/Repair Alexandria, VA

Bulldogger

Well-known member
Steel Soldiers Supporter
1,404
586
113
Location
Quantico VA
Thanks AA, we'll definitely have to get together. I'd love it if we were both driving green iron, though it's taking me several weeks to get through the lube order and the open/inspects. I am about ready to begin taking it on the road for short trips as part of getting to know the old gal.
I bought some CARC replacement paint and plan to do something to get the doors a little closer to looking like they belong. It's lower on the list at present.
Bulldogger
 

Another Ahab

Well-known member
17,825
4,157
113
Location
Alexandria, VA
Thanks AA, we'll definitely have to get together. I'd love it if we were both driving green iron, though it's taking me several weeks to get through the lube order and the open/inspects. I am about ready to begin taking it on the road for short trips as part of getting to know the old gal.
I bought some CARC replacement paint and plan to do something to get the doors a little closer to looking like they belong. It's lower on the list at present.
Bulldogger
Anytime, Bulldogger (you can PM me).

And I meant what I said about the doors not matching. It's a stinkin' work-horse MV! Nobody says that they're supposed to be "pretty".
 

Bulldogger

Well-known member
Steel Soldiers Supporter
1,404
586
113
Location
Quantico VA
Long time between updates. I've posted several small accomplishments to the "what have you done lately" thread instead of here.
I've completed the greasing as of today. I'll do the gp oil points this weekend.

My my plan to take this coming Thursday off and tear off the right front hub and half shaft has been overcome by work tasking.

I have been been driving her now, short trips, not above 45 mph. While checking the grease results (wiping off flung globs, etc.) I noticed a grease arc from the upper boot of the right front half shaft. I assume I will have to replace that boot? And then might as well replace the lower boot too, right?

I can can add these to the open and inspect plans for that hub. It leaks around the seals a little anyway (seepage in the dirt). I've already ordered a set of hub seal replacement kits for the whole vehicle.

I also noticed while hitting all the zerks that I couldn't find a grease fitting for the lower bearing of the right front control arm. All the other arms have one. My experience with other heavy equipment (farmboy) tells me this very likely means the zerk is broken off and covered w rust and dirt. Meaning I'll have to dig out the remaining bits of that zerk and open and clean the bearing before repacking and putting in a new zerk.
Sound about right?

Picture of grease pattern below


Bulldogger.
 

Attachments

Retiredwarhorses

Well-known member
Steel Soldiers Supporter
4,261
3,874
113
Location
Brentwood, Calif
Long time between updates. I've posted several small accomplishments to the "what have you done lately" thread instead of here.
I've completed the greasing as of today. I'll do the gp oil points this weekend.

My my plan to take this coming Thursday off and tear off the right front hub and half shaft has been overcome by work tasking.

I have been been driving her now, short trips, not above 45 mph. While checking the grease results (wiping off flung globs, etc.) I noticed a grease arc from the upper boot of the right front half shaft. I assume I will have to replace that boot? And then might as well replace the lower boot too, right?

I can can add these to the open and inspect plans for that hub. It leaks around the seals a little anyway (seepage in the dirt). I've already ordered a set of hub seal replacement kits for the whole vehicle.

I also noticed while hitting all the zerks that I couldn't find a grease fitting for the lower bearing of the right front control arm. All the other arms have one. My experience with other heavy equipment (farmboy) tells me this very likely means the zerk is broken off and covered w rust and dirt. Meaning I'll have to dig out the remaining bits of that zerk and open and clean the bearing before repacking and putting in a new zerk.
Sound about right?

Picture of grease pattern below


Bulldogger.
early lower BJ's did not have zirk fittings...for your halfshaft, wrap the boot in duct tape to keep the grease in the boot till its replaced...I don't do boots, I just replace the shaft. The shafts are cheap...
 

Bulldogger

Well-known member
Steel Soldiers Supporter
1,404
586
113
Location
Quantico VA
early lower BJ's did not have zirk fittings...for your halfshaft, wrap the boot in duct tape to keep the grease in the boot till its replaced...I don't do boots, I just replace the shaft. The shafts are cheap...
Thanks RWH. I'll see about a new half shaft. I'd rather replace than wonder. Then I will keep the take off as a spare. I will still take a good hard look at that wheel bearing. If all the other control arms have a lower grease fitting, that makes me wonder if that Bearing is still original. I still plan to take that hub apart first anyway, so if the Humvee is on blocks a little while longer fine by me.

Bulldogger
 

Bulldogger

Well-known member
Steel Soldiers Supporter
1,404
586
113
Location
Quantico VA
Since some new carbide burrs came in the mail today, I decided to try again on that broken transmission pan bolt. After cutting on the base of the broken extractor for several minutes I gave up and tried getting at it from the top again. I found I could just see it if I opened the engine access hatch. Some careful wraps with a long punch and I got the broken extractor out. Then I went in with a new quality Irwin brand extractor. Snapped that off too. So I decided to try something else. I took the hole that was already there and drilled it out to 15/64 inch , and then tapped it for 1/4 x 28 threads. Made a 1/4x28 bolt the right length and sent it in. Decided some blue Loctite might help keep the threads from rusting . We'll see how it goes.
In some ways it doesn't matter, since I don't ever expect to take that transmission pan off again. I only did so to replace the filter. This pan has a drain plug, so I don't have to take it off again I hope.
It was a longer evening than I planned, but I'm glad to be done with it and have the pan evenly torqued.

On a side note, I wonder if ever anyone else has had trouble breaking extractors? These were Irwin brand, I broke one and ground the edges off another in standard steel bolts

Bulldogger
 
Last edited:

Bulldogger

Well-known member
Steel Soldiers Supporter
1,404
586
113
Location
Quantico VA
Installed a new horn button today and between that and my open and inspect of the horn I now have a working horn.

I didn't get to drive yesterday due to heavy rains, and not feeling like going out much. But today I went raspberry picking at a local park and decided to take the Humvee. It fired up quickly as always, but I noticed it had a much more even idle and as I started to drive it off I accelerated and then quickly let off the pedal, and it didn't try to stall.
I am hoping that having run two tanks of diesel through it with injector cleaner in that I've cleaned it up inside and won't have to do any more maintenance on the engine for a while.
Next up will be replacing the right front half shaft and doing an open and inspect of the hub.
Bulldogger
 
Last edited:

Bulldogger

Well-known member
Steel Soldiers Supporter
1,404
586
113
Location
Quantico VA
Replace the right front half shaft this evening. Came out and new one went back in nice and easy. Unfortunately the hub is not so nice. The washer for the halfshaft capscrew was cracked and broken and I could see water inside that area which came from me hosing off all the mud on the hub . Furthermore when I drained the hub the oil was very milky. So I will continue with my open and inspect . I have already replaced the input seal and I will replace the spindle seal tomorrow as well as clean out the hub as best I can and inspect the gears and bearings.

I have my fingers crossed that there is no damage or degradation inside the hub.

I will complete the open and inspect and replacement of input and spindle seals on the other three hubs before I drive it again.

Bulldogger
 

Bulldogger

Well-known member
Steel Soldiers Supporter
1,404
586
113
Location
Quantico VA
I also wanted to mention that I got to replace a spindle seal on Thecaptain's Humvee last Sunday. He lives outside Manassas and convinced me to come out and learn about hubs while we replaced a leaky seal on his 1993 Hmmwv. It was a very straightforward repair. He also let me drive it and it was very different from my own. I noticed immediately that his slightly younger Humvee with one fourth of the mileage of mine drives like a big car whereas mine drives more like an old tractor. I will have to do some work clearly on my engine and drivetrain. I will be asking this kind forum for advice when I am ready to start on those things. For now I am focused on the open and inspect and replacement of seals on my hubs.
Bulldogger
 

Bulldogger

Well-known member
Steel Soldiers Supporter
1,404
586
113
Location
Quantico VA
Well, I've finished all the hubs and am now more confident to take her up to roadway speeds. Drove to a friend's farm in Waldorf yesterday and everything was fine. I can now cruise at 55MPH and am no longer worried about some mystery hub issues. I like knowing when the maintenance was done, and take pride in knowing that it was done by ME!

Now I plan to tackle some cleaning and cosmetic issues as well as other repairs that are not as critical as making sure the hubs don't fall off :)

So, for the experiences here I would like opinions and advice on making her run better.

The issue is that I have slow acceleration from idle, and trouble pulling strong up hill. It is a 6.2L, normally aspirated, with the 3L80 transmission. If the motor is not warmed up, it will crash stall when taking off from a stop if I pull my foot off the accelerator pedal quickly. It is OK, though it stumbles slightly, when I yank my foot off after warming up fully.

I didn't think much of this until I drove Thecaptain's 1991 6.2L/3L80 last month. His HMMWV drives like a big truck, my HMMWV drives like a tractor. I have slow throttle response, and less control over the throttle. Driving the other HMMWV is like driving any truck, I can vary speed just fine with small pedal changes. My HMMWV is a bit more on/off in terms of throttle. My throttle spring feels a little harder than Thecaptain's, but I don't think that explains all of this. I would note that his HMMWV has a fourth of the miles on the clock than mine does, but I have ZERO blow by evident, had a good oil analysis from GP and it's still only 67K miles on the clock (assuming it's original, and I'm inclined to believe it based on the overall condition of the vehicle). The RPM increase more easily if in neutral, which is not surprise, though I do still sense slow response and something of a dead spot, though small, in pedal travel versus RPM.

I have put about 300 miles on my HMMWV since rescuing her from Ft. Meade and getting her running. I have been adding injector cleaners in every tank full, either Lucas or Pro Trucker. I don't want to start a debate over additives, just pointing out that I'm using some (full recommended dosage). The motor improves the more I drive it, but I'm thinking that I might be getting all the improvements I'm going to get out of stuff I add to the fuel.

So, where to look next? The injector pump? The throttle linkage? (looked fine) The torque converter? How do I evaluate these and establish a root cause? I think I can improve throttle response and crash stalling, but don't know for sure where to start. (this is my first diesel, can you tell?) An injector pump and torque converter are not cheap, so I don't want to replace them if not needed.

Many thanks,
Bulldogger

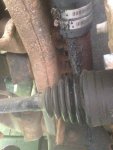
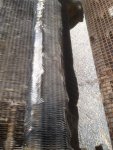
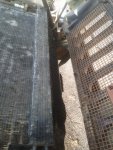
pics of my rear hubs, refurbished this weekend. The hardest part was scrubbing off the mud!
IMG_2715[1].jpgIMG_2718[1].jpg
 
Last edited:

Bulldogger

Well-known member
Steel Soldiers Supporter
1,404
586
113
Location
Quantico VA
Topped off the brake fluid, cleaned the tires a bit and embraced my inner OCD to straighten some cooling fins. The small trans cooler was easy. The oil cooler is in worse shape and is very tedious. Had to stop when I lost the light and when my back ordered me to.
Bulldogger
 

Attachments

Bulldogger

Well-known member
Steel Soldiers Supporter
1,404
586
113
Location
Quantico VA
Also finished the oil cooler fins. Took a while. Back still hurts!

Then I put a rubber shim under the Cadillac valve to help with the hissing noise some of us have.

And a few little things, like lubricating the accelerator cable and such.

I am going to tackle the steering pump next. Leaky sucker. A seal set should clear it up and then I am getting down to cosmetic and "nice to have" improvements!

I noticed this week that my transmission doesn't exhibit a kick down function. I will research that soon too.

The old girl is nearing Full Mission Capable status, and daddy is happy.

Bulldogger

IMG_2721[1].jpgIMG_2723[1].jpg
 

infidel got me

Well-known member
1,685
32
48
Location
Newberry, Florida
Bulldogger-- I would replace that pump vs. rebuilding it. I've seen the pumps online for under $100. If the shaft is scared you will end up replacing it anyway. Not saying you cant do it-- just trying to save you a wrench throwing, kick the dog, sailor cussing, kind of day. I'm sure you don't need the practice of power steering pump r&r. Plus you will have a new pump-- one less part you have to worry about. Again this is just my opinion and everyone has one. lol. Either way-- good luck on the repair.
 

Bulldogger

Well-known member
Steel Soldiers Supporter
1,404
586
113
Location
Quantico VA
Bulldogger-- I would replace that pump vs. rebuilding it. I've seen the pumps online for under $100. If the shaft is scared you will end up replacing it anyway. Not saying you cant do it-- just trying to save you a wrench throwing, kick the dog, sailor cussing, kind of day. I'm sure you don't need the practice of power steering pump r&r. Plus you will have a new pump-- one less part you have to worry about. Again this is just my opinion and everyone has one. lol. Either way-- good luck on the repair.
Point well-taken. Do you know a good source infidel? I already looked and found only New for ~$300 or more. The seal kit was only $7. If I could have found a decent condition pump for ~$100 I would buy it. Apparently the stock GM pump isn't up to snuff for this application, so has to be a HMMWV specific part, with accompanying price.

Bulldogger
 

Bulldogger

Well-known member
Steel Soldiers Supporter
1,404
586
113
Location
Quantico VA
Now a leaking water pump gasket?

I'm starting to lose coolant and now seeing a seepage puddle beneath the HMMWV that's just come to be in the past two weeks. Based on wetness on the engine block, it looks like the gasket between my water pump and the adapter plate is leaking.
Is this common? Might it be somewhere else? It sure doesn't seem to be coming from any of the older small hoses, but rather from the seam between those two items.

The pump bearings seem fine, I'm not having trouble there. If I have to replace the gasket, I intend to replace the pump too, so as not to worry about it later.

Any advice, or lessons learned as to why it might NOT be the water pump? If I tear into it, I will definitely remove the radiator stack as recommended in the "What have you done..." thread where we told the story of replacing TheCaptain's pump without removing the front end.

It seems like the coolant leak is more than I can just keep adding to the tank, and I don't want to risk a failure while out and about this winter. I'd hoped to enjoy the snow with the beast.

Looks like I found out what I'm doing this coming weekend. Oh well.

Bulldogger

Picture from TM and where it seems to be leaking from highlighted
HMMWV water pump leak.jpg
 

86humv

Well-known member
Steel Soldiers Supporter
1,692
489
83
Location
Texas
Gaskets don't normally start leaking if not disturbed....check the weep hole ...might need a bright light and mirror.
Its under shaft about 1.5 ".
Pully might be covering it a bit.
 

Action

Well-known member
3,581
1,551
113
Location
East Tennessee
Do you have a hose attached to the coolant bottle, at the top by the cap? If not, you could have coolant spraying out that hole onto the engine. But, if that was the case, you may have seen steam.
 

juanprado

Well-known member
Steel Soldiers Supporter
5,508
2,710
113
Location
Metairie/La (N'awlins)
Gaskets don't normally start leaking if not disturbed....check the weep hole ...might need a bright light and mirror.
Its under shaft about 1.5 ".
Pully might be covering it a bit.

My other lifetime was selling parts for 20 yrs, I do agree that almost always the water pump will leak from the weep hole or in cases of sever neglect/wear from the shaft itself. If it leaking from the shaft, it is ready to become a missile and take out your fan/radiator. Very rarely will a gasket leak after the fact unless combustion pressure needs to go somewhere and that is usually a head gasket/cracked block or head.

It sounds like it is water pump r&r time ;-(
 
Top
AdBlock Detected

We get it, advertisements are annoying!

Sure, ad-blocking software does a great job at blocking ads, but it also blocks useful features of our website like our supporting vendors. Their ads help keep Steel Soldiers going. Please consider disabling your ad blockers for the site. Thanks!

I've Disabled AdBlock
No Thanks