• Steel Soldiers now has a few new forums, read more about it at: New Munitions Forums!

  • Microsoft MSN, Live, Hotmail, Outlook email users may not be receiving emails. We are working to resolve this issue. Please add support@steelsoldiers.com to your trusted contacts.

84 m1009 cucv chevy blazer build-up

Sharecropper

Well-known member
Steel Soldiers Supporter
1,818
952
113
Location
Paris KY
Great advice! Thanks! I bought a Flow Kooler Water pump that rotates clockwise and is said to flow 110gpm with the 16 blades. I’ll post that up when I install it. Fan choice is minimal.
Yeah that’s the same Flow Koller I installed on my P400. I’m making the conversion to dual electric fans if I ever get around to finishing the dang thang. A regular fan/clutch won’t work on my engine now that I’m going to install a Bullet Supercharger.
 

2INSANE

Well-known member
722
819
93
Location
Belgrade, Montana
Yeah that’s the same Flow Koller I installed on my P400. I’m making the conversion to dual electric fans if I ever get around to finishing the dang thang. A regular fan/clutch won’t work on my engine now that I’m going to install a Bullet Supercharger.
I did a shit ton of research online and read that there is a 1977 454 7 blade fan that would bolt right up with the clockwise rotation.

Could a HMMWV fan work that has the V-Belt?

Here’s link:


So you tried the cucv dual alternators with a 6.5 turbo installed and it fit great? I need to get to your build thread lol!
 
Last edited:

Sharecropper

Well-known member
Steel Soldiers Supporter
1,818
952
113
Location
Paris KY
I did a shit ton of research online and read that there is a 1977 454 7 blade fan that would bolt right up with the clockwise rotation.

Could a HMMWV fan work that has the V-Belt?

Here’s link:


So you tried the cucv dual alternators with a 6.5 turbo installed and it fit great? I need to get to your build thread lol!
No, I have not and do not plan on installing a turbo. The CUCV alternators bolted right up to my 6.5 P400. I plan to install a Bullet supercharger.
 

Sharecropper

Well-known member
Steel Soldiers Supporter
1,818
952
113
Location
Paris KY
Here’s a link to my thread about aligning the pulleys -


2INSANE

Well-known member
722
819
93
Location
Belgrade, Montana
Such a nice day today! I love having weekdays off work because all the businesses are open! Lol!

Got some stuff done today. I refurbished a 6.2 Water pump plate. First I scraped off all the old gasket and RTV with a razor blade, then used a wire wheel on my cordless to get the plate some what clean and bolt holes and then used the Roloc to fine clean it. I put it in the kitchen sink and washed it with Simple Green and scrubbed it with a Scotch pad. Dried it off and put 3 coats of gloss black on it.

While waiting between coats I refurbished all the water pump plate bolts with my wire wheel on the cordless.
 

Attachments

Last edited:

2INSANE

Well-known member
722
819
93
Location
Belgrade, Montana
I then ordered a boost gauge, pyrometer, wiring, probe and a mechanical turbo master boost controller from Kennedy Diesel.
 

Attachments

2INSANE

Well-known member
722
819
93
Location
Belgrade, Montana
The 6.5 Optimizer has quite a few oil port access locations. One is in the valley which I will not be using. I took off the rear oil port plug, put some Optimum Black RTV on the threads and relocated that plug in the valley oil port since it did not have a plug.

Using a new to me product to seal threads, I cleaned up and reinstalled the Phantom 2 Mechanical Oil Pressure Sensor and the 6.2 OEM Oil Pressure Sensor.

Afterward, I took off the oil pan and cleaned up the block where the oil pan mounts using a razor blade, wire brush and brakekleen on a paper towel. Remember I have a custom oil pan with a 1/8 npt bung welded so I can put the Oil Temperature Sensor on to get more accurate readings.


Just my luck again... The auto parts store did not have a oil pan gasket in stock... Back to the waiting game...
 

Attachments

Last edited:

2INSANE

Well-known member
722
819
93
Location
Belgrade, Montana
When I purchased a plethora of 6.2 and 6.5 parts from a gentleman locally, I scored me a custom modified 6.5 Dual Thermostat Crossover that had its spout lengthened and a custom bracket for the throttle cable and high idle solenoid. I plan on attempting to use this in the near future if it fits with the set up I am going to run. Of course, I will get it cleaned up!

Also a sneak peak at the upper pentium and turbo oil drain tube:)
 

Attachments

2INSANE

Well-known member
722
819
93
Location
Belgrade, Montana
Today I got the modified oil pan on. With the motor upside down, I used Optimum Black RTV and a gasket to seal it. I also installed the Oil Temperature sensor on the oil pan.

With my second set of Injector rings, the first set I ordered did not fit, I put antisieze on the new injector threads and torqued them down to 50 foot pounds.

I cut the ends off a set of old injector return lines so they would seal better with the clamps, blew them out with compressed air and installed them as well.

Taking a chance with a used 4911 injection pump and injector lines to save some cash, I installed it on the Optimizer. Crossing my fingers...
 

Attachments

2INSANE

Well-known member
722
819
93
Location
Belgrade, Montana
I had some fitment issues with the intake manifold. The edges of the valve covers were in the way preventing the intake manifold from fitting snug against the gaskets. I ground down the lip on the valve covers with my carbide bit.

The Optimizer timing cover does not have a timing mark for the injection pump. I at first thought it was painted over, but after removing some of the paint it’s clear I will have to adjust the timing by ear once the motor is running.
 

Attachments

Last edited:

2INSANE

Well-known member
722
819
93
Location
Belgrade, Montana
It is water pump time! I noticed BMI did not clean out the valleys on the timing cover. A simple flathead and some scraping did the trick.

The water pump I choose to use is an upgraded 16 blade from Flow Kooler. It is said to flow about 115 GPM compared to the Oem 6.2 85-89 GMP. It was $177 shipped. They raised their price since the last time I bought one. I used the gasket they sent and added Blue RTV on both sides using my finger painting method. After I installed it, I put the fittings on the pump. Cap on the passenger side and 6.2 bypass nipple on the driver side.
 

Attachments

2INSANE

Well-known member
722
819
93
Location
Belgrade, Montana
Next up is the 6.2 water cross over, coolant temp sensor and heater core fitting nipple. I used some Blue RTV on the threads of the heater core fitting nipple and thread tape on the coolant temp sensor.

For the oil fill tube, I used a 6.5 because the 6.2 oil fill tube is not needed with the CDR being relocated to the air intake. To seal it, I put Optimum Black on the rubber seal. For now I will use the CUCV oil fill breather cap.

I also installed the 6.2 Motor puller bracket. I put thread lock on every bolt.
 

Attachments

2INSANE

Well-known member
722
819
93
Location
Belgrade, Montana
Not forgetting the timing mark bracket...

Also got the Cucv J Code Dual Alternators installed. So far so good as far as figments go.

A quick mock up of the Quadstar upper plenum.
 

Attachments

2INSANE

Well-known member
722
819
93
Location
Belgrade, Montana
Well done for the day. I have to work this weekend and have some family coming to visit next weekend, so I do not know when I’ll get more time to work on this Optimizer. Stay tuned!
 

2INSANE

Well-known member
722
819
93
Location
Belgrade, Montana
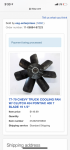
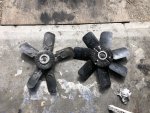
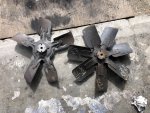
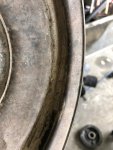
Along time ago I researched and researched for a 6.2 diesel fan upgrade. Well... there isn’t one... At least that I am aware of...

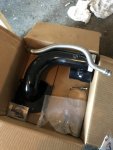
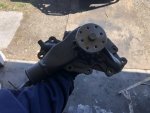
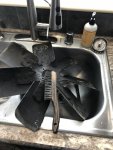
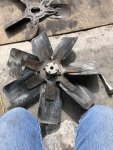
However there is a fan that is built for a 1977-1979 Pontiac 454 that bolts right up to a 6.2 Diesel fan clutch. They do not make them anymore either...

Here is the source of my information:


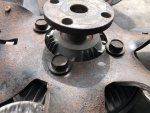
Well today I decided to hunt one down and got super super lucky with eBay! Yes I bought it! Score!

The fan is said to be a direct bolt on. 7 blades instead of 5 blades. The blades are wider and they stretch about the same as an OEM fan. 19 1/2”. Everyone that has done this has claimed it drastically increases air flow. Because of the additional blades and the fact that the blades are wider. I am super stoked!

When it arrives in the mail, I will get you more pictures and info on it.

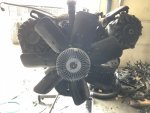
I am thinking the fan upgrade, water pump upgrade and my bigger 4 core radiator should be enough to keep this optimizer cool. If not, I will try other options.

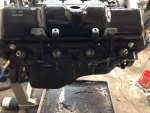
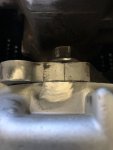
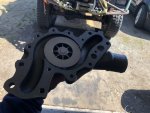
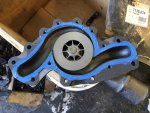
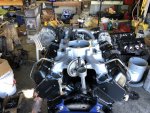
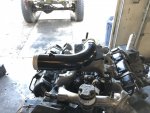
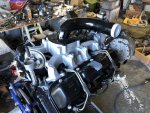
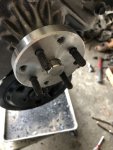
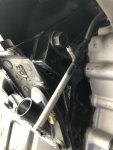
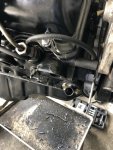
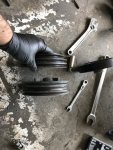
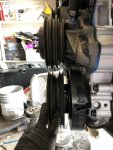
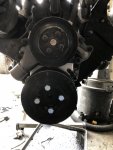
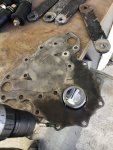
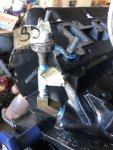
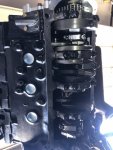
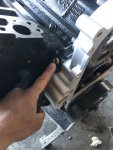
Today I spent a few minutes installing the water pump pulley bolts. I put lock tight on the bolts and double nutted them to get them tight.

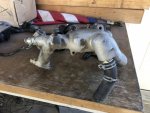
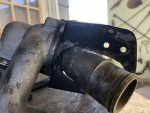
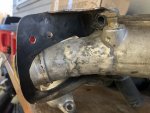
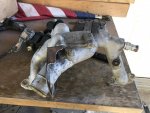
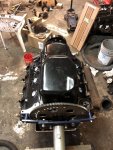
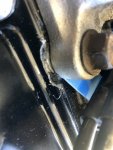
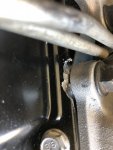
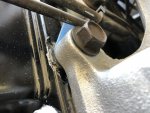
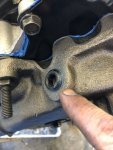
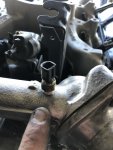
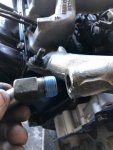
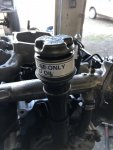
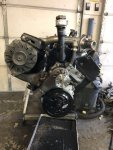
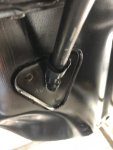
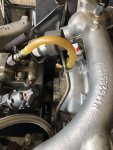
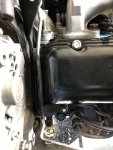
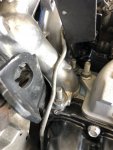
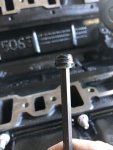
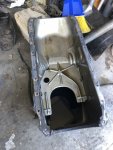
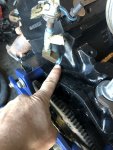
I also installed a 6.5 oil dip stick since the 6.2 design does not work with the 6.5 Exhaust Manifold. I put a new rubber O-ring on the end of it and sealed it great with Optimum Black RTV since this is prone to leak oil. Besides, the 6.5 dip stick is in a much more convenient location then the 6.2 dip stick. I am happy with it.

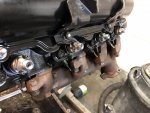
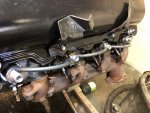
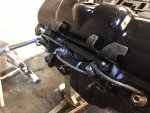
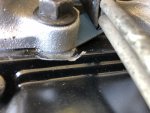
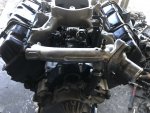
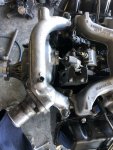
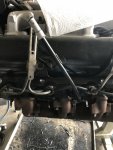
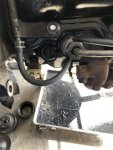
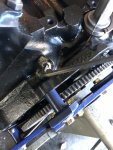
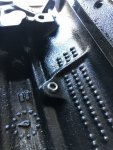
I did not forget to put those little screws in that hold the injector lines to the 6.5 injection line brackets.
 

Attachments

Last edited:

2INSANE

Well-known member
722
819
93
Location
Belgrade, Montana
It finally warmed up and I have 3 days off work!

I installed an Oem 6.5 oil fill line for the turbo.

Then installed a 6.2 fuel return hard line and a used clear tube connecting the ip return to the hard line.
 

Attachments

2INSANE

Well-known member
722
819
93
Location
Belgrade, Montana
I cleaned up the water pump pulley in the sink and mounted it.

Compairing the 6.2 Oem 5 blade fan to the 1977-1979 Pontiac 454 7 blade fan, the new 6.2 fan clutch bolts right on! I washed the 7 blade in the sink and installed it just for a mock up.
 

Attachments

2INSANE

Well-known member
722
819
93
Location
Belgrade, Montana
I removed the new harmonic balancer and installed my Fluidamper.

Here is a real treat for you guys! Last year I scored a Dampened V-Belt Crank Pulley. They are super rare and are not made anymore. This one is still in like new shape. I cleaned it up in the kitchen sink from all the dust it accumulated from sitting over the years and I installed it on the Fluidamper. Compairing the Oem 6.2 V-Belt crank pulley, you can see how the 6.2 crank pulley gets a lot of mud stuck in it and makes the harmonics off. This Dampened V-belt crank pulley design helps prevent mud from getting stuck on it and it also helps dampen the harmonics with its 2 rubber seals. I think this mated with a Fluidamper is the number 1 best crank set up one could get for a 6.2 V-belt.
 

Attachments

Last edited:
Top