• Steel Soldiers now has a few new forums, read more about it at: New Munitions Forums!

  • Microsoft MSN, Live, Hotmail, Outlook email users may not be receiving emails. We are working to resolve this issue. Please add support@steelsoldiers.com to your trusted contacts.


A3 Parking Brake Shoes Install Problem

rivercreek

Member
101
1
18
Location
Berryville, VA
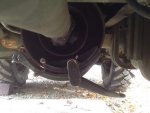
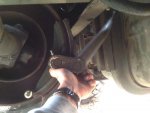
M35A3 parking brake shoes. Old assembly removed without difficulty, but I seem to be unable to re-install the new shoe assembly on the drum. I hope that im missing something obvious here, but i've been scratching my head and searching posts for awhile with no luck so far. I was unable to locate anything in the A3 TM (9-2320-386-24-1-1) for this procedure so have been referencing the multi-fuel deuce manual (9-2320-361-20) which has a pretty clear procedure with one exception (perhaps just a typo?) Section 8.3.d assembly instructions do not seem to match the illustrations. The reference #'s don't seem to match the pictures. Still, unless there is something different about the A3 parking brake assembly and the A2 assembly, the procedure is pretty clear. As I said, I didn't have much difficulty removing the old shoe assembly from the drum, BUT there was practically no shoes left on the old ones. With the new shoes (added thickness), I cannot seem to get the lever up past the frame rail. Am I having a stupid moment here? What am I missing? I removed the old assembly clockwise (from behind drum, facing front of truck), but it doesn't seem possible to install new assembly the same way the old one came out (counter-clockwise install). There isn't room for me to install clockwise from the other side either. In any case, I sincerely hope one of you guru's can tell me what i'm doing wrong and I'll gladly smack myself in the forehead. I attached a couple of photos to try and illustrate my problem. Thanks in advance for any advice on this.image.jpgimage.jpg
 

Wildchild467

Well-known member
Steel Soldiers Supporter
2,052
56
48
Location
Milford / Michigan
Go to this TM: TM9-2320-361-24-1

Or this link if it works: http://www.steelsoldiers.com/upload/M35/TM9-2320-361-24-1.pdf

Scroll down to page 1027 OF THE PDF FILE. (or sequence number 0164 00-1)

This is the best way to explain it... I couldn't explain it better if I tried, so its just easier showing you the section in the manual where it shows how to put it back on. Let us know if you have issues after you check it out in the manual.
 

Wildchild467

Well-known member
Steel Soldiers Supporter
2,052
56
48
Location
Milford / Michigan
A3 parking brakes are the same as A2... with the exception of the parking brake light switch, but that is located on the parking brake lever inside the cab. It has nothing to do with what you are working on... but that is the only difference. The transfer case brake is the exact same.
 
Last edited:

rivercreek

Member
101
1
18
Location
Berryville, VA
Wildchild, thanks for the quick response. The specific problem that I am having is being able to re-install the inner & outer shoe assembly. With the thickness of the new brake linings, there just doesnt seem to be room enough to slide them over/under the drum and then spin the assembly up to towards the top where it belongs. I'm hitting the frame crossmember to the rear, and the arm that attaches to the e-brake cable is hitting the frame rail. I can't imagine there's anything different about this particular truck than others, but as I said it was a real tight fit getting the old assembly off with no brake linings left, and now that i've got the new linings(shoes), the arm will not "fold up" (for lack of a better description) close enough to the outer shoe to allow the assembly to spin up the drum. I hope that makes sense. It's one of those things that would be very easy to show you, but difficult to describe. I don't know how I could photograph it differently to illustrate my problem better. I'm considering trying to remove the &%$#@ crossmember. Not sure what else to do. TM says simply "Install inner and outer brakeshoe and lever on brake drum." I know I don't have the stupid thing put together wrong, I've checked and rechecked and double checked. I've adjusted the cam screw to the furthest point as well.
 

gimpyrobb

dumpsterlandingfromorbit!
27,785
747
113
Location
Cincy Ohio
Why put it on, on the bottom? Its been a while since I did mine, but I thought I put them on the drum at the 3 o'clock position, not the 6 o'clock position.
 

Wildchild467

Well-known member
Steel Soldiers Supporter
2,052
56
48
Location
Milford / Michigan
From your pictures, it looks as if the shoes slid all the way on the drum? Did you try the method described in the manual? I dont mean to beat that topic, but it should work that way and that is the best way to describe it.... plus it has pictures.

Try putting the shoes on where they are supposed to be and slid them on the drum. you wont be able to slide them on at the bottom and then rotate the drum. You didn't do that to take them off, did you?
 

Wildchild467

Well-known member
Steel Soldiers Supporter
2,052
56
48
Location
Milford / Michigan
Or install it in pieces on the truck. Was the surface under the shoes clean before you riveted the new shoes on or did you buy new shoes? I had new brake linings put on my front axle brake shoes and they were hard to get back on also... so I'm not sure. Make sure your shoes do not have any high surfaces that would grab the drum and cause them to not slide on all the way.
 

rivercreek

Member
101
1
18
Location
Berryville, VA
I bought new shoes, so there shouldn't be any issue with the surface under the linings. When I removed the old shoes, I removed the main pin at the bottom (large bolt & nut), springs, e-brake cable, etc., and I was able to rotate the whole assembly around the drum clockwise to the bottom where I was able to pull them off the drum. Wildchild, as far as the TM instructions go, unless I am missing something, there is no specific explanation on installing the assembly on the drum. It says to assemble the two shoes together with the arm, install mustache spring, etc and "install on drum". GimpyRob, your suggestion putting them on at the 3 oclock position is exactly my problem. There isn't room between the rear of drum and the front of the crossmember to slide them on at the 3 oclock position. I have to slide them on the drum at the 4-5 oclock position and then slide the assembly up the drum. Problem is, the arm is hitting the frame, so I can't slide them all the way around to the top where they need to be. Wildchild, I thought about installing it in pieces on the truck, but there won't be room to install the snap ring on the pin to hold the shoes onto the pin assembly if I do that. One thing I will mention is that there weren't any snap rings holding the shoes on when I took the old assembly off. I thought at the time that "some idiot in the motorpool didn't put these on right, maybe that's why they wore out like this". I'm beginning to come to the conclusion that perhaps the crossmember in my truck is located further forward than normal for some reason. Not to give myself too much credit by any means, but im a fairly mechanically inclined guy. The fact that NOBODY else on SS seems to have ever had this problem tells me that something must be different in my case. This should be a 1st grade procedure, TM is clear and concise for the most part on this and as you guys said illustrated well.
 

Wildchild467

Well-known member
Steel Soldiers Supporter
2,052
56
48
Location
Milford / Michigan
How did you make out with your parking brake? Did you have another set of eyes look at it? Sometimes that helps me out. We all miss the little things from time to time and asking for help is sometimes the best thing. Keep us updated.
 

rivercreek

Member
101
1
18
Location
Berryville, VA
Sorry about the delayed update, yes I did finally get them on there. Ended up pulling the driveshaft and drum completely off the truck and then re-installed the whole assembly. The only explanation I can come up with is that for some strange reason, the crossmember behind the parking brake drum must have been installed too far forward by a hair to assemble it properly. I do appreciate you guys sticking with me through that frustration. I was hoping that I was doing something stupid, but at least this time it doesn't appear to have been the case. It sure did seem like it should have been a very simple straightforward process. I guess the spacer and snap rings that were missing when I disassembled it the first time speaks to the fact that the last poor soul to put parking brake shoes on this truck must've had similar problems. In any case, all's well that ends well. And that's that. On to the next project: M923A1 with a mysterious and so far undiagnosable intermittent fuel delivery problem. Calling in some reinforcements for that one.. )
 
Top
AdBlock Detected

We get it, advertisements are annoying!

Sure, ad-blocking software does a great job at blocking ads, but it also blocks useful features of our website like our supporting vendors. Their ads help keep Steel Soldiers going. Please consider disabling your ad blockers for the site. Thanks!

I've Disabled AdBlock
No Thanks