• Steel Soldiers now has a few new forums, read more about it at: New Munitions Forums!

  • Microsoft MSN, Live, Hotmail, Outlook email users may not be receiving emails. We are working to resolve this issue. Please add support@steelsoldiers.com to your trusted contacts.


Bonedoc's M35A2 modification thread

Ford Mechanic

Active member
1,805
6
38
Location
Edenton, NC
I'm fixing to put a new set of tires on my 923 and I'm wanting to go with 395's. Where did you get yours and what did you give for them?

Sent from my SM-G900V using Tapatalk
 

bonedoc

New member
502
1
0
Location
Bangor, PA
I'm fixing to put a new set of tires on my 923 and I'm wanting to go with 395's. Where did you get yours and what did you give for them?

Sent from my SM-G900V using Tapatalk
Sorry I left that portion out. The MVTs held up great they are about 70% tread left. I haven't measured it exactly but it looks approx. 1/2" depth on the tread blocks. I have to see if I can find out how deep they are new and measure these.
The 395s I bought through gov liquidators. Bought 2 sets. The first set I scored for 500.00, the second set I paid almost 700.00, so about 1200.00 for 8 of them. The variable in the price is because it is an auction. I find a lot of times the high bidder on those are the same bidder, so I'm assuming it is a large vendor looking to scoop them up. I got them out of Chambersburg, PA. Took the chance when they had them.
 

lesrrt

New member
7
0
0
Location
Cecil county, MD
Wow! Great read and info on entire thread so far. Excellent craftsmanship Mr Bonedoc. Have a few ?s: Did you pick up any MPG gains with the lock out hubs? And, is there a upgrade to the manual 5sp for an overdrive cog for more top end. Also, the later modeled deuce 's had Allisons auto trans. Do they have the same gear ratios as earlier deuces and overdrive? Just getting an idea of a future project with either a like-rig like yours, a 5ton or an FMTV. Read a great deal on the FMTVs with respect to regearing the Rockwells from 3.90 to 3.07. Gave the Cats more usable power for better cruise speeds and not staying right below the red zone. This is per members that did the conversion and like this upgrade. However, mpgs are 3.5 to 7.0mpg best per what members posted. My goal is to have a working rig as yours with a capability to score 12-13 mpg unloaded flat roads
 

bonedoc

New member
502
1
0
Location
Bangor, PA
Wow! Great read and info on entire thread so far. Excellent craftsmanship Mr Bonedoc. Have a few ?s: Did you pick up any MPG gains with the lock out hubs? And, is there a upgrade to the manual 5sp for an overdrive cog for more top end. Also, the later modeled deuce 's had Allisons auto trans. Do they have the same gear ratios as earlier deuces and overdrive? Just getting an idea of a future project with either a like-rig like yours, a 5ton or an FMTV. Read a great deal on the FMTVs with respect to regearing the Rockwells from 3.90 to 3.07. Gave the Cats more usable power for better cruise speeds and not staying right below the red zone. This is per members that did the conversion and like this upgrade. However, mpgs are 3.5 to 7.0mpg best per what members posted. My goal is to have a working rig as yours with a capability to score 12-13 mpg unloaded flat roads

Hello and thanks, glad you enjoyed the thread and I hope it was informative for you. I get approx. 8-10mpg in my deuce with the lock out hubs. I've read of some members getting better but I'm not sure if 12-13 MPG is an achievable figure. I know I would not be able to get that where I live, too many hills.
Look into Waterloo specialties, they make some awesome mods for the deuce. He has an overdrive 5th gear mod that is supposed to make highway speed cruising much easier. I thought about doing it but again, where I am, I don't see the highway often enough. They do make an awesome power steering upgrade, it is spendy but looks great and is next on my list. Hopefully by the end of the summer I'll be able to order the kit.
Unfortunately I can't help you with your question regarding the A3 auto trans. From what I've read...their top speed is slower than a deuce on the highway. I think 46mph. Nor do I know much about the 5tons or FMTV.
Good luck in your research, you will find your answers on this site, keep digging and asking questions. A wealth of knowledge in this site.
 

Another Ahab

Well-known member
17,825
4,157
113
Location
Alexandria, VA
Wow! Great read and info on entire thread so far. Excellent craftsmanship Mr Bonedoc. This is per members that did the conversion and like this upgrade. However, mpgs are 3.5 to 7.0mpg best per what members posted. My goal is to have a working rig as yours with a capability to score 12-13 mpg unloaded flat roads
Like bondoc said, "Good Luck", and please keep us all posted.
 

bonedoc

New member
502
1
0
Location
Bangor, PA
Well time to start the summertime job list. Picked up a load of parts from Big Mike's. Have a lot planned for this summer and fall. Going to refurbish these old torque rods and replace all of mine. Replace my trans with a NOS unit. New clutch, pressure plate, throw out bearing, pilot, and rear main seal while in there. Also have a NOS stock oil pan so since mine has a good size dent and the gasket is seeping pretty good going to R&R that. While trans is out will throw new U-joints in jack shaft and install Peashooter's reverse light switch into the new trans. Also going to install new input and output seals on my transfer case, new parking brake shoes and a new parking brake cable since my current one has a lot of cracking in outer case.
Some is needed, some is just while I'm there but all in all should really update and bring current a lot of areas on truck. Once these are all done...hoping to order Waterloo specialties power steering upgrade by end of summer....yes!!!

Here are some pics of parts I picked up. I pressed all the old bushings out and have the torque rods at a local shop getting dipped and stripped so I can then press in new ends, tape the taper and threads up and prime and paint them before install.
 

Attachments

rustystud

Well-known member
9,071
2,388
113
Location
Woodinville, Washington
Well time to start the summertime job list. Picked up a load of parts from Big Mike's. Have a lot planned for this summer and fall. Going to refurbish these old torque rods and replace all of mine. Replace my trans with a NOS unit. New clutch, pressure plate, throw out bearing, pilot, and rear main seal while in there. Also have a NOS stock oil pan so since mine has a good size dent and the gasket is seeping pretty good going to R&R that. While trans is out will throw new U-joints in jack shaft and install Peashooter's reverse light switch into the new trans. Also going to install new input and output seals on my transfer case, new parking brake shoes and a new parking brake cable since my current one has a lot of cracking in outer case.
Some is needed, some is just while I'm there but all in all should really update and bring current a lot of areas on truck. Once these are all done...hoping to order Waterloo specialties power steering upgrade by end of summer....yes!!!

Here are some pics of parts I picked up. I pressed all the old bushings out and have the torque rods at a local shop getting dipped and stripped so I can then press in new ends, tape the taper and threads up and prime and paint them before install.
WOW !!!! You have spent a pretty coin here on all that stuff !!!! I do like the idea of replacing all the torque rods though. So many people don't realize the effects just changing out one at a time does to the rest of the suspension. You must replace them in sets or don't replace them at all. I plan on replacing mine next year after my Alaska trip. Their still in good shape but I don't want to have to replace them when I'm that much older. I can still do the work now, so I will replace them now. Then my son can replace them thirty years down the road.
 

winfred

Member
358
9
18
Location
port allen la
yea i need to do all 12 of my rod ends, not looking forward to it. welded plates across the ends in attempt to keep any from popping off till i can fix em properly, problem is whatever the centers are made from sucks to weld and booger welds aren't strong welds

I do like the idea of replacing all the torque rods though.
 

Another Ahab

Well-known member
17,825
4,157
113
Location
Alexandria, VA
WOW !!!! You have spent a pretty coin here on all that stuff !!!! I do like the idea of replacing all the torque rods though. So many people don't realize the effects just changing out one at a time does to the rest of the suspension. You must replace them in sets or don't replace them at all. I plan on replacing mine next year after my Alaska trip. Their still in good shape but I don't want to have to replace them when I'm that much older. I can still do the work now, so I will replace them now. Then my son can replace them thirty years down the road.
rustystud, Brother, THAT is planning ahead. :beer:


ABC.png
 

bonedoc

New member
502
1
0
Location
Bangor, PA
WOW !!!! You have spent a pretty coin here on all that stuff !!!! I do like the idea of replacing all the torque rods though. So many people don't realize the effects just changing out one at a time does to the rest of the suspension. You must replace them in sets or don't replace them at all. I plan on replacing mine next year after my Alaska trip. Their still in good shape but I don't want to have to replace them when I'm that much older. I can still do the work now, so I will replace them now. Then my son can replace them thirty years down the road.

My feeling exactly. I've read many stories of people having them fail. Mine are cracked but do appear to pass the pry test. I just felt it was one of those items on the 'to do' list. Actually the ends on the torque rods I bought from big mike to re furbish were in pretty good shape...better than the ones on my own truck. But again...doing it this way I know what is in there and when it was done. I bough the 6 to refurbish so I could re build them and then do all 6 on my truck instead of doing them one at a time and rebuilding the rods...6 different times.....lol.
I will probably take my old set, rebuild them and sell them after I'm done.
 

bonedoc

New member
502
1
0
Location
Bangor, PA
Got my torque rods back from being stripped. Pressed in the new bushing ends and then primed and painted them. They came out really good. Definitely pricey. Between buying the bushing ends, nuts, etc I'd say about a 700 investment with everything else being my labor. Still way cheaper than buying 6 rods already rebuilt or N.O.S. Plus once installed the relative peace of mind will be nice. Here are pics of original pieces, then once stripped and new ends put in, then repainted and done.


Attachments

Last edited:

bonedoc

New member
502
1
0
Location
Bangor, PA
Installed 4 out of 6 of my new torque rods today. Did the lower 4. The uppers I have to research some more. I've read of people grinding down a socket to fit. That is probably what I'll do. Others have mentioned just jacking up one of the axles. Not sure I like that. To me these torque rods have to generate a preload of some sort. So if they are installed with the axle jacked up it will create torque on that bushing when at a neutral position. It may not be enough to effect the vehicle but would atleast cause premature wear to the bushing. Glad I replaced them. The ones I pulled out were pretty bad. They were cracked bad and rubber was breaking up around the metal tapered fitting. They came out fairly easily. The nuts were no problem to remove, the hardest part was using the BFH to break the taper fit loose.
Once I get the other 2 done I may refurbish the 6 rods I have just like the ones I did for my truck. If anyone is interested let me know and I'll definitely do it so. I figure between buying the new ends, stripping the old rods, press and paint time I can do all 6 for about $900.00 not including shipping.
 

Attachments

bonedoc

New member
502
1
0
Location
Bangor, PA
Wow...can't believe it has been almos t a year and a half since I last updated my mod page. Well I finally spent some time uploading pictures of things done recently and will get this page up to date.
 

bonedoc

New member
502
1
0
Location
Bangor, PA
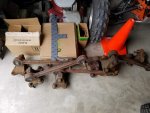
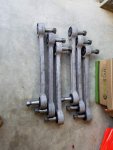
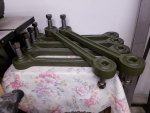
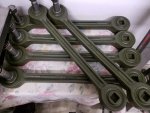
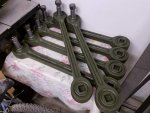
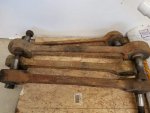
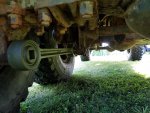
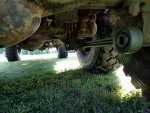
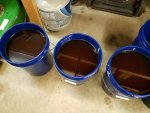
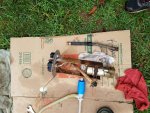
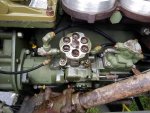
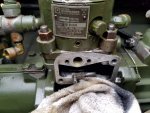
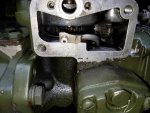
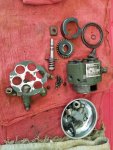
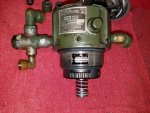
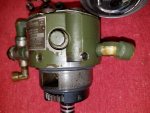
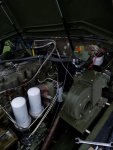
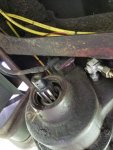
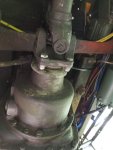
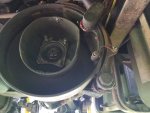
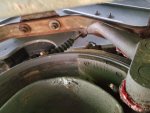
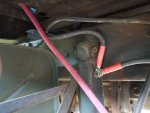
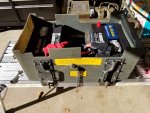
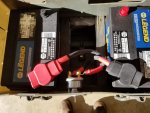
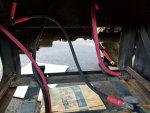
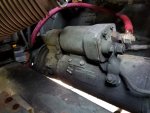
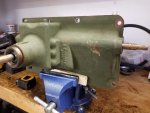
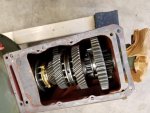
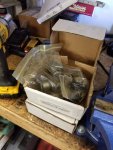
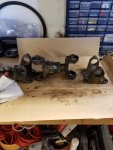
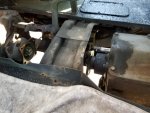
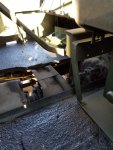
After I finished my torque rods my truck spent pretty much the entire summer sitting along the tree line in the back of my property. Was a very busy summer with tons of projects and activities, none of which involved my truck. The main problem was that the fuel tank was facing toward the sun, everyday....all day. It was October and I started to prep the truck for a show. I had it running along side my driveway warming up when it suddenly bogged down and stalled. Very unusual...tried to re-start it and the motor did nothing but crank over. The in tank pump was running and and fuel was present. I checked the fuel closer and found I had an algae bloom in my fuel system. Though this didn't help the matter it likely wasn't the problem. Further concensus lead to the HH. So I removed the hydraulic head, broke it down completely, soaked it, cleaned it and re-assembled it with new o-rings, button and retainer. Drained my tank, flushed that out, I had new injector lines so since my originals were hopelessly stuck on the HH I cut them and replaced them all. Once everything was backed together, I flushed the whole fuel system with about 10 gals of gasoline to kill any algae. Then drained that, filled with fresh Diesel, changed filters, and she fired right up.
 

Attachments

bonedoc

New member
502
1
0
Location
Bangor, PA
In July of 2017 I finally had had enough of my leaking input and out put seals of my transfer case. So I did both output seals of the transfer case. The rear output was much more complicated as the flange, parking brake drum and splatter shield are all pressed together. I had new parking brake shoes, springs, cable, and splatter shield so the rear output was disassembled completely. The severely bent up old splatter shield was discarded all with the old shoes, springs, and cable. Was a pretty straight forward job except that getting the rear flange off and then back on involved some significant coaxing. Unfortunately I didn't get as many pictures as I wanted. Looking back the only thing I should of added was I had replacement u-joints in the rear shaft. Though they weren't bad, I should of tossed new ones in while the shaft was out.
 

Attachments

Last edited:

bonedoc

New member
502
1
0
Location
Bangor, PA
October 2018, getting ready for the Swayze Mill Car Show in Hope New Jersey. Here are some pics of the truck the day before the show after getting all cleaned up. Took first place in Antique Truck and Kids choice award....LOL
 

Attachments

bonedoc

New member
502
1
0
Location
Bangor, PA
After the show, I noticed that after a day or two of sitting my batteries were struggling to crank over the truck. Decided it was time for new batteries. I had my battery box set up for Group 65s and the winter prior my disconnect switch had burned off a terminal struggling to start the truck in some bitter cold weather. Opted for a new set of Napa Group 65s and a Caterpillar disconnect switch. Also made up all new battery cables for the truck out of 2/0 welding wire.
 

Attachments

bonedoc

New member
502
1
0
Location
Bangor, PA
In November I decided I had to get something done that I had mentioned many times beforehand. Time to finally replace my clutch, rear main seal, swap in new trans, etc. The job went very smoothly. I knew my rear main was leaking but can't believe that my clutch wasn't slipping with how oil soaked it was. The new trans was prepped with Peashooter's reverse switch and new throw out bearing. The jack shaft was disassembled, cleaned, and re-assembled with new u-joints. The slip joint was seized so it took a bit to get that moving again. It was greased regularly when the truck gets greased but that joint is fairly fixed in there. It was packed with oil grease that was like tar!! To get the trans out I used a hoist system with a heavy pipe across the cab. The flywheel was resurfaced by a local machine shop. I cut the heads off some long bolts that I threaded into the end of the crank to walk the flywheel out on. As others have said it is heavy. To lower it I put a piece of rope through one of the holes on the edge. Knotted it and used that to lower it to the ground. Before I took it off I mark one of the bolt holes recess with a file to mark the hole for positioning during installation. Installation of the flywheel was done with new flywheel bolts and new bolts in the pressure plate.
Actually one of the hardest parts of installation was after the trans was in. I had to install the clutch release lever. This is done after the trans is in. You open the viewing hole on bottom of clutch housing. Move the throwout bearing forward till it contacts the fingers of the pressure plate. The clutch release lever is then installed and clocked 3.25" from the transmission flange to the center of the bolt hole at bottom of the lever. This is easy and straight forward. The problem is when you go to install it with the trans installed the throttle linkage bracket under the floor is in the way. Had to unbolt it, move it, install the lever, and then reinstall the linkage. The hard part is doing it solo. You cant get to both sides of the bolts by yourself. Fortunately I had one of my son's show up just in time and save the day...LOL
Over all the install went very well with no major hiccups. The truck drives and shifts great. After doing the final adjustment of the clutch and allowing the 1.5"+ of free pedal it operates as it should. Engages and disengages as it should.
 

Attachments

Top
AdBlock Detected

We get it, advertisements are annoying!

Sure, ad-blocking software does a great job at blocking ads, but it also blocks useful features of our website like our supporting vendors. Their ads help keep Steel Soldiers going. Please consider disabling your ad blockers for the site. Thanks!

I've Disabled AdBlock
No Thanks