scboolitcaster
Member
- 277
- 4
- 18
- Location
- Belton, SC
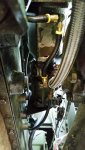
I'm tempted to turn that one big piece next to the steering shaft into two much smaller legs. That way I could reach through it if I needed to.
Steel Soldiers now has a few new forums, read more about it at: New Munitions Forums!


I'm tempted to turn that one big piece next to the steering shaft into two much smaller legs. That way I could reach through it if I needed to.
That's another reason I attached my heater straight to the wall. No bracket to deal with !I'm tempted to turn that one big piece next to the steering shaft into two much smaller legs. That way I could reach through it if I needed to.
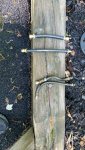

Last week I took the hose info from Parttarget.com for the smaller hose to a local hose shop to have one made up.. They didn't have the same diameter hose, and guessed at the fitting size. I guess no one carries that smaller diameter hose (which has a higher temp and psi rating.) Oddly enough, the parttarget specs don't specify the exact fitting.
Fittings ended up too large, I took it back and they swapped them for me.
I haven't had a chance to install the newest version. The war department issued orders diverting all manpower to the construction of a portable mini chicken coop.
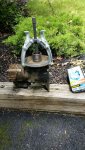
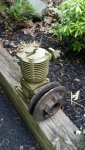
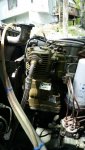
Pic of the one with the too large fittings:
View attachment 625877
I guess I should replace the other hose too.. Did you have to take anything off to do it, or was it all accessible from the bottom?
Oh, and do you happen to have specs for the braided hose and fittings that you had made up for the compressor?
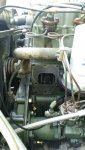
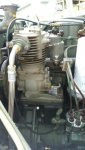
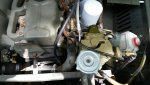
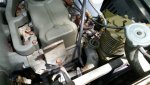
I went with some PTFE stainless steel hose just like the air lines and fuel hoses. The ends are just standard AN fittings.Was a good weekend and got to spend some time working on the truck. Replaced the oil lines for the injection pump. Worked out really well, given the tight space and big hands. Took about an hour which was primarily because of the tight space. Big thanks to Gimpyrobb for the oil line set. They worked perfectly.


Agreed, If I wasn't able to get them from Chris I would of taken them to my local hydraulic shop and had them made up. I would of done the same thing. The good thing is that these rubber are new production and will likely have a very long life...if not the rest of mine or my truck's life as well.View attachment 625923View attachment 625924
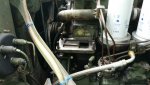
I also had to replace the engine oil fitting. When I went to replace the hose the old brass fitting snapped off flush with the engine block ! So I replaced it with a stainless steel fitting. Now with the PTFE stainless steel hose and stainless steel fitting I shouldn't have to deal with these hoses for the rest of my life.
I was sweating buckets I can tell you and praying up a storm when I was doing this !I'll bet that was a royal pain to get out!
Sent from my LG-V410 using Tapatalk
I'm gonna get mine from him. Wish I'd just done that in the first place.Agreed, If I wasn't able to get them from Chris I would of taken them to my local hydraulic shop and had them made up. I would of done the same thing. The good thing is that these rubber are new production and will likely have a very long life...if not the rest of mine or my truck's life as well.

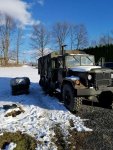
Congratulations on the scholarship!Wow, has been quite a while since I posted here. Have been pretty busy. Memorial day weekend of 2016 we sold our home and we moved at the end of August of 2016 to a much needed larger home with more land and space. Plus my oldest graduated high school and started college at Virginia Tech via the ROTC scholarship. So as I'm sure most of you can imagine things have been pretty busy so other than just driving it I haven't done much to my truck.


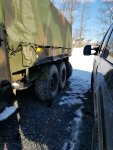
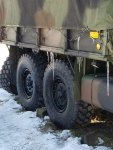
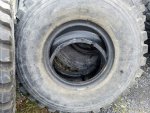
They were too narrow for the A3 rims. The width of the tire with the run flat as compared to the tire with the beadlock, it is almost 2" narrowerAny reason you didn't leave the run-flats in for the front tires?
Looking good! So which style boots did you go with? And how much tread are on those 395's you pulled off?
Sent from my SM-G900V using Tapatalk