• Steel Soldiers now has a few new forums, read more about it at: New Munitions Forums!

  • Microsoft MSN, Live, Hotmail, Outlook email users may not be receiving emails. We are working to resolve this issue. Please add support@steelsoldiers.com to your trusted contacts.


Deuce Light Rack Build

980
24
18
Location
Dover, New Hampshire
Well my truck is still at a storage location where it has been all Winter so I haven't been able to do much to her other than grab some measurements here and there. I decided in the Fall that I would spend the winter collecting parts for my Spring projects.
If you end up with a bar that extends over the windshield then do what I did and buy BBQROD's hood strut kit, otherwise the hood will hit the bar when open and will sit at an unstable angle. I haven't installed mine yet but it is a bolt on install.
 
980
24
18
Location
Dover, New Hampshire
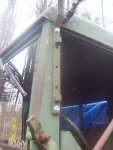
Made a lot of progress today, started with the right side bracket.
At first I used clamps to hold the bracket in place as I drilled the 5/16 pilot holes but I later found out that the bracket moved and caused one of the holes to be out of alignment. Pretty simple fix, just reamed the hole on the bracket a bit and it was good to go.
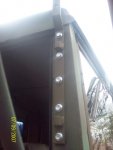
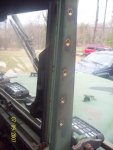
Once all the pilot holes were drilled I stepped them up to 9/16 for the Rivnuts, after a bit of de-burring I painted the holes and let them dry.

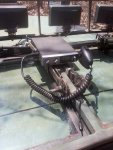
The Rivnuts went in pretty easy and my tool worked great. I would definitely recommend making your own tool if you only need to do a handful of these, I just couldn't justify spending big bucks on a tool for hardware I may never need to use again.

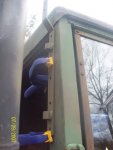
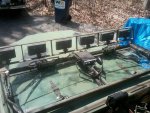
The Rivnuts I had were flush profile so there would be no gap between the windshield frame and the bracket.

After all of the nuts were in place I shot a quick coat of paint over them to hopefully keep them from rusting.

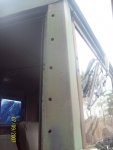
On the Left side I got smart about how I did the holes, I completed the top and bottom nuts before I drilled the pilot holes for the middle three. This way it was nearly impossible to drill anything out of alignment. I repeated the quick coat of paint and installed the brackets.

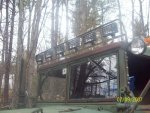
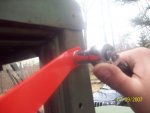
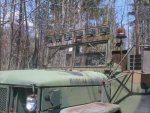
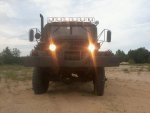
I can tell you this, these mothers are not going anywhere. Very secure fit and will withstand some pretty tough conditions.
I'm really glad I decided to go this route, my original intention was to use big machine screws but I feel a lot better knowing it was done right.

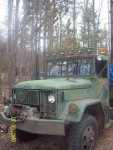
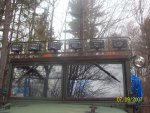
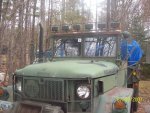
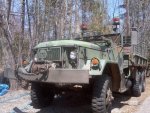
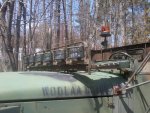
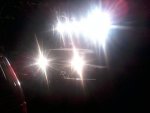
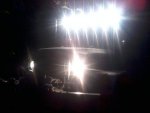
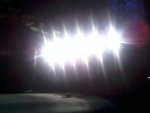
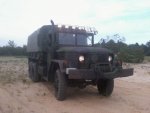
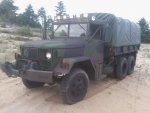
Finally I mounted the bar, looks pretty neat but I think it's going to take some getting used to.

(pay no attention to the date on the pics, I was using an older camera)

Next up, getting her wired up.
-GM
 

Attachments

980
24
18
Location
Dover, New Hampshire
Wired up the bar today and checked out how it looked with the windshield down.
My CB bracket has the same capability.
 

Attachments

980
24
18
Location
Dover, New Hampshire
Here are the night pics, sorry my phone doesn't take the best quality night pics but they are very bright.

I am happy with the way this build came out, the cool factor almost exceeds it's usefulness.
With the exception of an inline fuse yet to be installed, I now consider this project done.
If anyone has any other questions or would like to see the drawings I did for the rack just let me know. Thanks for all the input and interest! [thumbzup]
 

Attachments

Top
AdBlock Detected

We get it, advertisements are annoying!

Sure, ad-blocking software does a great job at blocking ads, but it also blocks useful features of our website like our supporting vendors. Their ads help keep Steel Soldiers going. Please consider disabling your ad blockers for the site. Thanks!

I've Disabled AdBlock
No Thanks