• Steel Soldiers now has a few new forums, read more about it at: New Munitions Forums!

  • Microsoft MSN, Live, Hotmail, Outlook email users may not be receiving emails. We are working to resolve this issue. Please add support@steelsoldiers.com to your trusted contacts.

Diablo Build Update (pics)

Recovry4x4

LLM/Member 785
Super Moderator
Steel Soldiers Supporter
34,014
1,814
113
Location
GA Mountains
Oh yeah! I stopped by last night but you were no where to be found. Checked out the bottom of the cab and the wring on the frame. Looks good! Now, did you get those numbers I posted that you were knudging for? Did ya? Did ya?
 

devilman96

New member
2,056
16
0
Location
Boca Raton, FL
If ya wanna take that axle up? We can drop the tires while here if ya dont want to take it? Odds, ends, parts, pieces??? Need to pull those mirrors off but I dont know if I wanna under take those hinges just yet.

Ever remember where you got those blue lens covers from? PM me... I gotta get some of those here shortly.
 

rdixiemiller

Active member
1,760
3
38
Location
Olive Branch Mississipi
I'd be a little cautious about the 24 V alternator pulley, you don't have a lot of contact with the belt. Maybe a slipping issue whan running with headlights on. If you have a load on the 12 volt alternator, it might cause the water pump pulley to slip on the belt that is driving it and the 24V/AC setup.
It may work, just looks like a potential problem area. The main area of concern would be the 12V alternator interfering with the water pump operation. Overheating could be an issue. I imagine it feels really good now, with paint on the pulleys and new belts. However, after the belts get a little wear, and glaze a bit, could be an issue.
Of course, I could just be wrong .
My 2 cents worth.
You are still doing a great job on the build!
 

rdixiemiller

Active member
1,760
3
38
Location
Olive Branch Mississipi
Just looking at the engine pics, if you take the 12 V alt belt, get one long enough to go around the crank pulley as well, that would eliminate the water pump concern. The 24 volt alt. still looks a tad iffy, IMHO.
Remember, free advice is usually worth what you pay for it!
 

rdixiemiller

Active member
1,760
3
38
Location
Olive Branch Mississipi
rdixiemiller said:
Just looking at the engine pics, if you take the 12 V alt belt, get one long enough to go around the crank pulley as well, that would eliminate the water pump concern.

Never mind. I see the PS pump will not allow that. You may need to add an idler, although I don't like to use them unless really necessary.
 

devilman96

New member
2,056
16
0
Location
Boca Raton, FL
Original plan was to dual belt the water pump, 24V alt, and AC with a additional pulley mounted on the water pump to run the 12V... Will proably end up going there but as I said for simplicity's sake I will give this a whirl first... Swapping it out only takes 20 mins and I have so much going on machining the pulley for the water pump is... well... I need 5 more of myself working on this thing!!!
 

devilman96

New member
2,056
16
0
Location
Boca Raton, FL
Proably can not tell but I have put over 30 hours in this thing over the past two days...

Ken was over Sat morning collecting my spare parts and pieces... Did a PM on his rig... I would have taken some pics but errr... ummm... damn!!! I will let HIM explane why I spared him!

Things are going slow but coming on the truck... Lots of work but what takes 10 minutes to remove takes an hour + to put back!!! Every time I turn around I have to make a little something or another or hunt down a piece of material for this or that... Started working on putting the inside together... Insulation, trans covers back on... Made up a spacer for the AC and adapters from 2.5 inches to 1.5 inches for the defroster. Steering is back in and actually full of fluid... Hung the second tank mounts, will pull them and paint them over the next few days... Started in on the wiring harness, lots and lots of modifications to be done there!!! on and on and on...

Keep hoping the shop fairy will show up and sand blast my sheet metal... Im starting to think the whole thing is a myth and I may have to do it myself... *sigh*
 

Attachments

Recovry4x4

LLM/Member 785
Super Moderator
Steel Soldiers Supporter
34,014
1,814
113
Location
GA Mountains
Half the truck, twice the fuel! Hmm. Anyway, before Mike tosses me under the bus, my coolant looked like chocolate milk when it came out. let it run for an hour with the petcock open and a hose in te radiator, still wasn't completely clear. Apparently when I repaired the radiator last year, I forgot to put coolant in the system. Since the embarrasment, I've bought 5 gallons of coolant to keep on the shelf in the garage.
 

devilman96

New member
2,056
16
0
Location
Boca Raton, FL
Took 3 days off... Very needed but I feel very behind too...

Though it might not look like very much I have HOURS AND HOURS vested in sandblasting, painting, or powder coating part after part after part.. Most of which will never amount to anything because you cant see them when on the truck but its more for piece of mind and doing things the right way I guess...

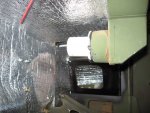
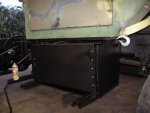
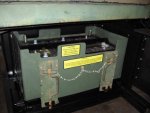
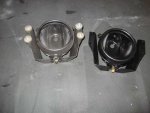
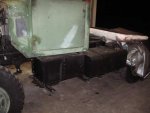
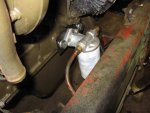
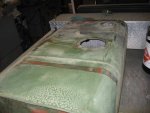
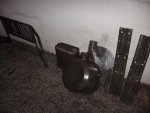
Got the boxes re-hung... They were sandblasted, primed, painted OD, and then polymer over in black. The battery rack was partially rebuilt and the new batters and holder are in place. I have received a few remarks about these batteries and the size, why didn't I use blue tops or red tops and yada yada yada... These little things carry a higher rating and even out perform the stock batteries for CCA and CA. The third will be for the 12V system... I thought I was lucky that it all worked out in the same box (no planning).

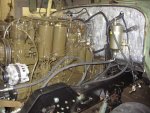
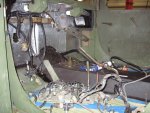
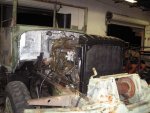
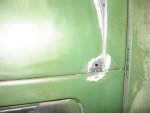
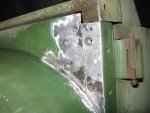
Some things ya cant see... I had some help so I opted to pull the rear head back off last Thursday night... When I had done the gaskets before my rear two cylinders looked to clean compared to the rest... Ether water vapor or injector problems but it didn't run bad before or after so I was a little stumped... Too be on the safe side I pulled the head to check and see what was what and all was fine this time so I am saying water leak from before...

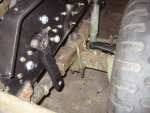
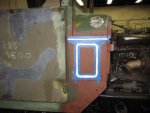
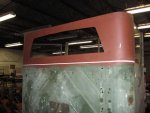
All of this fitting and shaping and squaring and finishing is taking forever to get done but in the end it should be pretty nice, the doors will open evenly and freely, no rattles, and no parts scraping each other up. On the other hand all I want to do is slam this thing out and go drive it!!!
 

Attachments

rdixiemiller

Active member
1,760
3
38
Location
Olive Branch Mississipi
90% of the work is done in 10% of the time. The last 10% (the details) takes 90% of the time. You are building a really nice truck, and your attention to details is going to really pay off with the finished product. You are showing admirable restraint, I always get it running, then never quite get around to finishing off all the details.
 

bottleworks

New member
920
2
0
Location
Central NC
It's looking great! Have you stopped eating and sleeping at this point? Your project is going incredibly fast. I can't wait to see more pictures of the A/C system progress!
 

devilman96

New member
2,056
16
0
Location
Boca Raton, FL
Yeah im stuck in sheet metal hell right now... Gotta get the cab closed in before installing the AC. I had finished the back a long time ago but never finished the top section... 19 hours on it so far today grinding and welding... Thing weights 87 lbs now and will hold at LEAST 3 people on top of it without bending or flexing... A 1/8th thick (10 GA) sheet metal Deuce top... I'ma idiot lol... Got it ready for sandblasting in the AM and HOPEFULLY by Tues night I will have a semi dried in cab again which means painting and assembling!!!

Its hard working by yourself because you get going in a direction and then figure out that you need something totally different done before you can proceeded so ya have to jump off of whatever and dump your time into the next hiccup while bouncing back and fourth on all of the things ya avoid doing too... Its a nightmare of a project.

Sleep... 3 - 4 hours a night and I think I've lost about 10 lbs so far!!! I wanted to be "drivable" this weekend but I will miss that by at least a week I think... Can we add a few more hours to the day please???

I will get some pics up in the next day or two... I've done heaps but there is not that much to look at....
 

Towman2277

New member
507
0
0
Location
Saraland, Alabama
Looking Good!

I really admire your attention and patience to details. Details is what makes a project this scale "Marvelous". Keep up the good work, can't wait to see it finished! Steve
 

devilman96

New member
2,056
16
0
Location
Boca Raton, FL
Im starting to feel like a bad MV project guy for not posting in so long... I am working non stop but the progress is slow due to the work and such... I don't think anyone wants to see a part by part refinishing job but I apologize for not having more interesting stuff... Its bad enough I have to watch the paint/ospho/powder/primer/filler dry... Don't think you want to see it too.

Hopefully these are in order for a change...

Radiator is back in business and the system is full... You can see the window frame has been raped and pillaged for hardware in preparation for new sealed glass sections.

Secondary fuel tank is mounted...

Fuel filter... Don't shoot me I changed the mounting from my TA because I liked the location better and I have yet to finish painting the front of the frame...

The trucks original fuel tank was a disaster, one of the pics is of the inside after 4 hours and 4 gallons of hydrochloric acid soaking in it... Algae and rust had made themselves a nice little mess but it cleaned up wonderfully.

Some paint strip work on the air cleaner, grill, and so on... Just this pile will take me about 10-15 hours get prepped and powder coated.

Seam work on the cabs vents... these are now welded shut... I am sealing off everything that I don't need to kill the air leaks. I am also sealing the seams in the cabs sheet metal... Too much time has been spent digging the rust out of them and this will help keep them dry and rust free for a long time.

Mounting a hard top is not at all as easy as I would have hoped for. Getting it to "look and fit" good is a pain, alignment will make all of the difference in the world with the window seals in the end so I vested taking the back section on and off about 10 times before I was happy with it. I am not using the stock rubber gaskets due to water and rusting... I used a high density sealing foam and then sealed the seam behind it. Once sanded, primed and it will hardly be noticeable.

Finally my 100 hour hard top lid is ready for paint which will be a whole different mess... First will be OD... when dry most of it will get taped off... sprayed with OD again... then sprinkled with aluminum oxide... dried... then painted over a last time... Its the only way I can get it non skid, the same color, scratch resistant and looking right.

The details are killing me but I am pushing myself to stay the course and so far its paying off... Once its all painted reassembly will be fast because all of the little stuff is ready to be bolted on.

Thanks for the words of encouragement on all of this stuff... Its frustrating as hell on some days but the little nudges and nods help make the effort feel work the agony.
 

Attachments

Armada

New member
3,046
4
0
Location
Buick City, MI
During the restoration process it seems like you'll never see the light at the end of the tunnel, but it does come! Keep up the great work!
 

devilman96

New member
2,056
16
0
Location
Boca Raton, FL
The top is painted and the aluminum oxide is down... This is a little brighter than I would have wanted for a "semi gloss" so the top will be installed and then painted again with the cab at which point I will use some flattening agent to tone it down... The pictures make it look funny with the flash but in person it really looks good and has a great feel to it.

You would have sworn this cab was rust free but not so... If I could back up a few weeks I would have just sand blasted it. I can treat and deal with it fine as is but it will take some time to get it all exposed and dealt with the right way. Everywhere metal is in contact with each other, around holes and seams, usual rocker panel stuff... Nothing to bad and the timing for fixing it in the life of the cab couldn't be better. Its just much easier to sand blast and be done with it than it is to part and piece things corner by corner and side by side...
 

Attachments

Top