• Steel Soldiers now has a few new forums, read more about it at: New Munitions Forums!

  • Microsoft MSN, Live, Hotmail, Outlook email users may not be receiving emails. We are working to resolve this issue. Please add support@steelsoldiers.com to your trusted contacts.

Exhaust Brake on an M35A2

frank8003

In Memorial
In Memorial
6,426
4,978
113
Location
Ft. Lauderdale, Florida
Now I already knew what PUI is, but did not know about FUD,
Doesn't sound all that bad to me. looked it up.

FUD; fəd; noun
fear, uncertainty and doubt, usually evoked intentionally
in order to put a competitor at a disadvantage.

Now, why don't all you teachers go back to teaching, I was actually
learning about new and old engine stuff for a while there.
I have a 48 year old truck to keep running and the teachers were helping!

How about a nice game of chess?
 

Chris Deuce

New member
17
2
0
Location
Everett, WA
I finished a cross country trip hauling 5000 lbs. in the bed and towing a 5000 lb. jeep behind the deuce and I have to say that an exhaust brake is a must for any hill driving. The brake seems to have steadied out and creates about 24 psi back pressure at 1000 rpm and 30-35 psi back pressure at 2000-2200 rpm. These numbers vary slightly depending on egt and time at that egt, but are fairly consistent given the design. I will say that the spring preload equation goes out the window due to the high temperatures, so this was mostly test, adjust, test, adjust, etc.
 

leprochaunking12

New member
10
0
0
Location
saltsburg, PA
I would love to see a materials list and a few photos if possible of the finished product. And what did you adjust when you were testing? Since it’s been more than a few months, have you had any issues or changes in pressure in regards to the spring under heat? A tutorial would be best but I understand that people don’t have time to make comprehensive tutorials. I have a good understanding of mechanics and a better understanding of electrical but can’t do the calculations that you did, wether they worked out or not. Love this thread, off tangent for a bit or not the information in this is fantastic. I personally think all deuces should equip these as a safety in case of total air failure. Any more information in regards to the install would be greatly appreciated. Especially pictures! Thanks again.

Rob
 

Chris Deuce

New member
17
2
0
Location
Everett, WA
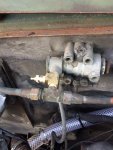
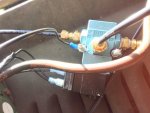
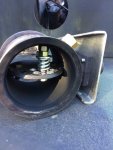
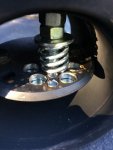
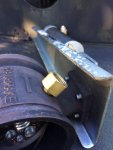
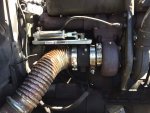
In the pictures you’ll see that I removed the circular disk that closes to create back pressure. I drilled out bigger holes and added a spring loaded disk to it to control the amount of back pressure required to open it. Theoretically it should hold that pressure regardless of RPM, heat, etc., but due to small gaps between the sides of the main disk and the outer wall of the brake and a changing “k” constant for the spring based on temperature; the brake varied from 24 psi at 1000 rpm to ~35psi at 2000 rpm. I have since sold the truck for other reasons (not practical at my new duty station), but it held up well for 5000 miles total or so. Pictures to follow.
 

Chris Deuce

New member
17
2
0
Location
Everett, WA
Materials:
-Pacbrake C20373
-air brake line
-various fittings
-MAC air solenoid
-pressure sensor and gauge
-3” to 3.5” v band adapter

Build:
-removed turbo down pipe (solid metal one)
-fit adapter onto turbo outlet with v band clamp
-attached exhaust brake to adapter
-removed exhaust flex pipe and stretched/bent it to fit from exhaust brake outlet to exhaust pipe
-removed brake
-removed butterfly disk inside brake, drilled holes, fitted pressure regulator disk to increase back pressure
-reassembled brake
-mounted air solenoid on passenger inner fender
-wired solenoid with hot wire from horn, ground, and activation wire through switch on dash and two mini switches for the gas pedal and clutch.
-Routed air line to the air T above air filter
-mounted pressure sensor to large diameter brake line bent over the engine to the calibration port on the Pacbrake to prevent overheating.
-tested and adjusted inner pressure regulator disk for optimal back pressure.

Lessons learned:
-Turbo outlet is 3”, not 3.5”
-flex pipe is 3.5”, not 3”
-lots of time spent testing and adjusting the brake for optimal backpressure
-ensure air solenoid is configured properly and rebuild if necessary for your application
-bending and stretching deuce exhaust flex pipe is time consuming and a pain. Use a shorty sledge hammer to help
 

Attachments

gentrysgarage

Active member
553
118
43
Location
Lost Angels, CA
Formula please

What is the formula you used to determine the number and size of the holes you drilled in the flapper and spring pressure needed. I will be modding a NOS M915 Freightliner (read using the actuator only) for 5 inch exhaust .

Thanks
 
Top