• Steel Soldiers now has a few new forums, read more about it at: New Munitions Forums!

  • Microsoft MSN, Live, Hotmail, Outlook email users may not be receiving emails. We are working to resolve this issue. Please add support@steelsoldiers.com to your trusted contacts.


Flexplate Replacement Parts (+ tangential component replacements)

cucvrus

Well-known member
11,279
9,621
113
Location
Jonestown Pennsylvania
As an extra measure disconnect the hose from the vacuum pump and start the engine. It should suck your fingertip fast to the connection at the pump while idling. Or at least make a chirping noise that indicates it is creating a vacuum. Good Luck. Report back and Merry Christmas to all and to all a Good Night. When out in the driveway arose such a clatter, I knew right away the CUCV was being returned after being loaned to my son. He heard me exclaim as he walked out of sight, I'm glad that's not my daily driver anymore. Merry Christmas.
 

ezgn

Well-known member
Steel Soldiers Supporter
650
1,039
93
Location
Lake Elsinore Ca.
Not sure if this makes a difference, but was thinking about it and figured I'd mention that my truck has 37" tires on it. So while my speedometer shows 20mph and 35mph when shifting from 1->2 and 2->3, in actuality the truck is travelling about 27mph and 42mph.

All of the above being said, I guess I just need to bite the bullet and order the tools needed to diagnose this problem... What I've gathered from this thread is that all I'll need is a vacuum gauge, a MightyVac, and a J-33043 vacuum gauge block assembly? Or is there something else I should have on hand that might be helpful?
You don't need a vacuum gauge block assembly. All you need to do is adjust it, drive it, until you get it right. Get a vacuum gauge and check your vacuum pump. Check all your vacuum hoses, and check your vacuum modulator on the transmission. Pull the vacuum line off the modulator to make sure there is no fluid seeping out, replace the modulator if leaking. You can test it with your finger but a vacuum gauge would let you know if your vacuum is steady and how much vacuum you're pulling. Don' know why you would need a mighty vac either.
 
  • Like
Reactions: Zeb

ezgn

Well-known member
Steel Soldiers Supporter
650
1,039
93
Location
Lake Elsinore Ca.
You don't need a vacuum gauge block assembly. All you need to do is adjust it, drive it, until you get it right. Get a vacuum gauge and check your vacuum pump. Check all your vacuum hoses, and check your vacuum modulator on the transmission. Pull the vacuum line off the modulator to make sure there is no fluid seeping out, replace the modulator if leaking. You can test it with your finger but a vacuum gauge would let you know if your vacuum is steady and how much vacuum you're pulling. Don' know why you would need a mighty vac either.
Your vacuum regulator could also be no good. Merry Christmas! Once you verify you have vacuum going to your regulator, then you can check and see if you have vacuum going to your modulator. At that point if it all checks out then you can look at the modulator.
 

ezgn

Well-known member
Steel Soldiers Supporter
650
1,039
93
Location
Lake Elsinore Ca.
Your vacuum regulator could also be no good. Merry Christmas! Once you verify you have vacuum going to your regulator, then you can check and see if you have vacuum going to your modulator. At that point if it all checks out then you can look at the modulator.
VRV vacuum regulator valve seems to have become another part not readily available. ACDelco #14057219 is available on eBay for around $65.00. A few other places have them for more money.
 
Last edited:
  • Like
Reactions: Zeb

Zeb

Member
50
82
18
Location
Alabama
Vacuum gauge came in, shows:
- a pulsatile negative 18 to 24 at the vacuum
- pretty steady negative 13 at the regulator to hard line connection
- a pulsatile negative 6 to 7 at the end of the hard line, where it connects to the modulator

No fluid seen leaking seen from modulator.
Lines and white plastic hose adapter appears to be in fairly good shape

...I am thinking next step is to replace the regulator. Do yall have any other suggestions before I order a new one?
 

Squibbly

Well-known member
406
1,030
93
Location
South Carolina
Vacuum gauge came in, shows:
- a pulsatile negative 18 to 24 at the vacuum
- pretty steady negative 13 at the regulator to hard line connection
- a pulsatile negative 6 to 7 at the end of the hard line, where it connects to the modulator

No fluid seen leaking seen from modulator.
Lines and white plastic hose adapter appears to be in fairly good shape

...I am thinking next step is to replace the regulator. Do yall have any other suggestions before I order a new one?
Can you not just take the regulator off and clean all its parts?
I haven't done it, but this picture makes it seem maybe not too difficult to do once you get that spring off.
Just take pictures of what things look like before you take it off, so you know how to put them back together.

1640789101105.png

Also, someone documented the procedure for setting the vacuum valve (It's also in the manual)
CUCV Throttle Vacuum Valve Adjustment | SteelSoldiers

I'll be doing this eventually, I'm sure.

FYI, I know "basic" mechanical stuff. I understand how an engine works, and how electricity works. Most of the jobs I've had to do on my own truck required lots of study and laying under the truck staring at things before I even turned a wrench or laying on top of the engine to make sure my arms and tools had clearance (like the rear glow plugs), because *knowing* and *doing* are much different things. I generally look at the TMs, then search the forum to see if someone has documented doing it, and then youtube.

I think the pressure you feel to get things done *quickly* comes from not having a second vehicle to take to work, but usually when I feel *rushed* on something, I spend twice as long as I would have making mistakes that cost me hours because I either broke something, or got frustrated, when I really just needed an extra 10 minutes of "staring" and possibly making a list of things in the order I would do them. Even then, I made the mistake when I did my flexplate/torqu converter install by *knowing* that there was supposed to be 6 bolts in the TC, and seeing my TC only had 3 pads. I don't know why I didn't mention it on the forum, besides maybe subconsciously I didn't *want* to know the answer, and that cost me another 2 days of work. Nobody likes to document their mistakes. These people on youtube that never make mistakes, is just clever editing. Even my brother who makes youtube videos told me it takes hours and hours longer than his videos depict to get some things done, and he has actually worked on these things in the Marines.

If you don't know what questions to ask, take pictures or a video, and explain what you see or hear or are trying to do.

There are a lot of really good helpful people on this forum. The whole point of this forum is to get help and help others. Of course there is an expectation that you know how to search the forum so people don't have to keep repeating themselves, and it looks like you've done that.

Every job you do, you just have to tell yourself you *are* going to get it done. Just like you can build a tolerance to quitting when things get hard and over time quitting becomes second nature, you build confidence by sticking to a job and getting it done. None of this bullsh*t *team* effort. It's you, doing the work, from start to finish, and many people don't seem to know how to do this anymore.

To summarize, don't quit and don't be afraid to ask.
One day you can aspire to be like @cucvrus with your crowbar leaf springs, wooden bench seat, and a belly full of rage...but I suspect even he had to climb a mountain of mistakes to get where he is. 😁
 
Last edited:

Zeb

Member
50
82
18
Location
Alabama
Can you not just take the regulator off and clean all its parts?
I haven't done it, but this picture makes it seem maybe not too difficult to do once you get that spring off.
Just take pictures of what things look like before you take it off, so you know how to put them back together.

View attachment 854462

Also, someone documented the procedure for setting the vacuum valve (It's also in the manual)
CUCV Throttle Vacuum Valve Adjustment | SteelSoldiers

I'll be doing this eventually I'm sure.
Thanks, I like that idea! I'll give that a shot before ordering any new parts.
Yeah that thread is the primary one I've been referencing for trouble shooting this issue.
 

ezgn

Well-known member
Steel Soldiers Supporter
650
1,039
93
Location
Lake Elsinore Ca.
Vacuum gauge came in, shows:
- a pulsatile negative 18 to 24 at the vacuum
- pretty steady negative 13 at the regulator to hard line connection
- a pulsatile negative 6 to 7 at the end of the hard line, where it connects to the modulator

No fluid seen leaking seen from modulator.
Lines and white plastic hose adapter appears to be in fairly good shape

...I am thinking next step is to replace the regulator. Do yall have any other suggestions before I order a new one?
My suspicion is the vacuum regulator. Everything seems to checkout except the regulator does nothing even after adjusting to extreme levels. A new vacuum regulator would not be a bad part to have in stock even if the one you have is still good. Not that expensive but you''ll have to make the call.
 
  • Like
Reactions: Zeb

cucvrus

Well-known member
11,279
9,621
113
Location
Jonestown Pennsylvania
A rebuilt transmission does wonders also. I had one that was indecisive and shifted erratically. I dropped it off at the transmission shop of a friends and he called and said it was pump pressure, burnt clutches or some other failure inside. I was doubtful because the vehicle had 19 K miles on it but sure enough, I had him rebuild the transmission and it shifted perfect. That issue inside the transmission was probably caused by little or no vacuum. I lost my Friend Rick the transmission man, so I hope I don't need any more transmissions overhauled. Hard to find honest people in the automatic transmission business. They all have 2 houses and beach front property. Sure, they got those fixing transmissions on the level. Happy New Year.
 

Zeb

Member
50
82
18
Location
Alabama
So I ended up replacing the vacuum regulator with a new one from eBay (ACDelco #14057219). This resulted in no change in the shift points, even when I adjusted the new regulator's positioning towards/away from the firewall.
Frustrated, I went back through my checklist...and when I checked the transmission fluid it was reading high this time (I swear I remember it reading on the full mark when I topped it off a few weeks ago... and yes I checked it hot at that time....could some have leaked from the transfer case into the trans? I topped both off at the same time). So I pumped enough ATF out of the transmission for the dipstick to read just below full with the truck running hot, and this helped a little. Trans now shifting around 17 and 30, without the lurching that it was doing before. But it still isn't responding to VRV adjustments.... I'm considering replacing the modulator at this point, since the vacuum pressure readings down the hardline appeared ok on last check.

On another unfortunate note, while I was test driving to adjust the shift points, I heard a loud "clunk" while turning at low speed....followed by the truck pulling hard to the left during braking. Upon inspection I discovered a bad drag link under the pitman arm. After reading this thread, I ordered a Moog Drag Link (part # ES2027L) to replace it. Death wobble has been a worsening issue lately, and steering has been super loose since buying the truck a few years ago, so I went ahead an also ordered a new Moog steering stabilizer (part # SSD84) and a CraneAxle kingpin spring eliminator kit. I considered ordering a kingpin rebuild kit, but wasn't sure if this was necessary and thought it looked a little more challenging than the simple component replacements listed above.

I think the pressure you feel to get things done *quickly* comes from not having a second vehicle to take to work
^you are spot on there! When I had another daily driver, working on the CUCV was fun. Now every time something goes wrong I get a sense of dread, and have to drop everything else to research what might be the cause and how I as a novice can most efficiently fix it. Add the responsibilities of 2 toddlers, a farm, and 80-90hrs per week at my day job… working on the truck is no longer fun. I still get that awesome sense of satisfaction and pride when I successfully finish a repair, but the process is less enjoyable, and lately every time I fix something...another something goes wrong. But I guess that makes sense since now that I'm putting daily miles on it, previously smoldering issues are rearing their ugly heads. Hoping everything smooths out soon, because we’re moving the farm in July and I’ll be relying on the m1008 to haul multiple loads of livestock, equipment, and furniture 70 miles north! I guess the silver lining is that I’m getting the opportunity to fix these problems now before I’m really putting the truck through its paces in July.
 

Attachments

Last edited:

Squibbly

Well-known member
406
1,030
93
Location
South Carolina
So I ended up replacing the vacuum regulator with a new one from eBay (ACDelco #14057219). This resulted in no change in the shift points, even when I adjusted the new regulator's positioning towards/away from the firewall.
Frustrated, I went back through my checklist...and when I checked the transmission fluid it was reading high this time (I swear I remember it reading on the full mark when I topped it off a few weeks ago... and yes I checked it hot at that time....could some have leaked from the transfer case into the trans? I topped both off at the same time). So I pumped enough ATF out of the transmission for the dipstick to read just below full with the truck running hot, and this helped a little. Trans now shifting around 17 and 30, without the lurching that it was doing before. But it still isn't responding to VRV adjustments.... I'm considering replacing the modulator at this point, since the vacuum pressure readings down the hardline appeared ok on last check.

On another unfortunate note, while I was test driving to adjust the shift points, I heard a loud "clunk" while turning at low speed....followed by the truck pulling hard to the left during braking. Upon inspection I discovered a bad drag link under the pitman arm. After reading this thread, I ordered a Moog Drag Link (part # ES2027L) to replace it. Death wobble has been a worsening issue lately, and steering has been super loose since buying the truck a few years ago, so I went ahead an also ordered a new Moog steering stabilizer (part # SSD84) and a CraneAxle kingpin spring eliminator kit. I considered ordering a kingpin rebuild kit, but wasn't sure if this was necessary and thought it looked a little more challenging than the simple component replacements listed above.


^you are spot on there! When I had another daily driver, working on the CUCV was definitely more enjoyable. Now every time something goes wrong I get a sense of dread, and have to drop everything else to research what might be the cause and how I as a novice can most efficiently fix it. Add the responsibilities of 2 toddlers, a farm, and 80-90hrs per week at my day job.. and working on the truck is no longer fun. I still get that awesome sense of satisfaction and pride when I successfully finish a repair, but the process is less enjoyable, and lately every time I fix something...another something goes wrong...
I didn’t have any luck changing my shift points (significantly) using the VRV either. TBH, after doing some research I think the governor controls that, and the VRV controls how soft or hard the shift is by delaying it in a 3-4 mph range.

Maybe someone can attest.


Sent from my iPhone using Tapatalk
 
Last edited:
  • Like
Reactions: Zeb

cucvrus

Well-known member
11,279
9,621
113
Location
Jonestown Pennsylvania
I had an M1028 A1 that had indecisive shifting. I changed the VRV and that made no difference. I took it to the transmission shop, and they adjusted it with a gauge. He said he was not happy with the way it shifted either. As time went on it remained a PITA. It would pull out in 2nd and shift on a slip shift. It had 19K miles on it and I had the truck 10 years. I dropped it off at the transmission shop and he pulled the transmission and called me. It had burnt several clutches and the inside of the transmission was toasted. He said a few seals and gaskets were hard and dried out. At the time I told him rebuild it like new. He did and $1,000 later it worked and shifted like new. I drove the truck till 2013 and sold it with 55K on it. I do NOT use used take out transmissions from 30-year-old trucks and I don't trust running them until they are totally shot. The TH400 cases are getting hard to find and I have cracked a few TH400 cases in plow trucks over the years. My Friend that did all my transmission over hauling has passed away and I hope to never need any more work like that completed. I have 1 M1009 left after my current build. The current Little Red build had the TH400 overhauled and has zero miles on it to date. Have a Great Day and Be Safe.
 
Last edited:

Zeb

Member
50
82
18
Location
Alabama
Shifting problem appears to be solved! :D

I replaced the vacuum modulator this afternoon, and the shift points finally moved. After removing the old vacuum modulator, upon closer inspection it looks like there was some gunk in the end that connects to the hose/hard line. Since the trans was shifting/working fine prior to the flexplate replacement, my best guess is that I got the end of the hose dirty when I pushed it out of my way, and then introduced some contaminants into the modulator when I reconnected it.

On my short test drive the transmission shifted so low and soft that I didn't even notice it shifting from 1->2 the first time (swiveled the vacuum regulator all the way towards the firewall at last adjustment a few days ago, in a last ditch effort to get the points to budge lower). Now the shift points with the new modulator and new regulator (swiveled all the way towards the firewall) are around 10 & 20. These are too low IMO, so tomorrow when I have time to do the adjust/test-drive/adjust routine I'll increase them to around 15 and 30.

Also the shift points are very soft... barely noticeable. Maybe they'll harden up when I increase the shift points to 15 & 30, but I also read that there is an adjustment tab within the vacuum modulator that can make the shift points harder/softer. @ezgn you mentioned that previously in this thread that I don't want soft shift points. Can you elaborate? I always assumed hard shifting was a sign of a transmission trouble, and that soft shifting was a sign of a healthy trans.... but I also know next to nothing about transmissions and am only a few years into getting to know my CUCV.

Lastly, I also had time to replace the drag links, the drag link adjustment sleeve, and the steering stabilizer today with new Moog parts from Advanced Auto. Also rotated the tires. Only had time for about a half-mile test drive afterwards, but steering was significantly tighter and I didn't notice a bit of wobble! Will go for a longer test drive tomorrow to verify that it's really improved. CraneAxle kingpin spring eliminator kit hasn't come in yet, but I plan to install it tomorrow if it gets delivered in time.
 
Last edited:

ezgn

Well-known member
Steel Soldiers Supporter
650
1,039
93
Location
Lake Elsinore Ca.
Shifting problem appears to be solved! :D

I replaced the vacuum modulator this afternoon, and the shift points finally moved. After removing the old vacuum regulator, upon closer inspection it looks like there was some gunk in the end that connects to the hose/hard line. Since the trans was shifting/working fine prior to the flexplate replacement, my best guess is that I got the end of the hose dirty when I pushed it out of my way, and then introduced some contaminants into the modulator when I reconnected it.

On my short test drive the transmission shifted so low and soft that I didn't even notice it shifting from 1->2 the first time (swiveled the vacuum regulator all the way towards the firewall at last adjustment a few days ago, in a last ditch effort to get the points to budge lower). Now the shift points with the new modulator and new regulator (swiveled all the way towards the firewall) are around 10 & 20. These are too low IMO, so tomorrow when I have time to do the adjust/test-drive/adjust routine I'll increase them to around 15 and 30.

Also the shift points are very soft... barely noticeable. Maybe they will harden up when I increase the shift points to 15 & 30, but I also read that there is an adjustment tab within the vacuum modulator that can make the shift points harder/softer. @ezgn you mentioned that previously in this thread that I don't want soft shift points. Can you elaborate? I always assumed hard shifting was a sign of a transmission trouble, and that soft shifting was a sign of a healthy trans.... but I also know next to nothing about transmissions and am only a few years into getting to know my CUCV.

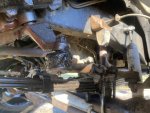
Lastly, I also had time to replace the pitman-to-axle drag links, the drag link adjustment sleeve, and the steering stabilizer today with new Moog parts from Advanced Auto. Also rotated the tires. Only had time for about a half-mile test drive afterwards, but steering was significantly tighter and I didn't notice a bit of wobble! Will go for a longer test drive tomorrow to verify that it's really improved. CraneAxle kingpin spring eliminator kit hasn't come in yet, but I plan to install it tomorrow if it gets delivered in time.

I did notice while I was replacing the steering stabilizer that the front (long) drag link is slightly warped/bent. Looks like somebody drove it into a stump or something, and it's put just a slight concave bend in the bar. Should I try to get it straightened out, replace it, or just leave it be?
I believe it involves your clutch bands slipping and wearing out over time when they slowly engage. Quick firm engagement reduces the slipping. Not my area of expertise so I may not be correct in my opinion, but a firm shift is what you want. The modulators are usually set to the correct shift points, so I would do my adjustments from the vacuum valve, and if need be you can try adjusting the modulator to fine tune. 15-30 or 35 seems a good range.
 

Zeb

Member
50
82
18
Location
Alabama
I believe it involves your clutch bands slipping and wearing out over time when they slowly engage. Quick firm engagement reduces the slipping. Not my area of expertise so I may not be correct in my opinion, but a firm shift is what you want. The modulators are usually set to the correct shift points, so I would do my adjustments from the vacuum valve, and if need be you can try adjusting the modulator to fine tune. 15-30 or 35 seems a good range.
Thanks!
 

Zeb

Member
50
82
18
Location
Alabama
*Please don't hesitate to let me know if I should create a new thread with this question, but thought I would give it a go here first*

Yesterday while I was replacing the steering stabilizer, I noticed the drag-link/tie-rod that it bolts to is slightly warped/bent (the long one that sits in front of & parallels the axle). It almost looks like somebody drove it into a stump or something, and it's put just a slight concave bend in the bar.

Should I try to get it straightened out, replace it, or just leave it be? Figured I'd go with a Moog replacement if I do... although this longer drag link is significantly more expensive than those shorter ones I replaced by the pitman arm
 

Zeb

Member
50
82
18
Location
Alabama
Replace the long drag link with a new one for safety sake! The ball socket end is worn too!
You might straighten it but it might break there sometime too!
Thanks for the guidance! That's what my gut was telling me. I'll go ahead and replace that entire tie-rod assembly (DS905 + ES2012S + ES2011R).
2 followup questions:
  • are there other components that have likely suffered increased wear (due to this bend) that I should inspect or consider replacing while I'm down there? ...specifically I'm wondering about the steering arms that the tie rod(s) connect to (#3 in the illustration below). they seem pretty heavy duty, but that's the next piece of hardware down the line
  • considering that this long tie rod and it's adjuster sleeve control toe/alignment on the tires.... should I take it to a shop afterwards to get realigned? Or is this something I can carefully do on my own? (measure sleeve position and tire front/back positionng prior to disassembly, and try to replicate after install?)
Capture.JPG
 
Last edited:

Mullaney

Well-known member
Steel Soldiers Supporter
Supporting Vendor
7,359
19,060
113
Location
Charlotte NC
Thanks for the guidance! That's what my gut was telling me. I'll go ahead and replace that entire tie-rod assembly (DS905 + ES2012S + ES2011R).
2 followup questions:
  • are there other components that have likely suffered increased wear (due to this bend) that I should inspect or consider replacing while I'm down there? ...specifically I'm wondering about the steering arms that the tie rod(s) connect to (#3 in the illustration below). they seem pretty heavy duty, but that's the next piece of hardware down the line
  • considering that this long tie rod and it's adjuster sleeve control toe/alignment on the tires.... should I take it to a shop afterwards to get realigned? Or is this something I can carefully do on my own? (measure sleeve position and tire front/back positionng prior to disassembly, and try to replicate after install?)
View attachment 855729
Parts #9 and #5 are worth replacing while you are down there. Replacing all those parts now will mean that when you go get the alignment, you won't find more worn pieces - and the alignment will "stick" and stay like they set it...
 
Top
AdBlock Detected

We get it, advertisements are annoying!

Sure, ad-blocking software does a great job at blocking ads, but it also blocks useful features of our website like our supporting vendors. Their ads help keep Steel Soldiers going. Please consider disabling your ad blockers for the site. Thanks!

I've Disabled AdBlock
No Thanks