- 1,949
- 1,665
- 113
- Location
- Laramie County, Wyoming
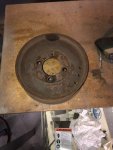
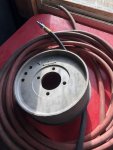
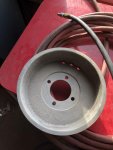
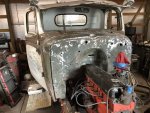
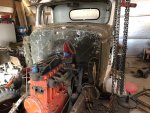
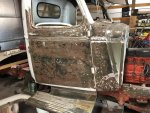
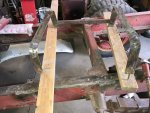
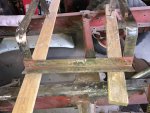
More sanding.
Attachments
-
 74.6 KB Views: 13
Steel Soldiers now has a few new forums, read more about it at: New Munitions Forums!


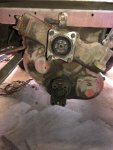
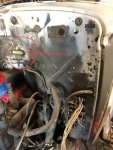
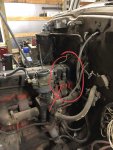
. To get the temp gauge removed, remove the sending unit from the engine. It will still be connected to the wire going to the gauge. At the fire wall there is a metal piece, not sure what it’s called but it protects various cable going thru the firewall. There’s a notch cut into the piece as well as a corresponding notch in the firewall. Remove the piece by removing various clamps on the wires/cables and remove the two clutch bit screws. It takes two to people do this. Then, go into the instrument panel and remove the gauge mount screws on the back of the temp gauge. Once it moves freely, gently pull the gauge out and slowly remove the cable that’s still attached to the sending unit. Using the two notches, pull the wire through the firewall and remove the gauge and wire all at the same time. There may be additional wires and cables behind the dashboard that may need to be removed. Take it slow and careful and it’ll come out just fine.What was the final method of removing the temperature gauge?
Not sure if it's your thread or some kind of old age trauma but the brother has a huge fleet of 40's civi cars rotting in the bush and he started pulling frames out this week.
Not sure how far it will go but I might get to wrestle with some 40's technology.
View attachment 760139

. We have 5 cats, one male, ginger with polydactyl front paws. Do not get in an argument with him. His gets his claws in, he takes meat. He’s a real nice cat tho. 2 coal black females, sisters. Extra sneaky. So sneaky we call them “Black Ops”. One calico female. She is one solid cat! Weighs about 15 pounds and getting her to do what you want? Heck no! And the last is my cat. She adopted me. Some jerk spayed her, declawed her front paws then dumped he out by my house. Took 6 months to earn her trust but she’s a sweetheart. Flat out got no more room. Cates, 3 dogs, 9 Guinea pigs and a son in law. Cats down belong to their owners, they allow you to feed and care for them, lol!Some of it looks different then the 1948 gauges but there are similarities. We'll likely need to go through that same process so really helps to go through it once already. Thank you.
This beast showed up as a stray in November. We usually let the neighbours and nature take care of abandoned animals. By Christmas he had me convinced I needed hair everywhere and aeration on all the furniture. He just had his last shots, baby makers were removed, worms and ear infection gone somewhere in my house so he's looking for a big family to hunt deer with, play golf and I think he's a cross-dresser. Need a cat?
View attachment 760154
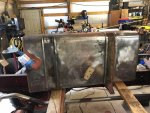
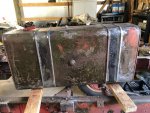
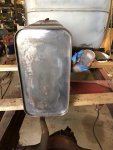
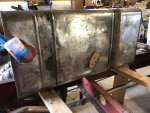
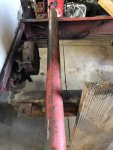
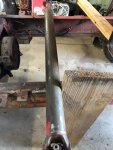
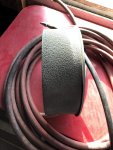
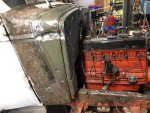
. The drive shaft has two or three coats on top of the original paint. It’s coming off relatively easy. The fire department that had it must have stored it inside. The limited rust is probably due to it being stored outside after the FD sold it. I wish I had a magic camera, lol! I could fix a bunch of stuff the easy way. In many ways this truck has become a surprising jewel!Are there layers of paint on the driveshaft too? Primer, green then is that red on top again or bottom primer? That beast was maintained. I can't remember a restore with a fuel tank that wasn't full of holes. That tank looks beautiful. Or are you using your trick camera again that hides all the flaws? If the previous paint or whatever was used to seal the metal is still bonded then we scratch the top and paint it. Our purpose is just to protect the goods underneath so you're already ahead to the game, thanks for the pics.
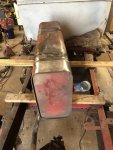
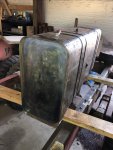
. I have considered using elephant snot paint remover. It’s great stuff. The problem is the smell and the chemicals in the stuff. I spent too many years working as a helicopter mechanic. Any more exposure is a bad thing. Thank you though for the suggestion and kind words!Have you tried good old chemical paint stripper on the sticky parts on that gas tank? Sometimes that will loosen and or dissolve that under coating. Might be worth a shot? Keep up the good work it is looking good!