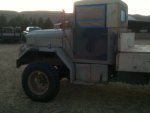
Well thanks to great weather yesterday, my brother and I got it painted! We used a grand total of 2.5 gallons to paint the whole exterior minus the inside of the bed. We are going to wait a couple days to get that painted to let the paint dry so we can put the drop sides down. All in all it was super easy! Only piece of advice I can give is if you're painting outdoor, don't spray into the breeze! Your face will also get a paint job!
For the technical information side, we used a Wagner power painter plus airless sprayer. It worked great and is easily cleaned. In our situation, the paint didn't need to be thinned and the sprayer handled it great. As stated before, we used the Behr premium plus primer and paint in one. We had it color matched to the Rustoleum tan camo spray paint (for easy touch up). For prep work, we used a putty knife and scraped all the areas where paint was peeling, used degreaser on any oily looking surface then cleaned that area with acetone to remove any residue that the degreaser might have left. We then pressure washed/scrubbed it twice and let it dry for a day. Then the typical tape and paper over the areas where paint wasn't wanted.
All I all, I am very pleased with the way it turned out. Now to see how well it holds up!


 89.5 KB Views: 95
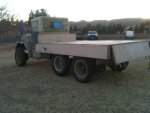 27.6 KB Views: 97
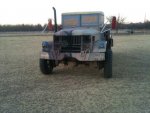 34.3 KB Views: 98
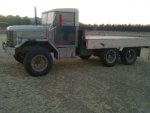 99.6 KB Views: 94

") I look forward to seeing your progress .......
I look forward to seeing your progress .......


