• Steel Soldiers now has a few new forums, read more about it at: New Munitions Forums!

  • Microsoft MSN, Live, Hotmail, Outlook email users may not be receiving emails. We are working to resolve this issue. Please add support@steelsoldiers.com to your trusted contacts.


M1009 Little Red Riding Hood.

cucvrus

Well-known member
11,285
9,643
113
Location
Jonestown Pennsylvania
If the day goes as planned, I will be able to paint the inside of the rear cargo roof and the doors jams for the second time. The door jambs had some paint lifting issues I am going to contribute to the rustproofing that was sprayed inside the doors when the truck was new. There were just a few spots in the door jamb that the paint did not adhere to my satisfaction. Anyway a few extra coats of CARC in the jambs will help prevent corrosion. The jambs and underside areas were always under sprayed at the factory on older trucks/vehicles. After lunch is the shoot time. Have a Great Day and Be Safe.
 

cucvrus

Well-known member
11,285
9,643
113
Location
Jonestown Pennsylvania
The painting took place outside on this wonderful day. I was going to let the stuff set out in the driveway but decided to put it away while I had some help. Everything looks great. My fear was a bird would fly over and drop a bomb on the parts and it would get baked into the fresh paint. And then you know what kind of job I would have. A sh--y one. I worked on putting a new muffler on my log splitter and cleaned up outside while the paint was drying. Take Care. I didn't have my camera with me. I will get pictures at a later date. It has been a long day.
 

WWRD99

Well-known member
Steel Soldiers Supporter
898
1,375
93
Location
York Pa
Facebook
Is this what you get for $14K.
I am lost in this new world. After I complete mine, I will be dumb founded to know its value.
That's Mike...he's got a good bit of these on hand. They are all southern trucks that are in great condition. He sells them all the time like this plus fully restored. He does tons of parts too if you need anything off of one. He'll get that price or close to it too. Your's would bring high money since it's been restored to better than new. The one my son is doing now is gonna go for 13 plus. Not many of these blazers left.

Sent from my SM-S906U using Tapatalk
 

cucvrus

Well-known member
11,285
9,643
113
Location
Jonestown Pennsylvania
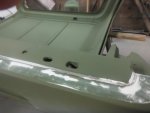
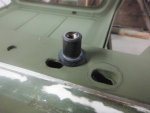
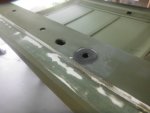
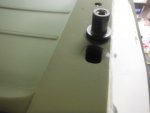
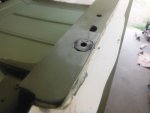
Today was a first day off in a long time. I was going to travel but dreaded the 5 hours in the truck on a holiday weekend. I stayed home and did some easy work. DSCF9171.JPG These are the holes in the roof from where the lower rear body to rear roof attach. As you may know I broke the anchor nuts loose in mine when I removed the top. After a lot of thought and an idea presented here, I purchased 2 3/8" well nuts. I should have done this drilling and milling with the router before I painted the inside of the top. Man, that thing is beautiful I will kick myself in the arse if I mess it up.DSCF9172.JPG
I traced the outsie of the well nut and set the router to the shoulder depth. DSCF9173.JPG I milled it out with the router and set it in place. A little dab of adhesive just to keep it in place while I am setting it on the body. DSCF9174.JPG I went to the other side and milled it also. I hit steel on this side. Chewed the bit up a bit but was still able to get it in place. DSCF9175.JPG DSCF9178.JPG Not as perfect but nonetheless in place and it will never be seen and will do the same job. I have a few other little tinkering jobs to complete today and hope to have the top sanded on the outside and back on the body today for paint. Not the final seating as I am going to paint the truck with all the weatherstrips removed and then remove the top and set it upside down again and install the new weatherstrips. Tricky business. I hope all goes as planned. striving hard for near perfection. I taped off the areas where the weatherstrip get attached so that the adhesive adheres to the fiberglass and not the paint. That is how the factory was attached. Made sense. Have a Great Day and Be Safe. Happy Labor Day to all you that Labor.
 

cucvrus

Well-known member
11,285
9,643
113
Location
Jonestown Pennsylvania
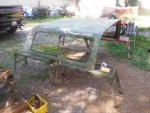
I asked a few friends and family to drop by today and help me get the rear cargo roof outside so I could sand it. That was a success. I ask if they would stop by at 5 to set it on the M1009. I have it sanded on the top side outside and will post more as progress happens. DSCF9187.JPG
And yes, I washed my hands many times today, so I didn't get any oil or grease on my M1009 parts. I will move onto getting the wheels off my M1009 and get it setting low for paint. I must reinstall the doors on the cab. I also must make cardboard window fillers so I can paint this entire thing with everything removed. More later. Be Safe.
 

cucvrus

Well-known member
11,285
9,643
113
Location
Jonestown Pennsylvania
I was successful in getting the roof back on the M1009. Of course, it is just setting on with no seals. It is amazing how much lighter the top is with no windows in it. Today after work I plan om getting the doors back on and adjusted. I think this will be the last time I must take them off. Although have the driver's door off will make it easier to reinstall all the wiring harness and steering column. Maybe. That can get risky. Have a Great Day.
 

cucvrus

Well-known member
11,285
9,643
113
Location
Jonestown Pennsylvania
I have the doors back on and adjusted and then I thought I may as well get the rear gate bolted fast to the body. Well, that idea was short lived. It seems I overlooked the pre-painting of the jams. This is the OEM gate, and it is in remarkably good condition. I set it up on the stands and I was not happy with the rubber seal. It had 40 years of wear and dirt bonded to it. I thought just pull it off and replace it. That was not the case. It was glued fast like it was welded on the gate. I spent an hour scrapping and brushing to get about 50% of it off. Tonight is another night. I was to get it ready and get the jam painted. I did manage to have every other piece of the gate pre-painted. I somehow overlooked the gate. I painted the torque rods and the plates for the torque rods. Even the hinges were removed and painted in CARC. It was a senior moment. But I am glad because it gave me an opportunity to remove the old rubber seal. I think it would have looked poorly after all the other details I have improved. More Later. I just traded my flip phone for an iPhone and am now lost and learning. Oh Boy. Be Safe and Have a Great Day.
 

WWRD99

Well-known member
Steel Soldiers Supporter
898
1,375
93
Location
York Pa
I have the doors back on and adjusted and then I thought I may as well get the rear gate bolted fast to the body. Well, that idea was short lived. It seems I overlooked the pre-painting of the jams. This is the OEM gate, and it is in remarkably good condition. I set it up on the stands and I was not happy with the rubber seal. It had 40 years of wear and dirt bonded to it. I thought just pull it off and replace it. That was not the case. It was glued fast like it was welded on the gate. I spent an hour scrapping and brushing to get about 50% of it off. Tonight is another night. I was to get it ready and get the jam painted. I did manage to have every other piece of the gate pre-painted. I somehow overlooked the gate. I painted the torque rods and the plates for the torque rods. Even the hinges were removed and painted in CARC. It was a senior moment. But I am glad because it gave me an opportunity to remove the old rubber seal. I think it would have looked poorly after all the other details I have improved. More Later. I just traded my flip phone for an iPhone and am now lost and learning. Oh Boy. Be Safe and Have a Great Day.
No more flip phone?? That's a huge jump to the iPhone! You'll figure it out, no problem.

Sent from my SM-S906U using Tapatalk
 

cucvrus

Well-known member
11,285
9,643
113
Location
Jonestown Pennsylvania
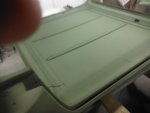
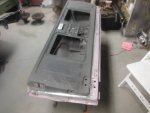
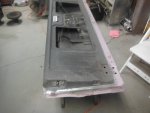
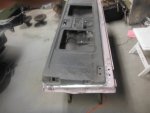
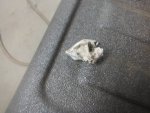
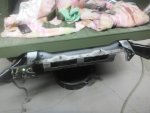
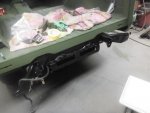
25 years ago, when I bought this M1009 I had all the OEM body parts. I still have everything except the front fenders. This gate I removed early on and was going to use it on another M1009 but decided to keep it so I could keep all the OEM parts together. DSCF9189.JPG I was originally going to LineX this M1009 project but at the last moment I decided not. I had the gate sprayed many years ago and will just paint CARC over the LineX. DSCF9190.JPG DSCF9191.JPG I was edge sanding and blowing it out and I saw something stuffed inside the bottom corner. I used a piece of welding wire and dug out a wad of duct tape. DSCF9192.JPG That tape was not from me. It was raining hard outside so I looked around for something I could do and wait out the rain. DSCF9193.JPG That primer overspray on my nice rear frame section has been irritating me for a few years. Time to fix it. DSCF9202.JPG DSCF9203.JPG That was easy. I washed the gate with DX330 wax and grease remover and was going to paint it when the rain was almost stopped. DSCF9204.JPG So, I went out and worked on the Wild Weasel M1009 project. More later. I want to get this gate on this week. Thank you for looking and take care. Have a Great Week.
 

cucvrus

Well-known member
11,285
9,643
113
Location
Jonestown Pennsylvania
WOW after thinking about the pictures I posted yesterday I never took or posted any pictures of the M1009 with the doors and roof back on it. Senior moment or just crazy from the heat. I will redeem myself next time out in the barn. I must get the gate inside and jambs painted.
 
Last edited:

WWRD99

Well-known member
Steel Soldiers Supporter
898
1,375
93
Location
York Pa
25 years ago, when I bought this M1009 I had all the OEM body parts. I still have everything except the front fenders. This gate I removed early on and was going to use it on another M1009 but decided to keep it so I could keep all the OEM parts together. View attachment 905614 I was originally going to LineX this M1009 project but at the last moment I decided not. I had the gate sprayed many years ago and will just paint CARC over the LineX. View attachment 905615 View attachment 905616 I was edge sanding and blowing it out and I saw something stuffed inside the bottom corner. I used a piece of welding wire and dug out a wad of duct tape. View attachment 905617 That tape was not from me. It was raining hard outside so I looked around for something I could do and wait out the rain. View attachment 905618 That primer overspray on my nice rear frame section has been irritating me for a few years. Time to fix it. View attachment 905619 View attachment 905620 That was easy. I washed the gate with DX330 wax and grease remover and was going to paint it when the rain was almost stopped. View attachment 905621 So, I went out and worked on the Wild Weasel M1009 project. More later. I want to get this gate on this week. Thank you for looking and take care. Have a Great Week.
That Line x will be fine when you paint it. I wonder if you need to use a primer on it so it sticks right?
 

cucvrus

Well-known member
11,285
9,643
113
Location
Jonestown Pennsylvania
Last night I was home in time and the weather was just right. I set up my gate and gate cover outside and went in the barn and mixed the green CARC. I washed both parts thoroughly with DX330 wax and grease remover and applied several nice even coats to the parts. I squeezed the can and used every bit of it. Like Maxwell house it was good to the last drop. I still have 1 full gallon of CARC paint that will make about 1 3/4 gallons when all mixed. That should be enough to paint the exterior of the M1009 and a set of new mirrors. I was also able to attach the rear gate hinges to the body and next up I will be attaching the gate I am hoping for the last time. I have never come up with an absolute way to attach a gate with the torque rods and it be an easy task. Them torque rods are a real tricky tough nut to crack attachment. On an older truck it is wham bam and on. It seems like when you are trying hard to not damage fresh paint everything that can go wrong goes wrong. Oh well. I can spray again in the jamb if needed. Take care. I have an iphone now and still can't post pictures. I must fall back on my trusty old camera. Maybe if I'm lucky I can get some pictures tonight. Take Care and have a Great Day.
 

cucvrus

Well-known member
11,285
9,643
113
Location
Jonestown Pennsylvania
I do like the look of the painted Line X on the m1009 tailgate and cover. Oh, that's right you can't see it. The CARC did a fantastic job. And I had CARC on my M1009 Mule floor as the primary floor covering and it wore well after several years of use, I hardly had any wear marks at the driver's pedal area. I did spray several heavy coats on the clean metal so it would hold up under use. I will post pictures later. And I still owe pictures of the roof back on the M1009 project.
 
Top
AdBlock Detected

We get it, advertisements are annoying!

Sure, ad-blocking software does a great job at blocking ads, but it also blocks useful features of our website like our supporting vendors. Their ads help keep Steel Soldiers going. Please consider disabling your ad blockers for the site. Thanks!

I've Disabled AdBlock
No Thanks