• Steel Soldiers now has a few new forums, read more about it at: New Munitions Forums!

  • Microsoft MSN, Live, Hotmail, Outlook email users may not be receiving emails. We are working to resolve this issue. Please add support@steelsoldiers.com to your trusted contacts.


M109A3 conversion in progress, setting the standard

81
4
8
Location
Rancho Cucamonga, Ca.
To jesusgatos,
Thanks for the complements! Setting the standard??????, well, we have to be proud of what we do or it is not worth the work, but its all good and everyone has different ideas and I do not think my way is the only way! the way i am doing this is just what popped into my head at the time. Hope i did not forget to do something important during the build? haha
SS M109????? I love it, thats a good one! I have seen so many good ideas from many people on this site!!!!!
Heck, a little competition is good for the nerves! I love to see imagineers at work!
Thanks jesusgatos
 

zout

Well-known member
7,744
154
63
Location
Columbus Georgia
MG - just from my perspective - I see no competition it in - we do with what we have - our ability - and most important - its the persons own truck and it is awesome however they built it - its what they want.

I for one appreciate seeing all of these units not just the 109's. Maccus as well has a great looking unit built into his 109.

Be sure to keep your thread posted with pics as I for one like to view them and I am sure others as well are appreciating them.

As far as papabear - pay attention to him - as anyone that has a tank in their compound gets FULL ATTENTION :roll:.

Just think - if you start out right now from CA - you will get here by the time the GA rally takes place - see ya there.;-)
 
81
4
8
Location
Rancho Cucamonga, Ca.
modiifications to m109a3

To ZOUT,
Thank you for the suggestion on rounding off the cutout for the vent and air conditioning headout! That is a great idea and i respect your knowledge! I should of thought of that myself since I am a welder and fabricator! You got me on that one but I am glad you mentioned it! It will save me future problems! My Hats off to you!!!!!

Oh ZOUT, I just finished going over all 30 something pages of your project and i left you a reply on your thread!! wow!!
Thanks again!
 

zout

Well-known member
7,744
154
63
Location
Columbus Georgia
Thanks MG - I had posted something here that belonged on mine and I edited it.

It was a post on my thread that someone thought I did not think he was kidding - I know he was.
I was not attempting to hijack your thread.

A member here took and 1 1/2 hours and read through my entire thread - he needs a life :)

keep your pics coming - great build - the exterior of yours is in awesome condition as well.
 
Last edited:
81
4
8
Location
Rancho Cucamonga, Ca.
M109A3 video #2

VIDEO # 2

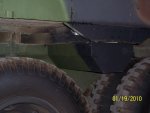
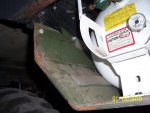
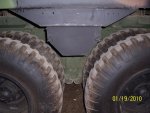
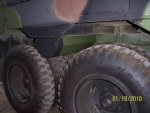
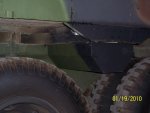
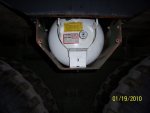
this video shows the propane tank compartment.
it is secured up with vertical bolts
it lowers down and is supported with side hinges , drops 9 " down, and a rear hinge at the frame supports the rear compartment
compartment is fabbed with 1/4" steel plate
Air conditioning at roof views
refer views with new oak panels
the kitchen cabinets in progress with oak styles
3 burner stove will be on the right side
double stainless sinks will be on the left side of cabinet
center section of cab. will be counter top with a toaster overn/broiler
I will have overhead cabinets over kitchen counter, over dinette and right side of refer will be cabinets with overhead cabinets and narrow closet in corner
water heater w/ plumbing / quick disconnect fittings

You need to click on the yellow link above the video window? I do not know why it wont work clicking play arrowat the bottom of the wmv. can anyone tell me why this is?
 

Attachments

Last edited:

jesusgatos

Active member
2,689
28
38
Location
on the road - in CA right now
LOVE that propane tank mount. Really great use of space. Sounds kind of sketchy until you think about how burly that formed 1/4" plate enclosure must be. I hadn't decided where to mount my propane tanks, but I think I might follow your lead here. I'll probably have the parts laser-cut and formed, so I could easily have extras made if anybody else wants one (not a money-making proposition).
 
81
4
8
Location
Rancho Cucamonga, Ca.
Propane tank

Thanks JESUSGATOS, I am glad you like it. The tolerances were very tight so I can use the tank I wanted and to be able to fab a compartment to fit between the floor joists.
I made up a pattern of the tank diameter and total width of the compartment space, leaving the 2 flanges on sides to run the bolts up into the existing joists. Remember you need to install the regulator outside the house for safety, (leaks or explosion) I mounted the regulator to the floor joist to the left or rear of the compartment. I will be installind a steel plate for protection.

Regarding lazer cutting, You can do what I did, this compartment was from one piece, On the breaks, I cut the breaks all the way through (horozontally)except 1/2 " at each end and center leaving these 3 tabs to keep the parts together, I just bent the joints to my pattern, tacked tie bars to retain the shape and welded and ground the joints. You can cut the joints with a torch or as I did a plasma cutter if you have one.
I also fabbed a hinge at the frame side using 2 vertical straps welded to the box frame and not the chassis, the straps are bolted to the bottom of the compartment. This system lets the frame flex from the spring loaded box without binding or tearing up the compartment.
Well, this is patent pending , so making one for non profit is fine
 

frodobaggins

Active member
2,861
16
38
Location
Ruston, La
Can you post up some regular pics of the rest of the work ? These videos just ain't doing it for me :) I'm sure the slower internet users would appreciate it too.

I do like what I've been able to see.
 
81
4
8
Location
Rancho Cucamonga, Ca.
big white thing on to

Hi CYBER_7
Ya, I am going to camo the big white thing on top! haha Actually i am waiting to test and replace the circut board on the darn thing and then I will camo it!

Well, If you do not get a M109 you can get a shelter for your M35 and always be able to remove it!

Thanks MIKE for the complements, Glad you like it. RV stuff is so expensive! :grd:
 
Last edited:
81
4
8
Location
Rancho Cucamonga, Ca.
Propane tank tire clearance

srodocker
I measured the travel from the axle to the rubber snubber and added a inch for compression of the snubber.
I measured up the same distance on top of the tire and swung an arch towards the compartment and I should have an extra inch. I will back the truck on a ridge and confirm!
Thanks,:grin:

O.K. YES I WILL TAKE A PICTURE WHEN i DO IT! :lol:
 
Last edited:

mangus580

New member
6,010
282
0
Location
Western NY
You need to click on the yellow link above the video window? I do not know why it wont work clicking play arrowat the bottom of the wmv. can anyone tell me why this is?
There is a problem with the code - The only ones that work properly I think are quicktime movies, and flash movies. Look around online (if you care) for a WMV to Flash converter and convert the files.
 

63sierra10

New member
116
0
0
Location
Worland, Wy
Mastergunner, that is a nice set up you have. I am in the process of building mine too. Mine started as an M35a2 that I bought the van shelter for. So far I am in the middle of reconfiguring my set up to be more liveable than just a weekender.
 
81
4
8
Location
Rancho Cucamonga, Ca.
conversion

Hello 63sierra10,
Thank you for the kind words, I am glad you like it so far. I would like to see your progress on your project. Good luck and thanks again!

We may need it after 12-21-2012! haha
 
Top
AdBlock Detected

We get it, advertisements are annoying!

Sure, ad-blocking software does a great job at blocking ads, but it also blocks useful features of our website like our supporting vendors. Their ads help keep Steel Soldiers going. Please consider disabling your ad blockers for the site. Thanks!

I've Disabled AdBlock
No Thanks