• Steel Soldiers now has a few new forums, read more about it at: New Munitions Forums!

  • Microsoft MSN, Live, Hotmail, Outlook email users may not be receiving emails. We are working to resolve this issue. Please add support@steelsoldiers.com to your trusted contacts.


M211 crew cab crusade

restlessrobie

New member
63
0
0
Location
Puget Sound
Send me a list of GM stuff you are looking for I may be able to either locate it in my scrap pile or worst case get you one **** of a discount :)

I have been a GM Tech for 15 0r so years so I do have a rather large pile of stuff I know someone would find useful
 

snowyrivers

Member
138
1
18
Location
Newberg Oregon
Getting some real good data sorted out.

Going to look seriously at mounting the 205 case into the frame solid like the 6x case is and using a QF50 Timken elastomer coupling between the two.

Coupling will handle 2000 ft lbs of torque and handle up to 2 degrees of misalignment (xy)

Nice easy way to shorten up the linear stack of the gear boxes.

Then a really short drive line between the TH400 and the 205 will gitterdone.

I am thinking about taking time tomorrow and heading over to the industrial supply house and looking at the coupling (Touchy feely ya know)

Will add more as it comes about.
 

snowyrivers

Member
138
1
18
Location
Newberg Oregon
Thumper came over today and we dragged an old Diesel Burb outta the blackberries to scavenge the engine saddle out of the frame.

This will give us the easiest shot at a simple engine mounting scenario.

The old Burb had been sitting in a bramble pile for quite a few years and getting it out took some serious reefing.

The recent rains made the ground like grease the other day, but today was dry and some coaxing with the 4x4 Dually truck got the beast out of the brush.

Sitting up on some logs now awaiting a few snips with the torch to get the front mounting out.

Will just chop the frame off on either side of the engine saddle and then get it where we can "Surgically" remove what we need.


Did quite a bit of snooping the last few days and spent 30 minutes on the phone yesterday with a Timken engineer picking his brain on the Quick Flex coupling system which looks to be our easiest and shortest coupling method to connect the 205 to the 6x6 box.

All the data gleaned was very positive and helpful.

The QF50 coupling will easily replace the center u joint system currently in the rig ahead of the T case.

The QF50 with the black insert will stand 2000 ft lbs of torque.

(Inserts come in Red, white, blue and black)
Red being very soft and offering the least torque rating)

This system allows us a very very close mounting of the NP205 to the 6x6 box.

A short drive line with slip yoke will connect the TH400 to the NP205

Looking forward to getting the frame cleared of excess left over junk and cleaned of dirty yuck so we can start getting things mocked up for some real time visual on this puppy.


Pix

Engine mount saddle(2 angles)
Side shot of old Burb
Nasty place it had sat for a long time.
 

Attachments

Last edited:

hendersond

Well-known member
Steel Soldiers Supporter
1,171
29
48
Location
Galesville, WI
When you put that in the GMC6x6 watch the top dog bone from frame to top of the axle. You may have the urge to cut it out for clearance. Notice the shackles on the front and rear of the leaf springs and you will know why it is there.
Can't wait to see more...:popcorn:
 

snowyrivers

Member
138
1
18
Location
Newberg Oregon
Copy on the DOG BONE

I have been looking at that and been wondering about any real clearance issues with it and the engine/cross member.

V8 engines have been stuffed in these trucks before, so we will just have to take it as it comes.

Before we pulled the 6 cyl out of the frame some measurements were taken, most notably the distance from the top of the frame rail to the CL of the crank shaft.

The goal is to keep the engine center line where it was originally and to keep the drive line vibes to a minimum.

The compact V8 is way shallower from the center line of the crank to the bottom of the pan, so hopefully things will not get real hinky.

My one worry was that the dog bone would interfere with starter on the V8


We shall see.

Worst case scenario is we will need to relocate the dog bone or ?????

Yessss it must be there some way shape or form.

Thanks for the heads up though, as it is always nice to know that others have been down the path.
 
Last edited:

snowyrivers

Member
138
1
18
Location
Newberg Oregon
Actually the most probable course of action will not be to use that entire cross member but rather just the portion that has the actual engine mount on it, which bolts to the cross member.

Will get the parts hacked off the old Burb frame and then possibly build a suitable fixture to hold the "motor mount portion" and allow us to fabricate a new channel piece that can slide into the 211 frame and bolt in.

The original engine mount stand offs from the frame are going to need to be removed to make room for the new set up.

I guess I gave the impression that we were going to install that complete cross member, ahhhh, hence the worry about the collision with the dog bone.
 

snowyrivers

Member
138
1
18
Location
Newberg Oregon
Hey troops

Yesterday we were going to use the Snow Camo deuce to pull the Burb from the brush pile but no start.

No fuel pump sounds and not even a pop.

Was fine last time we ran it, maybe a couple months ago.

I am suspecting a blown fuse but did not have time to sort it out.

Any input on fuses or ??? for the main ignition switch power feed.

I have no idea whats been done to this rig from when it was made.

Ideas will be appreciated

Thanks
 

m1010plowboy

Well-known member
Steel Soldiers Supporter
3,809
2,374
83
Location
Edmonton, Canada
Fuel Pump

The fuel pump likes to take a holiday when it sits too long and I've had the one in the M207 out 4 times. We take the screens off, clean it and away it whirrrs again. The one in the M135 has been strong for years so more use gives better juice. We took an old one apart and there was some waxy goop sitting on the strainer, (E) which might be enough to keep the Armature assy' from starting.

P9210932.jpg

If you decide to do an aftermarket pump there's a little work to do in the tank to modify the pick-up tube. There's more work than just putting a pump in-line because of the existing pump. Hopefully it's just a remove, clean and replace process with the existing pump.

Really pulling for you on the engine modification and looking forward to more pics showing the process.
 

snowyrivers

Member
138
1
18
Location
Newberg Oregon
Update on the deuce

Got a lot of measuring done today and some hard data gathered

Bottom line
To get the engine, tranny and 205 box in and connected, the 6x Tcase is going to need to be relocated to the rear about 18 inches

Rear drive lines will get shortened and the front one lengthened

There was just no way to get all the gear boxes in and buckled up.

Best part is that the big T case is held in place by 12 bolts
An easy deal to slide it back and re drill the holes
 

snowyrivers

Member
138
1
18
Location
Newberg Oregon
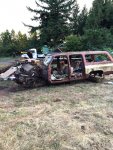
Spent about an hour at one of the large drive line shops up in PDX yesterday afternoon.

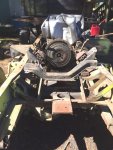
I took my sketches and data on what gearboxes we are using and what has to connect to what.

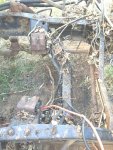
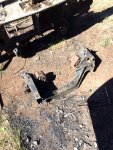
Took the Shorty center driveline and the output shaft from the TH400 along with me for good measure.

The fella behind the counter was very nice and listened intently as I explained the convoluted story of what we were doing.

He smiled and headed out into the warehouse and in a couple moments was back with a box of parts.

He had nearly everything needed to couple the TH400 to the 205 and the 205 to the 6x6 box.

Sweeeeeeeeeeeet.

All standard off the shelf goodies that can be easily replaced should the need arise.

The counterman printed out the Quote and we were off to the rodeo.
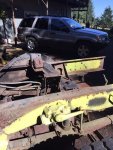
Some parts will no doubt have to be purchased new.

We will be doing some fabricating on the shaft between the 400 and the 205 but this is all in a days work.

Some of the component are readily available used and now that we know what is available its just a matter of scrounging.

The cost factor is of the utmost importance in this project.

The entire pile of parts came to about $900 and in and of itself is not a bad deal this amount of $$$$ would slow things to a standstill quickly.

Already scared up some stuff for pennies (Compared to new)

Would be great to just flash the card and go away with all new stuff, but we are gonna have to crawl in the mud and scrounge some to keep the project moving.

Used parts are fine as long as they are in good shape.

Dirt, rust and gunge are easily removed.

Makes one appreciate the journey more :-D
 
Last edited:

snowyrivers

Member
138
1
18
Location
Newberg Oregon
Made some great scores yesterday.

Scared up a nice drive shaft with 1350 yokes on it that can be easily removed in the lathe.
A tad dirty/rusty but as I mentioned that stuff comes off easily.

The 1410 shorty shaft needed to buckle the 205 to to the 6x6 case was priced at $600 (Ouch)
Found one new in the box on ebay for $115 (Shipped)

Still need a few items but so far things are looking great.

The weather thats been very fall like with rain and cool wind has returned to a more late summer type.

This will give a few days of good working time.
 

snowyrivers

Member
138
1
18
Location
Newberg Oregon
Got after the Old Burb yesterday afternoon and chopped out the engine mount cross member along with some frame to allow us to dissect it down to just what was needed.

Things look very promising at this point.

I have seen a few other V8 installs in the Old Deuces with various brackets fabricated, but the goal here is to use as much off the shelf tech as is possible.

Another goal was to have the original lower HD 4x4 bell housing cover on the TH400 that accepts the stiffened rods from the front engine mount to the bell housing cover (Keeps the tranny bell housing from cracking under hard use)

After pruning off the frame chunks the cross member and factory mounts look great and are "nearly" a drop in item (Well sort of)

We need to hang the cross member on the engine now and get some good dimensions on the location of the member in relation to the Crank shaft center (damper bolt center) and the location from the fans farthest point forward that will work back to the front of the cross member.

The cross member will need a tid bit of trimming to slide between the frame rails and then a new bracket on each end to allow the entire assembly to bolt into existing holes in the frame.

At present it looks as though the bolts used to retain the dampers (Shocks) to the frame can also double to retain the engine mount assembly to the frame.

Avoiding any excess drilling of the frame in this high stress area is at the top of the list.

The original frame stand off's that the 6 cyl mounted to are going to need to go away. completely.

Removing the rivets will take some finesse to avoid any damage to the frame rails.

The original arms that moved the radiator housing when the frame was tweaked heavily is a great item to keep and will likely get modified slightly to work with the new mounts.

Definitely want to be sure that the "Propeller" does not get into the shroud.

Here are some picx

#1 is in front of the old Burb shortly after the "exorcism"
The others are self explanatory.

Reaching a point where we need to finish chopping off all the old plumbing, wiring and other left overs from the frame and give it a good "Blow and go" with the Hot washer to clear off the YUCKIES.

That can be done on a nasty rainy day when trying to doodle on paper and do other tasks that rain tends to dampen a lot of things including the Esprit De Corps
 

Attachments

Last edited:

ThumperTDC

New member
44
0
0
Location
Forest Grove, Oregon
So this project may have become a little more interesting with finding this video today.

https://youtu.be/Mh8heCai6kA

I wish I would have seen this a couple of months ago, when there was a local guy on Craigslist selling a M211 rolling chassis for really cheap. 6x6 with 6 wheel steering is sure sounding like a sweet combo to me.
 

snowyrivers

Member
138
1
18
Location
Newberg Oregon
Ahhhh yesss

When I heard about this twist last night I just went nuts.

This will be so waaaaaaaaaay cooooooooooooooooooooool

I did some measuring on the rear tire area and with us using the super single tires all around it looks like there will be enough room to swing the tires without any interference.

The next challenge is doing the axle mods and getting the steering knuckles off of a standard M211 and grafted onto the rear axles.

To maintain the rear axle pumpkin offsets and other serious issues it is likely best to use the stock rear axle sets to build from.

The one challenge I am not totally sure of is producing the inner axle shafts for the conversion.

I am thinking that we can use the existing rear shafts and chop off the outer flange and then spline the outer end and add an appropriate yoke retained by a snap ring.

If this will work we should be able to do the work in house with our Lath and mill.

The stock shaft inner splines are a very course square cut type and we should be able to duplicate this in the mill using a dividing head and simply cut and index them.

The next move is going to be to rip "Fort Dallas" apart and get a front corner apart and see whats in there.

It is going to depend on the size/type of u joint and if we can find a compatible splined yoke that we can modify to fit on the end of the axle.

Getting custom shafts made off site will be very costly.

So far the old beast has proven to use readily available parts in most places.

This will test our mettle for sure
 

snowyrivers

Member
138
1
18
Location
Newberg Oregon
More ripping things off and clearing the way for the great things to come

Finally got the old 4 speed hydro and low range box out of the chassis.

Then slowly pruned out the old master cylinder, air lines, brake lines, and anything else that will no longer be needed.

Goal is a bare frame with little more than the axles/springs and the T case.

Getting closer now.

Nearly everything that has small bolts fastening it to the chassis is a real PITA to get off due to corrosion.

The larger bolts are pretty good still.

FILTHY IS THE NAME AND SKUNK PIZZ IS THE GAME.
 

Attachments

snowyrivers

Member
138
1
18
Location
Newberg Oregon
Hey troops.

Looking over the T case on the 6x6

It has 2 controls connected, one was originally activated by the trans shift lever when selecting reverse and the other was controlled by the long lever that was accessible by the drivers seat.

The control activated by the trans lever ???? I am not sure what this does.
The lever control in the cab seems to only select neutral or engaged.

How exactly does this massive box work ???

Is there a rear wheels only position as well as all wheel drive and neutral.

All I seem to find by moving the large lever is engaged and neutral.

Would someone with an M211 explain the proper function of the T case controls.

Thanks
 

m1010plowboy

Well-known member
Steel Soldiers Supporter
3,809
2,374
83
Location
Edmonton, Canada
G749 Transfer Operation

I think the book explains it better than I can. The sprag in the transfer kicks in the front axle when it 'feels' the rear wheels spin so that might be a drawback when using the G749 transfer.

I'm really digging the MAX transmission hoist. That's one fine looking yard mate. Keep the pics coming.

P9271048.jpgP9271047.jpgP9271046.jpgP9271050.jpg
 

snowyrivers

Member
138
1
18
Location
Newberg Oregon
Thanks for the info.

The little max is sure handy.

The Tranny/reduction box was just about all Li'll Red wanted to lift.

The RED is a 22 horse Hydrostatic drive 4x4 and really works great.

For the bigger lifts we use the Scat Trak skidsteer.

It will handily lift a fully dressed 6.5 diesel or other automotive type engine.


Tools are handy.

That 4 speed hydo is not one you are gonna belly in and bench press up in there.
 
Top
AdBlock Detected

We get it, advertisements are annoying!

Sure, ad-blocking software does a great job at blocking ads, but it also blocks useful features of our website like our supporting vendors. Their ads help keep Steel Soldiers going. Please consider disabling your ad blockers for the site. Thanks!

I've Disabled AdBlock
No Thanks