• Steel Soldiers now has a few new forums, read more about it at: New Munitions Forums!

  • Microsoft MSN, Live, Hotmail, Outlook email users may not be receiving emails. We are working to resolve this issue. Please add support@steelsoldiers.com to your trusted contacts.


M4A3 Sherman Restoration

Another Ahab

Well-known member
17,825
4,157
113
Location
Alexandria, VA
I'm going to find a way to see your M4 when it's complete even though your on the other side if the world.
You bet, Carlo, you GOT to come over to the USA someday: life's not complete until you've been in a 7-11 Store at 2:00 AM in the morning, somewhere over here.

And once inside the store (wherever it is), order yourself a spicy 1/4 pounder hot dog, and then load it up with everything; chili and cheese and the works, and then chow down. Right there in the store. You won't regret it (not immediately anyway).

(Your English is a WHOLE lot better than my Italian, but I hope this translates OK).
 
Last edited:

lilreddodge

New member
37
1
0
Location
Ashland, Ohio
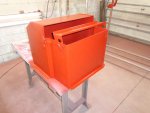
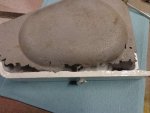
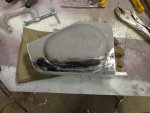
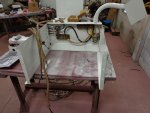
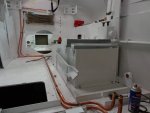
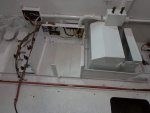
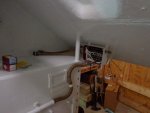
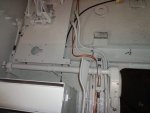
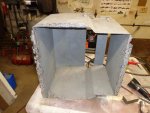
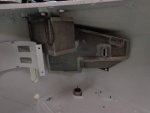
Here are a couple pictures of the restoration. I'm kinda held up waiting on other people to finish some parts for me so I can proceed onward. The first 2 pictures are of a storage box that holds .30 cal ammo behind the driver. The next 2 are of a cover for the clutch booster that I had to repair. The rest show some of the main hull wiring installed in the tank along with the battery box. The copper tubes are for the transmission oil cooler. More to follow as I get parts installed.


DSC01220.jpgDSC01233.jpgDSC01202.jpgDSC01203.jpgDSC01294.jpgDSC01301.jpgDSC01303.jpgDSC01304.jpg
 

Hummermark

Active member
211
31
28
Location
London uk
Hi,

Nice to see you have used copper pipe to replace the steel transmission oil cooler pipes and didn't go for the easy option of rubber hose. Have you reused the original gland nuts and the compression fitting olive - are they a standard part or did you have them made? Was the original steel pipes too far rotted or were they missing?

Looking good so far. How's the radiator? I had to record my GAA rad, which cost me $2500... Quite a rare model in Europe the GAA Sherman.

Regards,

Mark
 

lilreddodge

New member
37
1
0
Location
Ashland, Ohio
I noticed a picture a few pages back of restored parts sitting next to a pallet of Black Beauty. I bet you use a lot of that!
Yeah, I have lost track of how much I used so far. It took 3000 pounds to do the hull and I probably have used as much as that on the individual parts so far.
 

lilreddodge

New member
37
1
0
Location
Ashland, Ohio
Hi,

Nice to see you have used copper pipe to replace the steel transmission oil cooler pipes and didn't go for the easy option of rubber hose. Have you reused the original gland nuts and the compression fitting olive - are they a standard part or did you have them made? Was the original steel pipes too far rotted or were they missing?

Looking good so far. How's the radiator? I had to record my GAA rad, which cost me $2500... Quite a rare model in Europe the GAA Sherman.

Regards,

Mark
I made the lines like my originals, but I think that they were modified during one of its government rebuilds. The lines had ferrules on the ends and and had rubber hoses from the lines to the cooler and transmission. My lines looked questionable so that is why I made new ones. Unfortunately my oil cooler was bad and could not find one or anyone to re-core it. I had one made out of aluminium, I do not like it but that is the only option I could find.

As far as my radiator is concerned I have a NOS one. I will have it pressure tested before I install it and I hope that it is still good. You being able to get one re-cored for $2500 is cheap compared to some of the prices I have had to pay over here. I had $1100 in re-coring a M114 radiator which is a lot smaller than the sherman radiator not to mention that I paid $800 for the radiator to start with.

I have finally been able to start putting some parts on this week and should have some more pictures to share shortly.

Lance
 

Another Ahab

Well-known member
17,825
4,157
113
Location
Alexandria, VA
As far as my radiator is concerned I have a NOS one. I will have it pressure tested before I install it and I hope that it is still good. You being able to get one re-cored for $2500 is cheap compared to some of the prices I have had to pay over here. I had $1100 in re-coring a M114 radiator which is a lot smaller than the sherman radiator not to mention that I paid $800 for the radiator to start with.

I have finally been able to start putting some parts on this week and should have some more pictures to share shortly.

Lance
Give us More-Drool.jpg

You know. Pllease?
 
Last edited:

lilreddodge

New member
37
1
0
Location
Ashland, Ohio
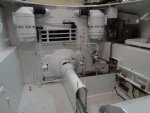
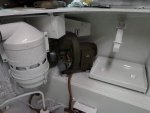
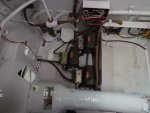
It was finally warm enough around here to be able to put some of the parts I have been working on for the last couple of months into the hull. The first picture is the gas tank for the little joe auxiliary generator. The next picture is of the little joe that I cleaned upped and painted. Attached to it is a new old stock voltage regulator. The next pictures show the air cleaners, oil cooler, little joe, voltage regulators, and part of the drive shaft tunnel installed. I'm working from the fire wall towards the front of the tank. More to follow in a few days.


DSC01326.jpgDSC01327.jpgDSC01371.jpgDSC01369.jpgDSC01370.jpg
 

lilreddodge

New member
37
1
0
Location
Ashland, Ohio
Is that your design or the original design of the little joe fuel tank? Brazed?

That is an amazing little construct of complexity:

View attachment 482121
It is copied off of an original one. I had a sheet metal shop build it so I could concentrate on other things. I should have built it myself, not only did it take them over 2 months to build it was very expensive. Plus I have no intentions to ever put fuel in it, but wanted it to be functional if needed to be. The tank is all
welded.
 

lilreddodge

New member
37
1
0
Location
Ashland, Ohio
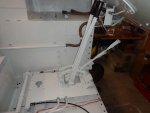
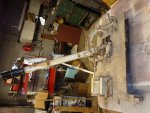
Today I got the driving controls installed. The first picture is of the original rusted mounting platform. I had a new platform cut out to replace the original. The last photo shows the clutch cross shaft and the clutch booster is on the right. I'm not confident that I have the linkage adjusted correctly since it was adjusted different than the manual shows when I took it apart. Because of this I have decided to put the engine in instead of the final drive assembly next so I can verify it is right or wrong. With the final drive installed it is very difficult to get to the linkage.

Unfortunately I have not worked on any of the parts that go in the engine comportment yet, so it is going to be a while before I will have any updates.


DSC01222.jpgDSC01375.jpgDSC01376.jpg
 

Another Ahab

Well-known member
17,825
4,157
113
Location
Alexandria, VA
Guessing the controls left-to-right across the mounting platform:

- Clutch/ left track/ right track/ brake?

And curious to know the function of the "paddle" (below) behind the track levers. If you don't mind, a clarification of all that would be terrific, please?


Sherman.jpg
 
Last edited:
Top
AdBlock Detected

We get it, advertisements are annoying!

Sure, ad-blocking software does a great job at blocking ads, but it also blocks useful features of our website like our supporting vendors. Their ads help keep Steel Soldiers going. Please consider disabling your ad blockers for the site. Thanks!

I've Disabled AdBlock
No Thanks