goldneagle
Well-known member
- 4,434
- 868
- 113
- Location
- Slidell, LA
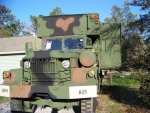
Well its day 1 after a successful recovery trip. See MV Road Trip thread for details of the recovery trip.
I got out to the truck late morning. I was waiting for the temperature to go up. Ended up being a perfect day for working on the truck!
First thing I wanted to test was the batteries. They had a chance to charge during the 5 hour plus trip home. I had a feeling there were bad batteries in the group! I tried to start the truck but it barely turned over!
Decided to take all the batteries out and take them to NAPA to be tested. Called my friend Billy and he volunteered to help me take the batteries to the NAPA store. Wife needed the car and the other truck was stuck behind the 5 ton.
Billy arrived about 30 minutes later. He was very impressed with the truck! He backed up his pickup close to the batteries and we loaded them up in back of his truck.
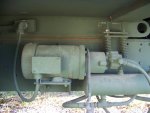
After a short trip we were at the NAPA store. Mark the Manager brought out the hand held tester and tested the batteries. 3 out of the 4 were BAD. I turned in 2 batteries as cores for the 2 I purchased the day before the recovery trip. The third was turned in to cover the core charge for the new battery I decided to buy. I now had 3 new NAPA Commercial batteries and one original Military battery to install in the truck. I also purchased a 4" 45 degree elbow, 4" flapper and exhaust clamp to repair the rusty exhaust stack.
We drove back to the house and backed in close to the truck. We unloaded the 2 batteries and parts. I then went and brought the other 2 batteries that I stored in back of the Isuzu truck to the M820A2.
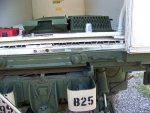
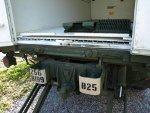
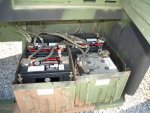
After deciding how we would place the batteries in the battery boxes we dumped the rusty debris from the two battery boxes and putt hem back on the step. I installed 2 of the new NAPA batteries in the left battery box. I installed the other new NAPA battery in the back of the right side box. The used MV battery went in front on the right battery box. After reinstalling the short bridge cables we started to install the positive cables to the two positive terminal. We then hooked up the negative cables to the 2 negative terminals left.
Once we got the battery cables hooked up we had to come up with a way to secure the batteries in the boxes. Since the NAPA batteries were slightly wider we could not use the metal brackets that had supported the MV batteries. I came up with a simple idea- styrofoam blocks!
I had over 200 styrofoam blocks measuring 16" x 12" that I had brought back with me from NJ on my visit in September. I had been using them to park equipment I was selling on Ebay. i have a hot wire cutter that i built that I used to cut the blocks into any sizes that I need.
Billy and I measured all the gaps left in the battery boxes. We used the hot wire cutter to cut custom size styrofoam pieces to fill in all the gaps between the batteries and batteries and box walls. Once the styrofoam pieces were in place all the batteries were well secured in the boxes.
Since the NAPA batteries were a bit taller than the MV ones we removed their terminals we very close to the top of the battery boxes. I was worried about putting the metal step over them in case it would short them out. We looked through the shop looking for some kind of rubber or plastic sheeting that we could cover over the batteries to keep them from shorting out on the metal step.
I found a roll of roofing ice shield and some heavy duty Dryvitt mesh screen. The ice shield is like thick rubber that has a sticky side that would go on the roof side during installation. The Dryvitt mesh is made of very hard nylon screen. I cut the screen first to the dimensions of the battery boxes. I used it as a template to cut the rubber roofing material. I pealed off the thin plastic protective film from the rubber roofing material and applied the rubber to the Dryvitt mesh. I installed the new insulation blanket over the batteries with the Dryvitt mesh up. I wanted the mesh to protect the rubber from the metal of the step.
Once the insulation blanket was in place i installed the step over the battery box without any problems! With the batteries secured I tried to start the truck. It started without any problems!
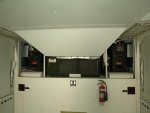
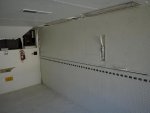
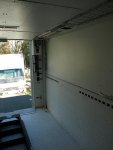
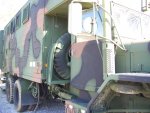
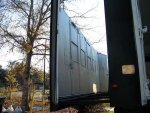
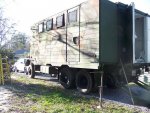
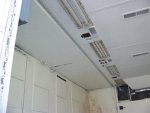
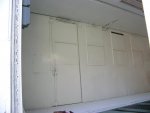
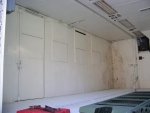
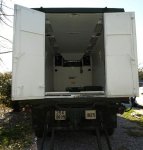
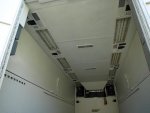
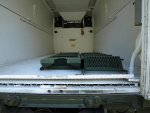
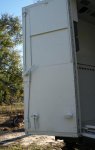
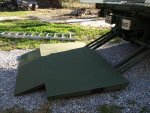
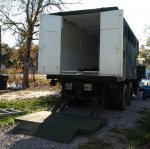
The next item on my list for the day was to try to operate the liftgate. I held the clutch down and engaged the PTO for the liftgate. We got the lever out of the cab and went to fiddle with the liftgate controls. After a little trial and error we figured out how to lower the liftgate down. We proceeded to open the back doors and see what was in the back of the 17' box. All we found were the 2 missing stairs/ladders for getting through the side doors. The rest of the box was painted white but looked to be unused since the painting,
I went and got my camera out and took pictures to post on this site. After I took the pictures we put all the tools back and I went inside the house for Dinner and rest.
I got out to the truck late morning. I was waiting for the temperature to go up. Ended up being a perfect day for working on the truck!
First thing I wanted to test was the batteries. They had a chance to charge during the 5 hour plus trip home. I had a feeling there were bad batteries in the group! I tried to start the truck but it barely turned over!
Decided to take all the batteries out and take them to NAPA to be tested. Called my friend Billy and he volunteered to help me take the batteries to the NAPA store. Wife needed the car and the other truck was stuck behind the 5 ton.
Billy arrived about 30 minutes later. He was very impressed with the truck! He backed up his pickup close to the batteries and we loaded them up in back of his truck.
After a short trip we were at the NAPA store. Mark the Manager brought out the hand held tester and tested the batteries. 3 out of the 4 were BAD. I turned in 2 batteries as cores for the 2 I purchased the day before the recovery trip. The third was turned in to cover the core charge for the new battery I decided to buy. I now had 3 new NAPA Commercial batteries and one original Military battery to install in the truck. I also purchased a 4" 45 degree elbow, 4" flapper and exhaust clamp to repair the rusty exhaust stack.
We drove back to the house and backed in close to the truck. We unloaded the 2 batteries and parts. I then went and brought the other 2 batteries that I stored in back of the Isuzu truck to the M820A2.
After deciding how we would place the batteries in the battery boxes we dumped the rusty debris from the two battery boxes and putt hem back on the step. I installed 2 of the new NAPA batteries in the left battery box. I installed the other new NAPA battery in the back of the right side box. The used MV battery went in front on the right battery box. After reinstalling the short bridge cables we started to install the positive cables to the two positive terminal. We then hooked up the negative cables to the 2 negative terminals left.
Once we got the battery cables hooked up we had to come up with a way to secure the batteries in the boxes. Since the NAPA batteries were slightly wider we could not use the metal brackets that had supported the MV batteries. I came up with a simple idea- styrofoam blocks!
I had over 200 styrofoam blocks measuring 16" x 12" that I had brought back with me from NJ on my visit in September. I had been using them to park equipment I was selling on Ebay. i have a hot wire cutter that i built that I used to cut the blocks into any sizes that I need.
Billy and I measured all the gaps left in the battery boxes. We used the hot wire cutter to cut custom size styrofoam pieces to fill in all the gaps between the batteries and batteries and box walls. Once the styrofoam pieces were in place all the batteries were well secured in the boxes.
Since the NAPA batteries were a bit taller than the MV ones we removed their terminals we very close to the top of the battery boxes. I was worried about putting the metal step over them in case it would short them out. We looked through the shop looking for some kind of rubber or plastic sheeting that we could cover over the batteries to keep them from shorting out on the metal step.
I found a roll of roofing ice shield and some heavy duty Dryvitt mesh screen. The ice shield is like thick rubber that has a sticky side that would go on the roof side during installation. The Dryvitt mesh is made of very hard nylon screen. I cut the screen first to the dimensions of the battery boxes. I used it as a template to cut the rubber roofing material. I pealed off the thin plastic protective film from the rubber roofing material and applied the rubber to the Dryvitt mesh. I installed the new insulation blanket over the batteries with the Dryvitt mesh up. I wanted the mesh to protect the rubber from the metal of the step.
Once the insulation blanket was in place i installed the step over the battery box without any problems! With the batteries secured I tried to start the truck. It started without any problems!
The next item on my list for the day was to try to operate the liftgate. I held the clutch down and engaged the PTO for the liftgate. We got the lever out of the cab and went to fiddle with the liftgate controls. After a little trial and error we figured out how to lower the liftgate down. We proceeded to open the back doors and see what was in the back of the 17' box. All we found were the 2 missing stairs/ladders for getting through the side doors. The rest of the box was painted white but looked to be unused since the painting,
I went and got my camera out and took pictures to post on this site. After I took the pictures we put all the tools back and I went inside the house for Dinner and rest.
Attachments
-
 66.4 KB Views: 886
 -
 45.6 KB Views: 885
 -
 62.8 KB Views: 881
 -
 89 KB Views: 859
 -
 53.1 KB Views: 823
 -
 101.4 KB Views: 857
 -
 80.8 KB Views: 881
 -
 49.2 KB Views: 870
 -
 53.8 KB Views: 842
 -
 83.5 KB Views: 950
") Keep up the good work.
Keep up the good work.