• Steel Soldiers now has a few new forums, read more about it at: New Munitions Forums!

  • Microsoft MSN, Live, Hotmail, Outlook email users may not be receiving emails. We are working to resolve this issue. Please add support@steelsoldiers.com to your trusted contacts.


MEP-531A not working due to electrical issues

reo12

New member
18
18
3
Location
Near Battle Creek, Michigan
Hi, I just bought a 531a with 1380 hours on it. It wasn't running well due to poor maintenance - such as .064 intake valve clearance and condensation in the fuel.

The output contactor switch will only remain in the ON position if the engine is not running. The moment the engine starts - it trips to off. There is never any voltage or frequency displayed. If I remove and install the instrument fuse with the engine running there is a momentary slight response from the hertz meter. The output of the flywheel generator is 47v on an AC scale. I have noticed that the stator to housing rivets show there is some movement. They should be peened or replaced. Any ideas of where to look for problems?
 

reo12

New member
18
18
3
Location
Near Battle Creek, Michigan
I performed a continuity test of cr-2 diode feeding the circuit breaker and is is functioning. It has 596 ohms resistance in the forward direction. I don't know if this is within spec though.
 
Last edited:

Dieselmeister

Active member
Steel Soldiers Supporter
167
233
43
Location
Flagstaff, Az
The Volt & Hertz meter on the 531A is upstream of the breaker, so they will read if your generator is making power, even with the breaker off. The diode you mentioned acts as a surge suppressor across the shunt trip coil in the breaker.

The breaker shunt trip coil is controlled by the A2 engine controller, which trips the breaker on overload, and also stops the engine on low lube oil pressure. This module is powered by the flywheel alternator, hence the breaker tripping only when the engine runs. The breaker shunt trip is triggered by the A2 module if the output voltage drops too low, as in the case of a severe overload. Since there is no power being made by the generator, the A2 module "thinks" that there is a severe overload and trips the breaker. The trip you are seeing is normal if there is no power coming from the main generator.

There should be no movement of the stator rivets. I would recommend dropping the control box down, and opening the cover of the generator to see if there has been any contact or damage between the rotor and stator. The stator to housing is a tight fit. If there is any movement that could allow rotor/stator contact, that would cause severe damage. Any movement of the stator in the housing needs to be repaired/stopped.

Your main troubleshooting at this time should concentrate on why the generator is not producing power. Either a A1 module, wiring, or generator issue.

The back of the manual has the schematic to help troubleshoot.
 

reo12

New member
18
18
3
Location
Near Battle Creek, Michigan
Well, I got it working. I figured out which terminals on the terminal strip were for the field and I flashed it after first disconnecting the voltage regulator for safety. Then started the unit. It still didn't have output but this time rotating the instrument fuse resulted in the voltmeter and frequency meters responding briefly. Repeated attempts to get the fuse to make good contact failed. i also tried switching the fuses and caps to no result. I switched the fuse holders and it worked great. I load banked it with a 3/4 hp furnace blower for 15 minutes. I then disassembled it to access the stator so I could work on the loose stator rivets. I found the top one hidden under the fuel tank to have actually worn through the sheetmetal housing. I also found one brush had it's lead broken off from it and another brush was broken. So - I'm in the market for some brushes. FYI - the field terminals were #6 and 7 from the right most used terminal. 7 is positive and 6 is negative.
 

reo12

New member
18
18
3
Location
Near Battle Creek, Michigan
The Volt & Hertz meter on the 531A is upstream of the breaker, so they will read if your generator is making power, even with the breaker off. The diode you mentioned acts as a surge suppressor across the shunt trip coil in the breaker.

The breaker shunt trip coil is controlled by the A2 engine controller, which trips the breaker on overload, and also stops the engine on low lube oil pressure. This module is powered by the flywheel alternator, hence the breaker tripping only when the engine runs. The breaker shunt trip is triggered by the A2 module if the output voltage drops too low, as in the case of a severe overload. Since there is no power being made by the generator, the A2 module "thinks" that there is a severe overload and trips the breaker. The trip you are seeing is normal if there is no power coming from the main generator.

There should be no movement of the stator rivets. I would recommend dropping the control box down, and opening the cover of the generator to see if there has been any contact or damage between the rotor and stator. The stator to housing is a tight fit. If there is any movement that could allow rotor/stator contact, that would cause severe damage. Any movement of the stator in the housing needs to be repaired/stopped.

Your main troubleshooting at this time should concentrate on why the generator is not producing power. Either a A1 module, wiring, or generator issue.

The back of the manual has the schematic to help troubleshoot.
Hi, Thank you for the detailed reply. Thankfully I was able to get it working after flashing the field and then getting enough output to get the bad fuse holder to become evident. Swapping the spare with the bad one got it working great.
I pulled it apart because I was very concerned about the stator moving in the housing and possibly contacting the rotor leading to major damage. The rotor is shiny clean. Got nervous that it was so clean. I cleaned the stator and do not find any signs of the rotor contacting the stator laminations. So - hopefully I can take care of the looseness. I need to find replacement brushes. Holders would be nice but definitely need at least 2 brushes.
 

Dieselmeister

Active member
Steel Soldiers Supporter
167
233
43
Location
Flagstaff, Az
Glad you got it working. Someone, within the last two weeks posted a vendor for the brushes. There is also a thread with p/n for the brush parts. If I find it I will post the info here. Looks like you got a good unit.
 

reo12

New member
18
18
3
Location
Near Battle Creek, Michigan
Glad you got it working. Someone, within the last two weeks posted a vendor for the brushes. There is also a thread with p/n for the brush parts. If I find it I will post the info here. Looks like you got a good unit.
Ohio Carbon came back with a quote. Sheesh. $14.08 each plus $19.07 for shipping. $75.39 for 4 brushes. I've never paid that much for brushes before except for a welder and those were large enough to make a number of these size from.
Does anyone else want some? I could get them shipped with mine and send them out by mail for a lot less than $19.
 

robson1015

Active member
515
132
43
Location
New Concord, Ohio
You will find that parts venders will want to rape you on government generator parts....I guess they are so used to the government paying rediculous prices for parts...
 
Last edited by a moderator:

reo12

New member
18
18
3
Location
Near Battle Creek, Michigan
You will find that parts venders will want to ass rape you on government generator parts....I guess they are so used to the government paying rediculous prices for parts...
I found a company who sells a brush that should be similar but longer than stock. I've got a couple coming for about $35. including $7.50 for shipping. I'll post how they work out.
 

Dieselmeister

Active member
Steel Soldiers Supporter
167
233
43
Location
Flagstaff, Az
You will find that parts venders will want to rape you on government generator parts....I guess they are so used to the government paying rediculous prices for parts...
That's an understatement. I just (4 May) received a quote from Aerobase for 4 (Four) spare brushes. $159.99 ea. 4 for $639.96. Over $600 for four pieces of glorified pencil lead!
 
Last edited by a moderator:

reo12

New member
18
18
3
Location
Near Battle Creek, Michigan
That's an understatement. I just (4 May) received a quote from Aerobase for 4 (Four) spare brushes. $159.99 ea. 4 for $639.96. Over $600 for four pieces of glorified pencil lead!
Well.....I know what you mean by glorified pencil lead. I was tempted to put an arc carbon in a tool block and mill it square to make some brushes. Back in my youth I tore carbon/zinc batteries apart for the carbon rod for experiments. Do understand that there are a multitude of grades of carbon brush material. They range from soft to hard and may contain various amounts of copper. The copper reduces resistance and also helps reduce glazing of the commutator. Too much copper wears the commutator quickly. That is the simplified version of what i recall. I came across one site that lists a good range of carbon grades. http://www.elektrokarbon.sk/en/carbon-brushes/

I purchased some brushes from www.carbonbrush.com Not much info available on the actual grade of carbon the brushes are made from - just the series that is used. I called and talked to a pleasant gal who helped as much as she could. She just didn't have more info than is available in the catalog. They mailed them quickly for $7.50 wrapped in bubble wrap and in a manila envelope. You can buy off their web site or call them. I'll get photos of what they sent and post them in comparison to the original ones.
 

reo12

New member
18
18
3
Location
Near Battle Creek, Michigan
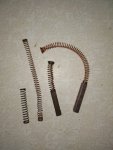
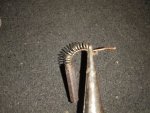
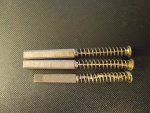
Well The brushes I ordered can be reworked to fit in place of the original brushes. I got obtained them from Arrowhead Electric at www.carbonbrush.com I used their part number 159A803P06 which cost $13.80. The brush is slightly longer than the original. The brush is supposed to be .875 inches +/- 0.050 inches. The replacement came as 1.068 inch long. The lead and spring are too long also. The spring cap is the same diameter (.245 inch) I unsoldered the caps from the old and new springs. Cut the lead from the new spring to about 1/16" longer than the original brush lead. Installed the original spring and used a needle nose plier to hold the lead as I compressed the spring. This allowed a free end of the lead to be available to install the cap. The last 1/16" of lead was folded to strengthen the solder bond then soldered the cap to the lead. The brush can be filed or sanded shorter to make it the specified length.


Mail at
Arrowhead Electric Company
13950 Rosecrans Ave Suite A
Santa Fe Springs CA 90670

by toll free
800-500-7311

by local call
562-921-8521

by fax
562-407-5182

by email about your online order
aec@gte.net

by email about anything else
sales@carbonbrush.com
 

Attachments

Last edited:

reo12

New member
18
18
3
Location
Near Battle Creek, Michigan
Thank you for sharing that info. Definitely beats $650 for four from the Gov. supplier. I just ordered some off their site as well. Here is the page that shows the brush (last one on the page).

http://www.carbonbrush.com/springloaded3.htm
I had contacted Dewey and did not hear back. So - I ordered from Arrowhead Electric. Well, Dewey had forwarded my request for price quote on replacement brushes to Argo Turboserve. An Argo representative sent me an email last Thursday asking how many brushes I needed. I replied that I wanted 2 yesterday. I was afraid to say 4.

They sent me an email today. They quoted 2 each of Dewey part # 31670, brush, is 1-2 week delivery.
Price each $60.00
FOB: Factory (+ UPS charges)

Sommer Romig Sromig@argoturbo.com 757-460-4475

They have decent communication but Yeesh. $240 plus shipping........ Nope. Not I am not going to play the part of a sucker. Guess it does beat whomever you had contacted. Maybe it will help someone absolutely needing parts to contact Argo Turboserve to get a quote.
 
Last edited:

reo12

New member
18
18
3
Location
Near Battle Creek, Michigan
Well, I mucked up. The stator housing was slightly loose on the stator - as evidenced by the 4 stainless steel rivets showing some movement - one having worn or broken through the sheet metal housing. I changed the wire on one of the MIG welders to some 308 stainless and welded the rivets to the housing. Got the finished unit outside and saw cracks around the welds. Come to find out - the outer housing is aluminum. The stator has 4 flats on it's outer circumference. These create gaps between the stator and housing. I've plugged one side of the openings with 5 minute epoxy. I'm going to pour liquid epoxy into the openings and hope it pots the stator to the housing.
6 month update. I cleaned the stator housing using brake cleaner to remove the oil and dirt from between the stator laminations and the aluminum outer shell. I warmed it and allowed it to dry over night. I then mixed 5 minute epoxy to seal one side of the stator to the shell. I then turned it over and mixed slow cure epoxy with a small amount of acetone to thin it slightly and filled the space between the stator laminations and the aluminum shell. I used slow cure so that it would have time to flow into the space and allow air to escape and for some of the acetone to evaporate. This worked as intended as I had to mix additional epoxy to keep filling the space as air bubbles escaped.
I warmed the aluminum shell to aid in allowing the acetone to evaporate. I painted the previous weld attempts to remove the discoloration and provide a means of seeing any movement.
Now - 6 months and easily 40 hours of run time later there does not appear to be any movement at the stator rivets.
 

WWRD99

Well-known member
Steel Soldiers Supporter
898
1,375
93
Location
York Pa
6 month update. I cleaned the stator housing using brake cleaner to remove the oil and dirt from between the stator laminations and the aluminum outer shell. I warmed it and allowed it to dry over night. I then mixed 5 minute epoxy to seal one side of the stator to the shell. I then turned it over and mixed slow cure epoxy with a small amount of acetone to thin it slightly and filled the space between the stator laminations and the aluminum shell. I used slow cure so that it would have time to flow into the space and allow air to escape and for some of the acetone to evaporate. This worked as intended as I had to mix additional epoxy to keep filling the space as air bubbles escaped.
I warmed the aluminum shell to aid in allowing the acetone to evaporate. I painted the previous weld attempts to remove the discoloration and provide a means of seeing any movement.
Now - 6 months and easily 40 hours of run time later there does not appear to be any movement at the stator rivets.
Glad this is working for you!! I have the same problem with no voltage and have tried to flash but I think I was doing pins 8 and 9?? I haven't looked at the tm in a while....Is there any chance you can take a pic of the actual pins you put power to? The tm said to use a 9 volt battery...is that what you used? I've had this machine since February and it just sits now...it runs great! hour meter works but no output! has 72 hours on it.
Thanks a ton!
Rich
 

reo12

New member
18
18
3
Location
Near Battle Creek, Michigan
Glad this is working for you!! I have the same problem with no voltage and have tried to flash but I think I was doing pins 8 and 9?? I haven't looked at the tm in a while....Is there any chance you can take a pic of the actual pins you put power to? The tm said to use a 9 volt battery...is that what you used? I've had this machine since February and it just sits now...it runs great! hour meter works but no output! has 72 hours on it.
Thanks a ton!
Rich
Honestly - I can't remember that far back. The TM is posted on this site. It is what I used. I don't have a 9 volt battery so just used a weak car battery and length of 18 ga wire to limit the power to the field. It only takes a couple seconds of power application to flash the field so it's not like you're likely to damage them. The external fuse holder below the instruments was bad on mine. How/why it was not making contact I don't know. Easy to test with an ohm meter or test light. Make sure it's not the problem. Approach taking off the end of the generator with reluctance. It is VERY easy to break the brushes. Yours is low enough hours that it is likely to be OK under there.
 

WWRD99

Well-known member
Steel Soldiers Supporter
898
1,375
93
Location
York Pa
Honestly - I can't remember that far back. The TM is posted on this site. It is what I used. I don't have a 9 volt battery so just used a weak car battery and length of 18 ga wire to limit the power to the field. It only takes a couple seconds of power application to flash the field so it's not like you're likely to damage them. The external fuse holder below the instruments was bad on mine. How/why it was not making contact I don't know. Easy to test with an ohm meter or test light. Make sure it's not the problem. Approach taking off the end of the generator with reluctance. It is VERY easy to break the brushes. Yours is low enough hours that it is likely to be OK under there.
I bet!! I've read 780 whatever pages of the tm many times...it's been at least 6 months since I gave up trying to flash the coil...I have no idea which pins are which...there are no pics showing where the pins are in the set itself...several very good diagrams of where the wires go...but nothing showing where they are...I doubt the brushes have been worn out yet too.

Sent from my SM-G955U using Tapatalk
 
Top
AdBlock Detected

We get it, advertisements are annoying!

Sure, ad-blocking software does a great job at blocking ads, but it also blocks useful features of our website like our supporting vendors. Their ads help keep Steel Soldiers going. Please consider disabling your ad blockers for the site. Thanks!

I've Disabled AdBlock
No Thanks