• Steel Soldiers now has a few new forums, read more about it at: New Munitions Forums!

  • Microsoft MSN, Live, Hotmail, Outlook email users may not be receiving emails. We are working to resolve this issue. Please add support@steelsoldiers.com to your trusted contacts.

MEP-803A —— Did I Score? I think so……

Tinstar

Super Moderator
Super Moderator
Steel Soldiers Supporter
4,476
2,447
113
Location
East of Edmond, Oklahoma
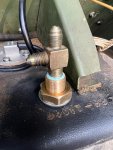
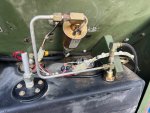
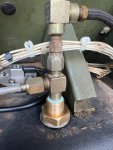
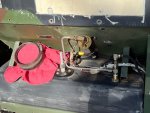
Installed improved top well nut and the new gasket on low fuel sensor. Old gasket was in great shape and looked almost new. Not hard or brittle.
Pickup tube gasket wasn’t leaking and is a nightmare to get to the rear screws, so I left it alone.
For now.

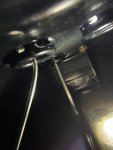
The inside tank picture seems to show the well nut isn’t flush with tank.
I double checked and it is. With mirrors and feeling the edge with my fingers. All good.

The bottom well nut isn’t leaking…..yet, so I also left it alone for today.
Will tackle it tomorrow morning when it’s cooler outside.

Had to cut off top of well nut and push it through into my waiting hand inside tank.
There was no way it was coming out the top without damaging the tank.

Have the fuel fill components soaking in Evapo-Rust.
They weren’t horrible, except the cap.
Should be done in about 48 hours.
Found a NOS fuel cap gasket and will be replacing it. Old one needed replaced anyway.

Yes, I’m very aware the tank needs cleaned up more but will wait until fuel neck is reinstalled.
Luckily the rubber fill neck boot isn’t damaged and is still very pliable.

One more well nut install and a change of fuel filters to go before load test.

IMG_4903.jpegIMG_4904.jpegIMG_4905.jpegIMG_4906.jpegIMG_4907.jpegIMG_4908.jpeg
 

Tinstar

Super Moderator
Super Moderator
Steel Soldiers Supporter
4,476
2,447
113
Location
East of Edmond, Oklahoma
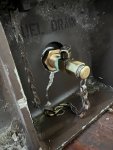
Bottom well nut installed.
Was a nightmare getting the old one out.
(Replacement fuel drain cap was reattached after photo)

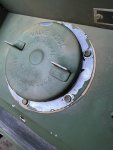
Fuel fill neck and strainer cleaned up nicely and reinstalled.
New fuel cap gasket installed. Used silicone grease on the gasket so it doesn’t stick, but still seals.

Topped off fuel tank with fresh red diesel and some two-cycle oil/Seafoam added.

Waiting for used AUX fuel pump to arrive before installing tank cover.
Bought a new Carter pump as recommended for a spare.

Still waiting on fuel filters, but the ones on unit look new so I think it will be fine for testing.
Will replace after testing.
Then a good pressure washing is due.

Load test time now.

EDIT:
Fuel filters arrived today and will go ahead and replace them before load test.
Also bought 8/4 wire cord for the load test.

Getting close.


IMG_4910.jpeg
 
Last edited:

Tinstar

Super Moderator
Super Moderator
Steel Soldiers Supporter
4,476
2,447
113
Location
East of Edmond, Oklahoma
Made a gasket from FelPro material to go between the neck flange and the fill housing.

There isn’t supposed to be one there, but there was a lot of grit and sand that had collected underneath and a lot was on top of tank.

So this gasket should prevent that.
It’s diesel fuel rated.

It’s getting a coat of paint today.

IMG_4928.jpeg
 

Tinstar

Super Moderator
Super Moderator
Steel Soldiers Supporter
4,476
2,447
113
Location
East of Edmond, Oklahoma
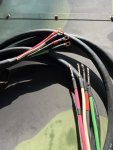
Load test cord is ready.
Storms forecasted for today so test will be tomorrow.
My soldering job is horrible. I ran out of my usual stuff and found some 40 year old solder in the barn.
Oh well, shouldn’t be an issue.

IMG_4948.jpeg


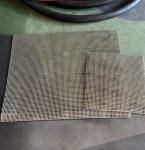
Have some stainless steel screen to cover bottom holes in generator housing.

IMG_4947.jpeg


I’m ready for this thing to be finished and ready to work.

I’m sure most are sick of this thread by now anyway.
 

2Pbfeet

Well-known member
693
1,407
93
Location
Mt. Hamilton, CA
I can't speak for anyone else, but for me, it has been enjoyable. Thanks for posting.

Good luck with the test.

One (perhaps obvious) thing that I would point out is that if your generator is being grounded via the cable at the main service panel, it won't have any grounding if there is a problem with the cable or the terminations. (Not going to open up that can of worms, but just be mindful of that fact. For me, that includes rubber footwear.)

All the best,

2Pbfeet
 
Last edited:

Tinstar

Super Moderator
Super Moderator
Steel Soldiers Supporter
4,476
2,447
113
Location
East of Edmond, Oklahoma
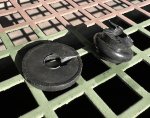
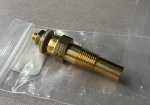
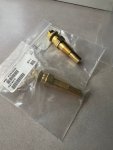
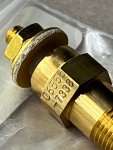
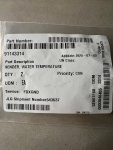
My lost shipment of MEP-803A Water Temperature Sensors showed up today.
Small flat package that I almost ran over at the gate.

They shipped directly from the manufacturer.
Did not know that’s what was going to happen.
The original one still works fine but wanted spares

I’m glad they showed up since I bought them at a very good price.


IMG_4949.jpegIMG_4951.jpegIMG_4952.jpegIMG_4950.jpeg
 

Tinstar

Super Moderator
Super Moderator
Steel Soldiers Supporter
4,476
2,447
113
Location
East of Edmond, Oklahoma
Load test complete.
Huge success!!
Nothing broke and it stopped smoking anyway.
Do need a new radiator cap. It started slowly leaking again.
Only a 3 hour test since the heat index is brutal outside.

Let generator warm up and did the 25% load for 15 minutes, 50% for 15 and so on.

It did have decent smoke coming out of the exhaust, but wasn’t as heavy as I was expecting.
A lot of carbon chunks were coming out.
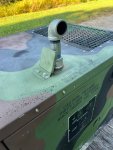
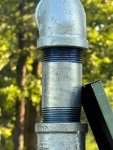
So much so I installed a 90 on the exhaust pipe so the carbon wouldn’t go down into the radiator exhaust.

Loads ranged (when unit was hot and ready) from 65% to 105%.
Load would cycle from light to heavy and back again every few minutes for nice dynamic loading. Exhaust got nice and hot, even turned the pipe exhaust threads blue.

She smoked mildly for almost an hour.
Then smoked lightly going from 65% to 105% for a few seconds.
After about another 45 minutes stopped smoking entirely.
I could still feel in the exhaust stream an occasional bit of carbon. Just no visible smoke in the sunlight. Would liked to have ran it a little longer.

No I didn’t load it up to 125% for hours or even a minute, but this generator will do what I need it to do, I have no doubt.
I’m not trying to break it or set a load record.
Just to power what I need and for days at a time.
This generator didn't stumble or hesitate one bit.
I did drop the whole load a few times and it handled it very well.
It also handled the load coming back without flinching.
These generators are quite something!

Extremely happy with the results.
Not too bad for a 3624.0 hour generator.
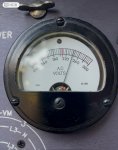
IMG_4974.jpeg


IMG_4964.jpegIMG_4966.jpegIMG_4967.jpegIMG_4968.jpegIMG_4969.jpegIMG_4971.jpeg
 

Tinstar

Super Moderator
Super Moderator
Steel Soldiers Supporter
4,476
2,447
113
Location
East of Edmond, Oklahoma
I still have a few things to do before I’m “Done”.

Drain and replace coolant
Find a radiator cap that will work.
Install new fan belt.
Install newly purchased used and working AUX fuel pump
Once that’s installed and verified to work, I can put the tank cover back on.

WASH Generator. It’s filthy

Waiting on battery terminal covers to arrive.
Will be doing fuel filters tomorrow morning.
Will also be installing 24v solar panel to keep battery’s topped off.
Will be connecting it to the NATO Slave positive/negative terminals, just behind the side cover.

Devil is in the details but the biggest hurdle was passed successfully today.


Thanks to all of you for the support, help, parts, etc.
I sincerely appreciate it.
 
Top
AdBlock Detected

We get it, advertisements are annoying!

Sure, ad-blocking software does a great job at blocking ads, but it also blocks useful features of our website like our supporting vendors. Their ads help keep Steel Soldiers going. Please consider disabling your ad blockers for the site. Thanks!

I've Disabled AdBlock
No Thanks