• Steel Soldiers now has a few new forums, read more about it at: New Munitions Forums!

  • Microsoft MSN, Live, Hotmail, Outlook email users may not be receiving emails. We are working to resolve this issue. Please add support@steelsoldiers.com to your trusted contacts.


My New Knuckle-Boom Deuce Thread.

M37M35

Well-known member
Steel Soldiers Supporter
572
648
93
Location
East Central Oklahoma
Thanks!

They're just cheap ones from Amazon. There's pictures of the install a few pages back. They're pretty bright and I think they're a good deal for the money. I do see a slight purple hue to them that I don't care for, but some people don't notice it. I don't remember what brand they are.

I don't like the purple hue and am thinking about replacing them with these: https://www.amazon.com/Eyourlife-Wa..._rd_wg=jN1VA&refRID=Y2970XG0F8CFJ0FY1CAX&th=1

I've had good luck with the "Eyourlife" brand. I have some smaller ones of these and they're a 'whiter' light. Also, I think this version would be easier to mount.
I plan to add a bunch more LED work lights later on.

One thing to keep in mind with any of these LED lights from Amazon... The number one complaint is they're not sealed well and get water in them. It's a good idea to put some clear silicone around the lens, cord, and all the seams before mounting them

Also, most of these LED lights are rated for 10-30 volt input. I'm running mine off the 24v system and they work fine.
 

M37M35

Well-known member
Steel Soldiers Supporter
572
648
93
Location
East Central Oklahoma
Now that it's running again, it's given me some motivation to do some of the other modifications I've been planning.

Installed two keyed battery disconnects. One for 12v, one for 24v. Just need to install the 12v alternator and fuse block now.

WP_20170806_001.jpgWP_20170806_003.jpgWP_20170806_004.jpg

More of a repair than a modification, but I noticed oil leaking from the exhaust pipe where it clamps to the turbo. I either lost the gasket when I had it apart, or it didn't have one to begin with. Anyway, I made a improvised gasket for that out of copper wire. We'll see how it works.
It's only an issue when it's idling running the boom, otherwise it burns it off. But it has been making an oily mess on the starter.
WP_20170806_006.jpg
 

M37M35

Well-known member
Steel Soldiers Supporter
572
648
93
Location
East Central Oklahoma
A few weeks ago I got a 5th wheel plate from Droprat. The idea was to be able to mount it on the deuce when I need to move semi trailers around. It wouldn't be very often, but it would be nice to have the capability.
I'll have to remove the bed to mount the 5th wheel plate, and vice-versa.

I also need to be able to tow a gooseneck trailer, so I'll work on fabbing up a way to mount one since the bed is off. Unfortunately I'll also have to remove the bed to tow a gooseneck trailer because it would be too high, but I think a gooseneck ball could stay permanently mounted under the bed.


The bed was only mounted with two bolts on each side, which I didn't think was sufficient to winch or pull against the bed, so I marked the holes in the rear plate before I removed the bed.
WP_20170808_003.jpgWP_20170808_004.jpg

Bed removed and rear mounting plate holes drilled.
WP_20170808_005.jpgWP_20170809_019.jpg


Mocking up the position of the 5th wheel plate.
WP_20170808_009.jpgWP_20170808_008.jpgWP_20170808_007.jpgWP_20170808_006.jpg


The plate can't mount just ahead of the axle pivot like the deuce tractor because the front of a trailer would hit the crane, so I had to move the plate back a bit. I discovered it would fit perfectly between the crossmember rivets and be the right distance from the crane for the front of a trailer to clear.
The plate being moved back a bit shouldn't matter for just moving trailers around offroad.
WP_20170809_016.jpgWP_20170809_017.jpgWP_20170809_018.jpgWP_20170809_020.jpg
 

rustystud

Well-known member
9,071
2,387
113
Location
Woodinville, Washington
Now that it's running again, it's given me some motivation to do some of the other modifications I've been planning.

Installed two keyed battery disconnects. One for 12v, one for 24v. Just need to install the 12v alternator and fuse block now.

View attachment 694640View attachment 694639View attachment 694635

More of a repair than a modification, but I noticed oil leaking from the exhaust pipe where it clamps to the turbo. I either lost the gasket when I had it apart, or it didn't have one to begin with. Anyway, I made a improvised gasket for that out of copper wire. We'll see how it works.
It's only an issue when it's idling running the boom, otherwise it burns it off. But it has been making an oily mess on the starter.
View attachment 694634
I hate to tell you but that oil leaking at the exhaust by the turbo is a major sign that the turbo is leaking. There really should not be any oil in the exhaust pipe. Take the pipe off and look at the turbo. If you see crusty oil build-up then you have a leaking turbo.
 

red

Active member
1,988
22
38
Location
Eagle Mountain/Utah
I really like the extra versatility (being able to swap beds). Is the 5th wheel back far enough to provide the clearance with a trailer? Or will you have to remove the bumperettes?
 

gimpyrobb

dumpsterlandingfromorbit!
27,785
747
113
Location
Cincy Ohio
I hate to tell you but that oil leaking at the exhaust by the turbo is a major sign that the turbo is leaking. There really should not be any oil in the exhaust pipe. Take the pipe off and look at the turbo. If you see crusty oil build-up then you have a leaking turbo.
He said it was mostly during crane operations, you sure its not just wetstacking?
 

M37M35

Well-known member
Steel Soldiers Supporter
572
648
93
Location
East Central Oklahoma
I hate to tell you but that oil leaking at the exhaust by the turbo is a major sign that the turbo is leaking. There really should not be any oil in the exhaust pipe. Take the pipe off and look at the turbo. If you see crusty oil build-up then you have a leaking turbo.
He said it was mostly during crane operations, you sure its not just wetstacking?
I think it's a combination of wetstacking and leaking exhaust valve guides. Before I took the heads off, I thought the rear of the rear head gasket was leaking oil as there was oil running down the back of the block and firewall. After I got the heads off I found out the head gaskets were fine and weren't leaking at all. The oil was coming from the #6 exhaust valve and the exhaust manifold gasket on #6 had a portion missing, so it was blowing out there and running down the block and firewall.
There was also some oil residue in a couple other exhaust ports.

I decided not to mess with the heads or valves at all because of the crack in the block. It ran fine and I didn't want to spend a lot of time and money on it if the block repair doesn't hold. If all it's down to is just leaking/burning a bit of oil, I can live with that.
If I end up having other major issues with this engine, I'll probably try to put a DTA466 in it.

Oh, and my improvised copper gasket isn't working so I'll have to come up with something else...
 

M37M35

Well-known member
Steel Soldiers Supporter
572
648
93
Location
East Central Oklahoma
I really like the extra versatility (being able to swap beds). Is the 5th wheel back far enough to provide the clearance with a trailer? Or will you have to remove the bumperettes?
When you have a new toy, you have to go try it out, right?

WP_20170813_002.jpgWP_20170813_001.jpgWP_20170813_003.jpgWP_20170813_004opsec.jpgWP_20170813_008.jpgWP_20170813_007.jpgWP_20170813_006.jpgWP_20170813_005.jpgWP_20170813_011.jpgWP_20170813_010.jpgWP_20170813_013.jpgWP_20170813_014.jpgWP_20170813_015.jpgWP_20170813_017.jpgWP_20170813_019.jpgWP_20170813_020.jpgWP_20170813_012opsec.jpg

It worked great and clears with plenty of room! It's just a baby trailer but a full size one should pull just fine too. Could hardly tell it was back there!

I did find out I really need to trim some tree branches. Well... not as many now...
 

M37M35

Well-known member
Steel Soldiers Supporter
572
648
93
Location
East Central Oklahoma
Bracket painted and mounted.


WP_20170815_003.jpgWP_20170815_002.jpgWP_20170815_001.jpgWP_20170815_004.jpgWP_20170815_006.jpgWP_20170815_005.jpg


Alternator mounted.

Haven't decided if I'm going to paint the alt or not. Need to at least see if it works first since it's a used take-off from something.

I was going to run both belts around it, but the parts store only had one in stock. One belt may work fine, guess we'll see.

Started wiring it up today but didn't get very far, cause it seemed to be one of those days where anything that could go wrong did go wrong.
WP_20170815_012.jpgWP_20170815_011.jpgWP_20170815_010.jpg
 
Last edited:

M37M35

Well-known member
Steel Soldiers Supporter
572
648
93
Location
East Central Oklahoma
Well the fuse block finally came in from Amazon, so I was able to get the 12 volt wiring in place and the alternator wired up. Started the truck up... And the alt didn't work...:-( Double checked the wiring, checked all the connections, checked everything with a meter... Nothing.


So, I dug around and found another alt, swapped the pulley over, mounted it, and... This one doesn't work either. :-x It seems to have a shorted field.
WP_20170824_008.jpgWP_20170824_011.jpg

Before doing all that a third time, I figured there had to be an easier way of finding out if they work. After going through 5 or 6 I finally found one that worked. I guess I shouldn't expect much from used alternators I gave next to nothing for. Apparently they were taken off for a reason...
WP_20170825_010.jpg

Go to install the next alt and found a camouflage stowaway.
WP_20170824_006.jpg

Installed. Looks better than the orange one.
WP_20170826_001.jpg

The resistance of the indicator bulb I put on the dash wasn't enough to start the alt charging, so I had to add some resisters across it. Played around with a few different ones with test wires til I found the right combination, then soldered them across the bulb.
WP_20170826_002.jpgWP_20170826_003.jpg

It works! I now have a full 12v system to power whatever I want to run.
 

rustystud

Well-known member
9,071
2,387
113
Location
Woodinville, Washington
Well the fuse block finally came in from Amazon, so I was able to get the 12 volt wiring in place and the alternator wired up. Started the truck up... And the alt didn't work...:-( Double checked the wiring, checked all the connections, checked everything with a meter... Nothing.


So, I dug around and found another alt, swapped the pulley over, mounted it, and... This one doesn't work either. :-x It seems to have a shorted field.
View attachment 696632View attachment 696631

Before doing all that a third time, I figured there had to be an easier way of finding out if they work. After going through 5 or 6 I finally found one that worked. I guess I shouldn't expect much from used alternators I gave next to nothing for. Apparently they were taken off for a reason...
View attachment 696630

Go to install the next alt and found a camouflage stowaway.
View attachment 696633

Installed. Looks better than the orange one.
View attachment 696636

The resistance of the indicator bulb I put on the dash wasn't enough to start the alt charging, so I had to add some resisters across it. Played around with a few different ones with test wires til I found the right combination, then soldered them across the bulb.
View attachment 696635View attachment 696634

It works! I now have a full 12v system to power whatever I want to run.
Good job ! :goodjob:
 

gimpyrobb

dumpsterlandingfromorbit!
27,785
747
113
Location
Cincy Ohio
WOW!
Don't see too many of the old 25amp generators! Ever thought of upgrading to a common 60a alt(militarily speaking)?
 

M37M35

Well-known member
Steel Soldiers Supporter
572
648
93
Location
East Central Oklahoma
Good job ! :goodjob:
Thanks!

WOW!
Don't see too many of the old 25amp generators! Ever thought of upgrading to a common 60a alt(militarily speaking)?
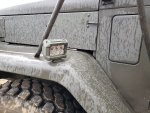
It came on the truck. The truck is a 1966, but the engine has rebuild tags from 1989. I would think they would have put the 60A alt on when they put the rebuilt engine in, but I guess not.

Replacing it is on my list of things to do, but the generator has been working fine. Although if I turn all the lights on, I'm drawing a bit over 25A.

I have a 60A alt from a deuce, but it's used and I don't know if it works. I'd hate to go to the trouble of swapping them and wiring it up just to find out it doesn't work, and have to swap back.

Do you happen to know how the 60A alt is wired? If I knew that, I could probably bench-test it like I did the 12V alts.
It's been awhile since I dug it out and looked at it, but I 'think' it had a big and small post. I would guess the big post goes to the positive battery terminal and the small one gets switched 24v, but I don't know if there's any diodes or resisters involved in the wiring anywhere. A wiring diagram would be great but I haven't looked for one yet.
 

M37M35

Well-known member
Steel Soldiers Supporter
572
648
93
Location
East Central Oklahoma
Added a coolant overflow tank. I had to stare at it for quite a while to figure out how to mount it where I wanted it. Ended up shaping a couple hardware store "L" brackets to make it work.


WP_20170823_018.jpgWP_20170823_017.jpgWP_20170823_019.jpgWP_20170823_020.jpg
 

74M35A2

Well-known member
4,145
311
83
Location
Livonia, MI
Delco's are not the highest quality, they were just the most commonly available at their time. I even bought a brand new Delco Heavy Duty 110A 24V latest model 28Si from an International truck dealer to benchmark (paid $330 my discount price). It failed in less than one year of hobby use only on my M925a2 (Cummins 8.3L), with brand new batteries behind it. This is why Japanese alternators are taking over todays OE truck market, and Delco now nearly closing its doors. It really is too bad, but they were not strict enough on design and manufacturing quality for the long run. This leaves a difficult to fill grey void in the area of older hinge mount alternators in the field, especially 24v. Keeping your batteries fresh and in a good state of charge will lessen alternator load, and extend the life of an already marginal alternator.
 

M37M35

Well-known member
Steel Soldiers Supporter
572
648
93
Location
East Central Oklahoma
Wow! Has it really been 2 1/2 years since I've posted here!? I guess life has just been busy. I've changed jobs, and started my own business since then. Time sure flies...

I haven't made any major changes or upgrades, and it's still chugging along since the engine repair. I've put a few hundred miles on it since then without issue.

I'll add some of the little things I've done, and some action shots as I find and download the pictures. Unfortunately, it usually doesn't occur to me to take pictures when I'm using it.


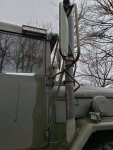
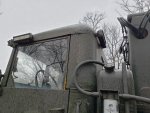
20191228_140314.jpg20191228_140402.jpg20191228_140431.jpg
Added 360* led work lights.

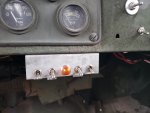
20191228_140337.jpg
From left: Left alley, Fender lights, 12v alternator charge light, Rear lights, Right alley.

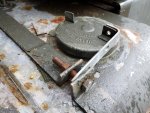
20191228_140450.jpg
It now has a locking filler cap.
 
Top
AdBlock Detected

We get it, advertisements are annoying!

Sure, ad-blocking software does a great job at blocking ads, but it also blocks useful features of our website like our supporting vendors. Their ads help keep Steel Soldiers going. Please consider disabling your ad blockers for the site. Thanks!

I've Disabled AdBlock
No Thanks