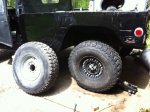
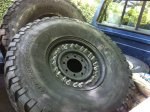
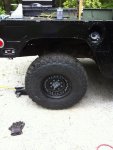
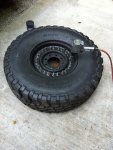
Update time. I got a bunch of stuff done over the weekend. First order of business was swapping out a leaking tire for a known good tire. With 24 bolts holding a rim together, I was glad my dad lent me his impact gun! It went pretty smoothly except for the o-ring that kept trying to creep out of the groove. I ended up sticking it in place with a few dabs of grease. I torqued it back together and aired it up. Thankfully, it didn't have any leaks.
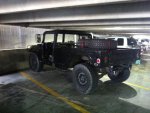
Next, I installed the driver's side splash shield that protects the radiator, engine, master cylinder, etc... from much and errant rocks. That was pretty straight forward except for a bent bracket.
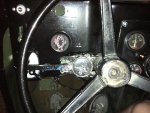
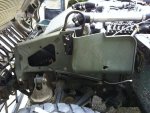
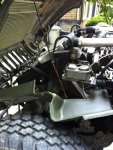
Once that was done, I got to work on installing my Westach boost/egt combo gauge. The hole where the air restriction gauge resided was the perfect size and location for it. I drilled and tapped the manifold for the pyro, used a plugged hole in the intake manifold for the boost feed, soldered a resistor inline with the gauge light to make it live on 24v, wired it up and mounted the gauge in the dash.
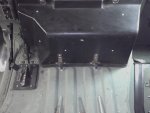
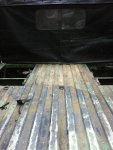
Then, I unscrewed the rotten plywood from the top of the drive-line tunnel. It was filthy and disgusting underneath with lots of muck, spent 9mm casings, and critters.
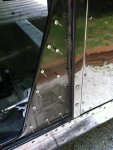
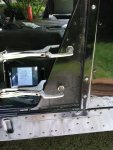
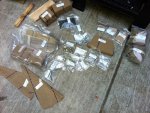
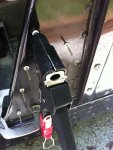
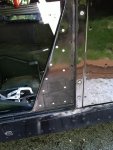
The last big project of the weekend was installing the 3-point seat belt kit. It was certainly time consuming and irritating to install, but I feel much more secure than I did in the 1980's lap belt. The kit consists of a bunch of aluminum stiffener panels that need riveted and epoxied in place. You are supposed to use a separate template kit to locate all of the rivet holes, but they are hard to find. Thankfully, the TM pictures were detailed enough that I could use them to located most of the holes. The biggest PITA was securing the reinforcing plate that holds the latch. It goes on the outside of the body in the tunnel and the bolt comes from the inside. It wouldn't have been too bad with 2 people, but it was darn near impossible by myself. I ended up running a bolt through from the outside, bolting the mount down, drilling the required holes in it, riveting it to the body and then bolting the latch to it. Phew. I still need to mount the passenger side latch and retractor, but at least the reinforcement plates are done.
I took it for a test drive last night to check all of the new stuff out. It was great being able to watch the EGT and Boost numbers. I am concerned that I either have a boost leak or that my turbo is a real dog. My EGT's got as high as 1100 on a sustained climb, so the fuel is there, but the boost never got beyond 12 PSI, which is too low for a 190 hp engine. The usual rule-of-thumb is around 1 PSI per 10 HP. I need to make up a fitting so I can pressurize the system and check for bleed-off.

 My plan is to get some more road miles on it stock as it sits. I have a EGT/Boost gauge to install first. Then, I'll be able to get a set of baseline numbers. Once that's done, I'll pop that 100 plate in there and see what happens. Please keep your eyes peeled for a 3rd Gen manifold and HE351cw combo for me. I'll do an aftermarket manifold at some point, but would like to try the stock one first. The Ford style manifold that's on my engine currently has the turbo offset to the rear, which really helps with intake and exhaust fitment. I think the 3rd Gen will work just as well.
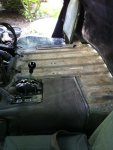

")