• Steel Soldiers now has a few new forums, read more about it at: New Munitions Forums!

  • Microsoft MSN, Live, Hotmail, Outlook email users may not be receiving emails. We are working to resolve this issue. Please add support@steelsoldiers.com to your trusted contacts.

New Here, Just started bringing my M-37 back from the dead.

WhirlingSun

New member
28
0
0
Location
Narrowsburg, New York
Update from last weekend.

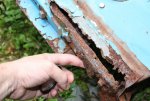
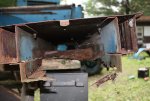
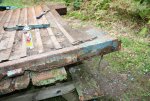
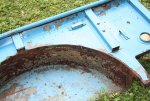
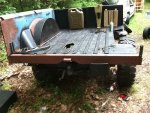
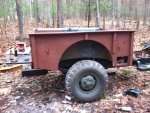
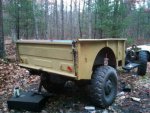
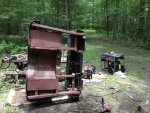
I brought the welder up and started chopping out rust. One bed side is just about ready. I cut the wheel tubs off, cut out the rust and then I made patches from the remains of the rotted outer fenders. Worked perfectly. I still need to grind the welds and weld on nuts for the outer fender to attach to. Anyone know what thread pitch they are? I'm 100 miles away from mine.

I still have a little bit of patch-work to do on the cargo box floor, but sometime within the next few weeks I'll be putting the cargo box back on the truck, all restored.
 

Attachments

majorhitt

New member
227
0
0
Location
Dallas Pa.
The nuts are 3/8-24. I may have some square ones if you need them. I'll have to go look. Just ran to the shop,No. I have a lot of 5/16-18 square. Sorry.
 

WhirlingSun

New member
28
0
0
Location
Narrowsburg, New York
The nuts are 3/8-24. I may have some square ones if you need them. I'll have to go look. Just ran to the shop,No. I have a lot of 5/16-18 square. Sorry.

Thanks and thanks! I appreciate it! I have some different sized square stock and a 3/8-24 tap... I can make these up on the lathe if there's too much sticker shock at McMaster Carr.
 

WhirlingSun

New member
28
0
0
Location
Narrowsburg, New York
Been a real long time since I posted any progress pictures. The cab floor was completely rotted out. I welded scrap metal braces into the door frames and cut out the floor in two sections.

Then I fabricated a steel box tube frame to replace the floor. The rockers are steel 2x4s and the rest of the floor is made from steel 2x2. The sheet metal on the bottom is just some 18 gauge to close in the floor. The tops of the frame will get 14 gauge to tie it all together and make it one big solid floor. Diamond plating being way outside my budget, I'm going to use a glue down rubber mat with tread pattern.

IMG_2669.jpg

The cab was placed back onto the frame but I didn't have any 1/2" bolts long enough to mount it. There's an ever so slight wobble to it, which I think might just be a high weld bead, but I'll know for sure once I start tightening bolts.

IMG_2672ww.jpg

Here it is with the cab on the frame. Checking to see how close to square I managed to keep it. Notice the hornet and wasp spray... I used 3 cans that day. This truck seems to be an ideal wasp habitat.

(Please ignore the WW2 German "Ambush camo" scheme spray painted on the front half of the hood, was just preventing rust, and playing with 90% empty rattle cans.)

Soon it will be time for motor mounts! In the mean time, I have a lot of body work to focus on. Very soon there will be no more rusted out stuff to grind off. I am at the point of only putting good stuff onto the truck now (not counting the little bit of body work to do on the cab and fenders).
 

Attachments

Last edited:

Tuko

New member
85
1
0
Location
CT
alot of people would have wrote that truck off as parts or scrap, glad to see you are bringing it back to life keep up with the pics!
 

o1951

Active member
899
155
43
Location
Bergen County, NJ
Seein as it is alone outdoors, glad you are in an area where no one messes with it between your visits. Round here, scrappers would have it right quick.
 

WhirlingSun

New member
28
0
0
Location
Narrowsburg, New York
Seein as it is alone outdoors, glad you are in an area where no one messes with it between your visits. Round here, scrappers would have it right quick.


It's not an easy to find driveway, so not too many people know where it is.

BUT just as a precaution, I littered the place with spent shell casings and threatening "trespassers will... " signs.
 

WhirlingSun

New member
28
0
0
Location
Narrowsburg, New York
Pictures of the cargo box restoration

I knew I had pictures of the cargo box work I did over the winter.. Finally found them on my old phone.

I think one more weekend is all I need and the cargo box will be finished completely.

First, a few before pictures from the night I dragged it home and the subsequent weekend of tearing it apart.
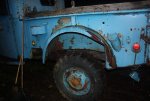
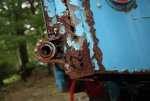
resized3954.jpgresized4584.jpgresized4660.jpgresized4663.jpgresized4664.jpgresized4690.jpg

I'm not really sure what was holding the tailgate on... I was able to remove it without tools.
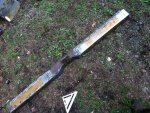
resized0696.jpgresized0715.jpgresized1391.jpgresized1396.jpg

There was no way I was going to sink 300 dollars into a rear crossmember. I broke all the spot welds, cut it into 3 parts and and re-made it using a sheet metal brake I improvised from 2x4s. For a template I just unfolded the rotten metal onto the new and spray painted around the perimeter.

The rear of the cargo box sides were pretty much fabricated new for the last 8 inches of the truck. The square tubes are actually 1/8" thick square tube cut to fit. It's what I had on hand, and now it's even heavier duty than it was.

The past 2 weeks I have been chasing around pin holes in the sheet metal with 5 minute epoxy. Next step is to have at the cargo box with seam sealer, a flap wheel to dress my fabulous welds, and probably a little bondo.

Brush on pickup bed-liner will make it all look like I knew what I was doing all along.

In the last picture the tailgate won't close properly. I've since fixed that with a judicious application of violence.
 
Last edited:

WhirlingSun

New member
28
0
0
Location
Narrowsburg, New York
Pretty much all the welding that has to be done on "C" or "D" has to run off the Generator. There's a trailer on the land with power, but not enough amps for most tools. The 125 foot extension cord provides enough resistance to limit me to small hand tools for the most part.

Anything I could fit in the Jeep, came home with me to for paint stripping, unfreezing bolts, stuff like that. Welding, grinding, painting, and bulldozing of the truck happens in the "open air mud garage" upstate.
 

o1951

Active member
899
155
43
Location
Bergen County, NJ
[thumbzup] Never worked in the open like that. If you can get heavier cord - say 10/3 - some people temporarily use romex rated for outdoor use - voltage drop should be greatly reduced, allow larger tools to run.
 
Last edited:
Top