• Steel Soldiers now has a few new forums, read more about it at: New Munitions Forums!

  • Microsoft MSN, Live, Hotmail, Outlook email users may not be receiving emails. We are working to resolve this issue. Please add support@steelsoldiers.com to your trusted contacts.


No help needed with M109 Restore..

goldneagle

Well-known member
4,431
864
113
Location
Slidell, LA
Today it was 72 degrees out so I decided to do some more work on the truck. Yesterday I had purchased 2 lengths of Unistrut channel. I am using it in the place of the heavy angle that was attached to the walls of the M109 box.

I used the existing 7/16" dia. bolts to attach the Unistrut channels to the 2 side walls inside the box. I have 10 heavy duty eyebolts that I attached to the channels to allow me to secure cargo to the walls during transport. These eyebolts can be moved along the channels to secure tall cargo to the walls. I will try ti take pictures of them tomorrow.

I also received the 2 rolls of insulation I ordered for insulating the cab floor and walls.
 

goldneagle

Well-known member
4,431
864
113
Location
Slidell, LA
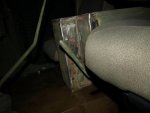
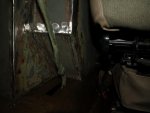
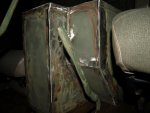
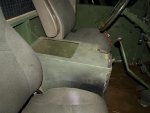
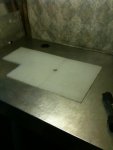
can i ask what you ordered for insulating the cab? im going to use horse stall matt as the carpet but i need something for underneath.
Welcome to THE best source for automotive insulation.
Proudly Made in the U.S.A.
--Scroll Down to Purchase--

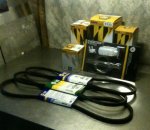
Low-E brand insulation is available here in 4' x 10', 4' x 50' and 4' by 120' rolls. Low-E is manufactured using a 3/16" closed-cell polyethylene foam core with 99% pure polished aluminum facings on both sides. (This is not the foiled bubble wrap sold at hardware stores).

A major concern when restoring a vehicle is finding an insulation/sound deadening product that won't cause long term damage to the body of the vehicle. When using foam, cotton or jute backed products, unwanted moisture can easily be the cause of early deterioration in the floor of the vehicle. This insulation prevents condensation and will not absorb moisture. Therefore, it will not mold nor mildew like cotton, foam and jute backed products do. It stops up to 97% of radiant heat transfer, which makes it ideal not only for firewalls, but also for lining engine covers in boats and motor homes. In the winter months, automotive insulation will keep all your valuable heat in your car or RV, where you need it most. It is also an excellent sound deadener, so it will keep out unwanted engine and road noise. This insulation is extremely lightweight (40 sq. ft. weighs less than 2 pounds), totally non-toxic and cuts with scissors or a sharp knife. This same brand of automotive insulation has been used in NASCAR, IROC, and World of Outlaws race cars.

It is IDEAL for use in hot rods, street rods, rat rods, classic cars, trucks, pickups, motor homes, vans, boats, race cars, stock cars, vintage cars, refrigerated containers, even airplanes. Has many other uses. Cut pieces to put in car, van, motor-home, camper or airplane windows to keep solar rays from damaging expensive interior or just to keep out heat and prying eyes. You can even insulate your garage doors! I have used this insulation in my own cars and in cars I have rebuilt for others and have never had a complaint related to this product.

On top of superior insulating and sound deadening properties, we deliver excellent customer service and fast shipping. Please take time to visit our testimonials page. We have over 2,250 feedback on EBay (100% positive - username is Lobucrod). We take pride in our product and our service and we know you will be completely satisfied.

Shane in Australia sent us some testing he did on his car 'before and after' installing our insulation, along with pictures. Click here to see his results.

Email Us for a FREE SAMPLE, estimate of your project needs, or any questions

Class A, Class 1 Fire Rating Burn Test Video

Click here to see the Residential and Commercial applications for Low-E insulation
www.harboursupply.net


4' x 10' (40 sq. ft.)

$31.50
*Great Value*


Shipping via USPS Priority Mail:
$8.50 continental US
$10.00 HI, AK, PR
$20.00 Canada $30.00 United Kingdom
$30.00 Australia (must cut to 2 - 2' x 10')

Email us for other international rates.
We ship worldwide!


4' x 50' (200 sq. ft.)

$130.00
*Save $27.50*


Shipping via USPS Parcel Post:
$30.00 continental US

Shipping via USPS Priority:
$32.50 Canada
$85.00 Australia (must cut to 2 - 2' x 50')

Would you like to visit our
100% positive EBay Feedback?


4' x 120' (480 sq. ft.)

$225.00
*Best Buy*


Shipping via FedEx:
$45.00 to continental US only
$55.00 to AK/HI 2-60' Rolls Shipped

Best Value for Upholstery Shops, Restorers, Rebuilders, Car Clubs, etc.

Ships Direct from Mfg.


Aluminum Splice Tape


3 inch x 10'
$2.50


3 inch x 150'
$25.00


To phone in an order call 817-523-0940
If we don't answer please leave a message and we will call you back.

Customers Please Note:
Automotive insulation rolls will occasionally contain a factory splice.
This is an appearance issue only and does not in any way detract
from the insulating, sound deadening or moisture resistant properties.
 

goldneagle

Well-known member
4,431
864
113
Location
Slidell, LA
I went through over 100 pages on Ebay looking for a center console for my M109A2. Most didn't have dimensions or just wouldn't fit. After wasting hours looking I decided to take a break. When I went to my shipping container today to pack something for shipping I walk right by the tool boxes i had removed from the M820A2 since the buyer decided he didn't need them on there.

Those tool boxes were the ones that came from 2 M818 trucks. They were originally installed behind the cab of the M818. I took a quick measurement and went to verify the dimensions in the cab. Well the Width was good, the hight was good, but the length was too long! I had 24" to work with and the box was 31" long. So far so good!

After I got the packages packed and shipped out I decided to work on the center console. I first marked the box at 24" long all the way around. i took a piece of cardboard and used it to make a template of the location of the HI/LOW shifter. I used the template to figure out where I need to indent the console to allow room for the HI/LOW shifter. I gave myself enough room to shift it with the console in place.

I dew out the lines for the indentation and proceeded to cut the tool box to the new design. Some of the pieces I just cut I was able to reuse to cap the indentation. I was able to use all the left over metal to seal all the openings. i welded all the metal pieces to cap off the box openings. i also cut a new opening on the top of the box so I will have access to the inside of the console for storage. I did not get a chance to fabricate the lid for the console yet! Ran out of daylight. I took the newly created console and put it in between the seats to see how she fits. All I can say is WOW. Looks great!

I took pictures that are attached of the temporary install. I am planning to drill 3 large holes on the top near the front of the console for cup holders. I am thinking of installing a Stainless Steel Dental tray on top of the trap door so I can store stuff on top without it rolling off.

I am open to suggestions as to what to put on top of the console.
 

Attachments

goldneagle

Well-known member
4,431
864
113
Location
Slidell, LA
Update for today. My friend Billy stopped by today and gave me a hand working on my center console. He was really impressed with what I already did to it! Makes me feel good. I did a lot of thinking last night about the design of the console. I decided to use external cup holders instead of drilling the box. One big reason is leakage. If a cup got a leak it could drain inside a ruin the contents! Even dripping from sweating would not be good. I drove to a few auto parts stores and picked up some nice cup holders to attach to the top of the console. Still looking for a coin holder and sunglasses holder...

Anyway, I was thinking about all the room inside the console. It would be a real mess if you just put a bunch of stuff in it. The stuff would get all mixed up...what a potential mess! So I came up with a great idea...divide it up into 3 levels by installing removable shelves inside. Put all the least used items in the bottom, put in the shelf pieces, put some more stuff in and put another shelf down. The third level would contain all the daily used items.

I bought some 1/2" angle at Home Depot for the shelf supports. We installed the first shelf support 5" above the bottom of the console. Next shelf went 10" from the console bottom. We had 6" hight left for the third level.

Once we had the shelf supports in we cut the shelves out of some used 1/8" thick aluminum. I used 2 pieces to make it easy to remove. We drilled a 1" hole between the 2 pieces so I could use my finger to lift them out easily. I ended up using some 3/16" nylon sheet for the other level since I didn't have any more aluminum sheets left. We drilled a 1" hole in the center and cut it through the middle of the hole for easy removal.

It was time to test out the space. We placed all the hand tools that I had stored in the tool box of the M820A2 truck into the bottom of the console. There was a large set of screwdrivers, a set of nut drivers, pliers set, a ton of wrenches, hammer, wire strippers, knives, and other hand tools. They all fit with room to spare.WOW! We placed the nylon shelf pieces on the first supports. Next i decided to put the spare oil filters, and fuel filters as well as all the fan belts and a mini brake bleeder kit. They fit without a problem! We installed the aluminum shelf pieces and they went in perfect! Now we have the top level to use for daily items. Now that's what I call storage space!

Since it was dark when we finished i did not take any pictures..but I will tomorrow. I want to photograph all the tools and filters to show you how much stuff I am able to store in the console. Wait until I tell you my idea for the top of the unit!

Stay tuned ....:drool:
 

srodocker

Well-known member
6,549
68
48
Location
Lacey, Washington
i have a 50 cal ammo can that im going to make my center console. i really like how you fabbed up a spot for the t case handle. the 50 cal box is like 2in to long to put in. im hoping to keep the lid so it seals up nicley. i like your work so far!
 

OPCOM

Moderator
Steel Soldiers Supporter
3,657
27
48
Location
Dallas, Texas
After waiting a week or two for volunteers that never surfaced
This is a usual case, that is, I've had very few instances where members could volunteer, or even come do something for pay. I think it's just the amount of time people have these days, plus the distance between members. That tends to limit help to emergencies.

All the work shown here looks really great. Keep it up because every project with its different details adds to the idea base for all of us to enjoy and learn from.

Center console? I wonder how ambitious it would be to creat a "walk through" to the interior of the 109 box. That is huge project and there's consideration for the fact that the front of the 109 box is floating relative to the chassis, as is the cab. And the seal between the two would be another matter. I've seen it done in pictures of an RV someone made from a 109, and was high-priced on epay. Well more likely my center console will be an a/c unit.
 
Last edited:

goldneagle

Well-known member
4,431
864
113
Location
Slidell, LA
This is a usual case, that is, I've had very few instances where members could volunteer, or even come do something for pay. I think it's just the amount of time people have these days, plus the distance between members. That tends to limit help to emergencies.

I have a similar issue with my M109 body. The floor is not rusted out but the wood needs removed, or at least some of it does, and the leaks in the roof need sealed and some few hoes patched. I have not asked anyone yet to help, but the likely situatin is to will take the truck to a semi trailer repair shop and see what they can do for the exterior, then have the top coated with rhino liner or a similar tough compund to prevent any future leaks.
I do see threads of certain members that have friends coming out of the woodwork to help them with their projects and others like us that get no help. I guess it depends on a lot of factors like location, member density and just plain luck. I am sure that if i lived near some of the members that are really active I would have gotten help. Like PB and his crew, AMGeneral, DH ....

I have gotten over the disappointment and I am becoming self sufficient at the task at hand. As you can see I have made a lot of progress since I started the thread. In fact I am going out to the shipping container to do some work on the console project.
 

RANDYDIRT

New member
403
4
0
Location
Furlow Ar.
I really like the console! I have some ammo cans that I was gonna use for mine, but like your idea better. I will have to use some of the space for a holster and a radio though.

Dirt
 

goldneagle

Well-known member
4,431
864
113
Location
Slidell, LA
OK before I continue with todays progress I have to apologize for the quality of the photos that I will attach.

Today I went out to my shipping container to look for an unused metal tool box I could scavenge to use for the lid I needed for the Console. After a bit of searching I dug up an old metal MAKITA 9.6 volt drill kit box. The lid was just the right width but short on the length. i decided to use it anyway!

I drilled out the 4 rivets that held the hinges to the box and removed the lid. The lid had a 1/2" high lip around the perimeter. I flattened the one opposite the hinge side. I used some sheet metal I had left over from patching the M109 box to fabricate an extension piece for the lid. After riveting the 2 pieces together I looked for some plywood to fill the inside of the lid and stiffen it up.

All I could find in stock was a 3/8" plywood, and some 3/16" luan plywood. The thickness of the 2 together was just right for filling the lid I just made. I used long 3/16" rivets to attach the plywood pieces to the lid. That worked great!. I attached the lid to the console. After positioning the cup holders I took the console outside for priming.

I primed and painted the console. Once it was dry i took it back inside and installed the clipboard paper holder inside the lid. I found a way to keep the 3 dental trays secured on top of the console lid. I will use velcro tape to hold the first tray to the lid and black spring paper clips to hold the tray stack together.

I took pictures of the tools and filters that I installed into the console and showed the shelves used. The dental trays will be used as food trays when eating on the road!
 

Attachments

RANDYDIRT

New member
403
4
0
Location
Furlow Ar.
I like the clipboard clip, just wonder if you may need another one facing the opposite way to hold the other end of your paperwork from hanging down and becoming fouled up.

Dirt
 

goldneagle

Well-known member
4,431
864
113
Location
Slidell, LA
I like the clipboard clip, just wonder if you may need another one facing the opposite way to hold the other end of your paperwork from hanging down and becoming fouled up.

Dirt
I was going to use it to hold a bunch of receipts or smaller pieces of paper not letter size sheets. I will be making changes as i see how my design works out. Things could get added or removed as needs change.

I just thought of adding a small led light with the flexible arm to the console for area lighting. Maybe a small hockey puck shaped led light on the inside of the lid to light up inside the box.
 

goldneagle

Well-known member
4,431
864
113
Location
Slidell, LA
wow nice box ge. how much of the insulation wrap did you order? im wondering how much to do under the hood and the cab floor and hardtop.
ZOUT said he used about 1-1/2 rolls to do the walls and floor of the cab. I ordered 2 rolls so I should have enough to do the engine side of the fire wall as well.
 

A059FMJ5.56MM

New member
15
0
1
Location
Charleston SC
GE it may seem like no one is tracking this thread, but that is far from the truth. It is just no one has any need to make major comments (IMO) your work seems top notch and you are giving the rest of us great ideas. I would love to know the specs on the seats, & how you installed the air line. the pics on the back floor told me tons and now i am sure i will take mine out when the weather breaks and i have time & $. your looks great. Same for the electric panel, the vent door, and the heater vent... Not wanting to leave out someone posted a pic of there truck with the inside walls stipped, same thank you. Now i know what to expect on that. The muffler looks great, also something i would like to do...need to make my truck quite. I wish to turn mine into a camper and am not sure what system to try to tackle first, power (24V, chargers, batts and solar) or water systems (fresh & black) or the fuel would like to increas tank size/storage and have many ideas running in my head. So your thread is great, keep up the good work. Thank you. A059FMJ5.56mm[thumbzup];-)
 
Top
AdBlock Detected

We get it, advertisements are annoying!

Sure, ad-blocking software does a great job at blocking ads, but it also blocks useful features of our website like our supporting vendors. Their ads help keep Steel Soldiers going. Please consider disabling your ad blockers for the site. Thanks!

I've Disabled AdBlock
No Thanks