• Steel Soldiers now has a few new forums, read more about it at: New Munitions Forums!

  • Microsoft MSN, Live, Hotmail, Outlook email users may not be receiving emails. We are working to resolve this issue. Please add support@steelsoldiers.com to your trusted contacts.


Our NEWEST project: M1010 Ambulance

Madmedic

Active member
271
85
28
Location
Spring, Texas
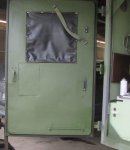
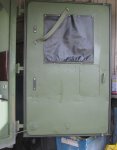
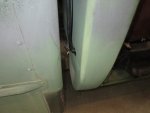
Here's another pict of one of the back doors, with the new weather seal in, paint complete. All they're waiting on now is the replacement black out curtains.

Back Doors 4.jpg
 

Madmedic

Active member
271
85
28
Location
Spring, Texas
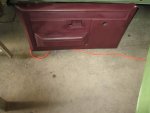
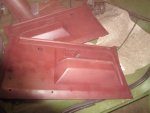
About to put the Driver's Compartment Door panels back on the doors. Went with Option "B", and dyed the panels with the Maroon Spray Dye from LMC. Couple of things to know for anyone thinking of doing same. 1st, 1 can should be enough to do 2 panels well. Be patient and do repeated light coats. The plastic will suck up the first couple of coats and look un-even at first.

Remember that there is a piece of the window weather seal that is attached to the plastic panels. You don't HAVE TO, but I am replacing those with "new", also from LMC. LMC no longer offers the plastic clips that help hold the panel to the door, but they are readily available from local auto parts stores.

Door Panel 2.jpgDoor Panel 3.jpg
 

Madmedic

Active member
271
85
28
Location
Spring, Texas
Door panels now on. Another word of caution with the spray dye. GIVE.....IT......TIME......TO....CURE. If you don't, it will easily rub off or gouge.

Door Panel 4.jpg
 

Madmedic

Active member
271
85
28
Location
Spring, Texas
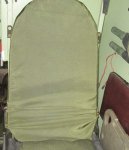
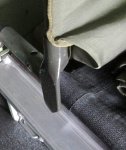
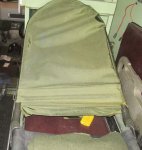
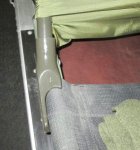
Going back to an earlier post,,,, I mentioned the Litter Back Rests, and showed a picture from GL of one. Thanks to MWMULES, we have have a couple, and here are the picts. The "cover" remains on the metal rests for padding/reinforcement. The back rest can be set into an almost vertical position, or in a reclining position.

Back Rest 1.jpgBack Rest 2.jpgBack Rest 3.jpgBack Rest 4.jpg
 

Madmedic

Active member
271
85
28
Location
Spring, Texas
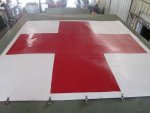
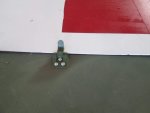
Work on the back roof and panel now finished. Thanks to CUCVRUS who got me the replacement clips I needed, no worries now about the roof panel flying off, when driving the vehicle. It'll stay up there out of the way, until we can get the vehicle into the paint shop for it's face lift (new paint).
Due to delays, and un-related issues, it doesn't look like I'll be bringing this one to Muster Day at Mabry. I may still be there assisting Carlos Manning, but no vehicles, un-less the M-Gator we're restoring for his use is ready.

Roof Cross 2.jpgRoof Cross 3.jpg
 

Another Ahab

Well-known member
17,825
4,157
113
Location
Alexandria, VA
Work on the back roof and panel now finished. Thanks to CUCVRUS who got me the replacement clips I needed, no worries now about the roof panel flying off, when driving the vehicle. It'll stay up there out of the way, until we can get the vehicle into the paint shop for it's face lift (new paint).
Looks excellent; great job!
 

Madmedic

Active member
271
85
28
Location
Spring, Texas
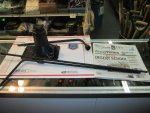
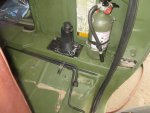
Received the tire tools I needed today from CUCVRUS (thanks again). Jack, Lug Wrench, and Jack Extension Arm. Picts show them loose and mounted in position. For the M1010, there is a small holding clip, underneath the foot ramp, between the two seats. One end of the Jack Extension Arm rests there. See picts.

Will be starting the attempt at putting in the rubber floor matting tomorrow with assistance, as previous plans to have others do it have fallen through. Tools will come out, as I estimate the edge of the rubber mat will be at the lip of the shelf where the jack it'self rests.
'
Tools 1.jpgTools 3.jpgTools 2.jpg
 

Madmedic

Active member
271
85
28
Location
Spring, Texas
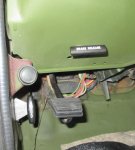
Got both the new Hood Release Assembly and the Parking Brake Assembly installed. Have laid down the rubber matting for the floor mat. Now waiting for temp and gravity to take their course, and have the matting somewhat mold it'self to the floorpan before we start any kind of trimming.

I have to say. Up till now, I've been very happy with the parts I've gotten from LMC. NOT this floor liner. We (the shop guys and I) are going to try to do this ourselves. BUT if I am not happy with final result, I plan on taking the hit, ripping it out, and taking it to a professional shop, who will put in their own floor liner. Before buying a liner yourself, THINK,,,, LONG and HARD. and ask yourself, how much patience do you have?

IMG_0603.jpgFloor Cover 1.jpg
 

richingalveston

Well-known member
1,715
120
63
Location
galveston/Texas
I have the lmc rubber liner. If you have a propane heater and a garage you can put it in overnight and just warm it, the folds will come out of the liner. It will not stretch. Do not heat it with a heat gun (industrial hair dryer) unless you want it to shrink. It will shrink a little but not stretch. It fits better if you have the insulation padding under it.

That was my experience with it.
Mine is not perfect in fit but it works well. With the padding I have it raises the floor some in comparison to the door jambs. I have spilled several large glasses of tea and it just pours out the door.
 

richingalveston

Well-known member
1,715
120
63
Location
galveston/Texas
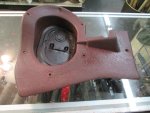
Also if you have not removed the shifter housing, it is kind of a must do in order to get it centered. Mine barely reaches each side. A few more inches of rubber on all sides of the liner would make it a much better product.
 

Madmedic

Active member
271
85
28
Location
Spring, Texas
Appreciate the suggestion for the propane heater. Unfortunately it is currently housed in a commercial shop next door to our store here in Spring. It would probably be a baaaaad idea to leave a propane heater going in someone else's shop.

Also, with this restoration, we're trying to get back as close as possible to original factory condition. Not necessarily factory fresh, but as issued. This is why I say, if I'm not happy with how this liner turns out, I'm gonna rip it out and go with the more expensive plan B.
 

Madmedic

Active member
271
85
28
Location
Spring, Texas
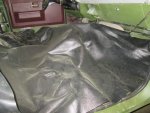
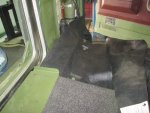
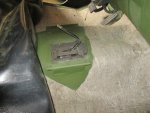
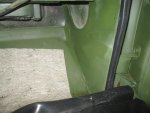
We're stillllll fighting with the floor cover.

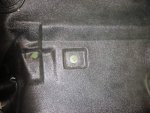
When we first got it out of the box, we noticed indentations in the material. Our 1st thought was that they were matching locations of the bolts for the seats. Then when fighting it into the truck, and tried to line up the back edge, they didn't line up. Well,,, then ignoring the dimensions of the material, the indentations WILL match the bolt pattern for the seats etc, somewhat. Just going to be a lot of trimming going on.

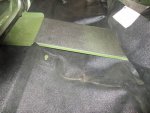
As RICH noted in his post, you must remove the housing on the shifter etc, in order to place the mat. Look at the pictures, you will see a large amount of excess material. In THEORY the excess amount could be lined up with the back wall. BUT,,, that will interfere with the placement of the jack and tools. We may work around that. However, my inclination at this point is to cut the material right at the edge of that shelf like area, leaving that back area bare metal. We'll see.

Instead of using artificial heat to mold the liner into place, we're letting ambient Texas heat do that for us.

Floor Mat 3.jpgFloor Mat 4.jpgFloor Mat 5.jpgFloor Mat 6.jpg
 

Madmedic

Active member
271
85
28
Location
Spring, Texas
While we were down there anyway messing with the floor cover, decided to take the side vent covers off. This allowed us to thoroughly clean them, and using the same spray dye we used for the door panels, re-dye them, and cover up some O.D. Over Spray, that got past the masking, when we were painting the interior.

Side Vent 1.jpgSide Vent 2.jpg
 

Madmedic

Active member
271
85
28
Location
Spring, Texas
Getting ready to re-install the seats and seat belt assemblies to see how that will work with the rubber mat. Used the same spray dye I used on the door panels for the seat belt mechanisms and parts of the seat belts themselves that had gotten sun faded. Worked very well.

Seat Belts.jpg
 

Madmedic

Active member
271
85
28
Location
Spring, Texas
Once again, CUCVRUS has come to the rescue. With his help, I now have good black out curtains on both of the back doors, and both doors are complete with holding rods now. If using salvage black out curtains for replacements,,,, BE CAREFUL. DO NOT expect the holes to line up perfectly. They won't. Wether it is because time caused the materials to change size/shape, or because the rivet holes were not factory uniform,, I don't know. But I do know, 1 set will not match the holes perfectly of a different ambulance.

Also, when putting in antennas, etc, there is a hole on the passengers side, behind the seat, for the cables. Then the cables are run under the rubber floor mat, and passenger's seat. There should be a rubber grommet (keep that name in mind) around this hole to prevent rubbing and cutting of the cables. When searching for a replacement on Amazon, or the internet, DO NOT use the words, Rubber, Hole, or Plug. YOU WILL BE SORRY. (think about it) The word is GROMMET!!!

Back Doors 5.jpgBack Doors 6.jpgIMG_0645.jpgIMG_0646.jpg
 
Last edited:
Top
AdBlock Detected

We get it, advertisements are annoying!

Sure, ad-blocking software does a great job at blocking ads, but it also blocks useful features of our website like our supporting vendors. Their ads help keep Steel Soldiers going. Please consider disabling your ad blockers for the site. Thanks!

I've Disabled AdBlock
No Thanks