-
Steel Soldiers now has a few new forums, read more about it at: New Munitions Forums!
poppop,s M37 restore thread
- Thread starter poppop
- Start date

More options
Who Replied?- 418
- 0
- 0
- Location
- Joseph, OR
Are these paints you all reference enamel, lacquer, water base, color coat clear coat? I am assuming enamel, but am not sure. It will be next year before my M37 gets new paint!
poppop
Well-known member
- 2,316
- 39
- 48
- Location
- Brooklet, Ga
acrilic enamal is what I got. You may want to shop around because I did not ask price when i ordered the paint. Rapco would have been the best deal but I assumed if I got it local with no hasmat fees it would be just as cost efective. I got two gallons of Epoxy primer and three Gallons of 24087 paint, with all harders and reducers to apply it and I dropped $1100.00. OUCH!! But it will be a quility job that will last for a long time.
- 7,744
- 155
- 63
- Location
- Columbus Georgia
Just my opinion - but for long lasting and a product that is current the epoxy primer was the best way to go.
Personally I will not buy another drop of Rapco or Gillispie - if you want to pm me I will answer but not on the open forum.
Whatever you paint - make sure it is not mix and match systems - its like the difference between an off the shelf chocolate chip cookie and a Ms Fields chocolate chip cookie.
They are chemically made with different components that match each others substrate - they also allow for the flashing of each systems chemicals when drying (means the reducers you use also).
Sounds like the $1100 for everything except the beer to help keep you refreshed while shooting was all purchased and I take the system you are shooting will be single stage enamal.
Dodge - Laquer has pretty much gone by the wayside due to the environmental VOC standards and there are far better paints today than shooting that stuff anyhow.
If you want to wind up with a flat finish - you can shoot the BC/CC systems and for the final clear use a satin - Talcum powder is basically the stuff used to flatten a paint.
But for the MV stuff single stage is the way to go - just not the latter two mentioned paints above.
poppop - got any pics of the paints you can throw out here ??
M-37Bruce
Active member
- 705
- 60
- 28
- Location
- Midlothian, VA
Looking Good
I have similar plans for my gate, when I'm able/fit enough! My rot is along the top of the square tube where yours was on the bottom.
I have similar plans for my gate, when I'm able/fit enough! My rot is along the top of the square tube where yours was on the bottom.
poppop
Well-known member
- 2,316
- 39
- 48
- Location
- Brooklet, Ga
Zout, I haven't painted any parts yet but do you mean a picture of the actual cans themselves?? It is single stage but with hardener added. It sounds like it would be great to use if you had all day to paint as the directions say one coat epoxy, flash time 30 minutes, second coat epoxy, flash time 30 minutes and then shoot the color. You could do the whole job in one day. The window on the epoxy before having to scuff before the next coat is 72 hours.
I planned to finish the tailgate today but ran out of wire for the welder. All I lack is two small pieces I am going to wrap around each end by the hinges. This will cover up some damage there and reinforce the ends. I debated about cutting it out and putting new metal in but there was already some patchwork just above that area so this will just make it stronger.
Since I could'nt weld I installed the seals in the diffs and the inner seals in the front axle. I was short one transfer seal but had gotten it in so I installed it. One fender well in the bed was banged up so I beat on it and got it looking decent. The only metal repair left to do is on one front fender. The square sheet metal reinforcement plate for a fender mount point has rust under it making it buldge out so I am going to cut the rivits out so that area can be blasted.
I may go to Tractor Supply tomorrow and get some welding wire so I can finish the tailgate. It has rained a lot here so won"t be able to get in the fields for a while. Maybe we can get some blasting done this week and spray some paint.
- 7,744
- 155
- 63
- Location
- Columbus Georgia
POP - I was saying from what you got was indeed single stage - and that is what you got. That was the best decision you made Just in my humble opinon. And
it sounds like you held nothing back on getting a top notch product.
I was with ya all the way on that one.
BC/CC would have been a total PIA and hours upon hours to do if you had gone that way.
Besides with the single stage you are not going to cut and buff as if you were doing a custom paint job - which for those just reading allows to bring
down a single stage to a near perfect - glossy surface. This is also true if if had been shot in BC/CC - the clear then would have been re-sanded to perfection
then more covers of clear shot over it then more sanding and then cutting and buffing.
Lloyd - great progress Sir. But that is from a knucklehead bum side spectator opinion. I am just a side show spectator.
poppop
Well-known member
- 2,316
- 39
- 48
- Location
- Brooklet, Ga
Brother Zout, you know when I grow up I want to be just like you don't you???
- 7,744
- 155
- 63
- Location
- Columbus Georgia
Some day when I finally growup - maybe I can figure out what I really want to do for a living as well  .
.
poppop - I was just personally interested in the product paint name you got was all - for a pic.
Might be of interest to others that may want to go the same route - just to show the array of items needed to just make the "paint" do its thing.
Neson - PPG - Omni >>
I don;t know why you post something without any updated pictures - man I am sitting on the edge of my chair - I am more of a visual person than I like reading
poppop
Well-known member
- 2,316
- 39
- 48
- Location
- Brooklet, Ga
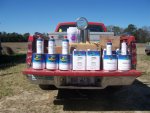
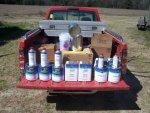
Here is the paint I got for the truck. Two gallons epoxy primer with its reducer and hardner, 3 gallons 24087 with its reducer and hardner, measuring cups and a measuring ruler, two empty cans, stir sticks and filters. The cans say western automotive paint on them. I got all from the local carquest dealer whom I have known forever and has been handleing paint forever. When I gave him the codes for different company's he said Acme Rodgers was his company.
I went ot Town to get welding wire to finish the tailgate and no one had the size I needed so that will have to wait till tomorrow. Came home and decided to work on the cab. It came as you see it in these pictures, primed and bondo applied. I am almost finished sanding it now and looks like only a couple small spots need filling. I think I will wait on that and get some spot putty to fix them with. I will add more pictures of it after sanding tonight.
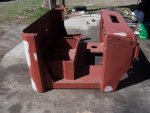
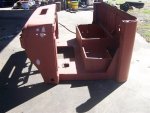
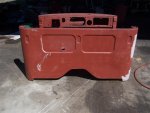
I went ot Town to get welding wire to finish the tailgate and no one had the size I needed so that will have to wait till tomorrow. Came home and decided to work on the cab. It came as you see it in these pictures, primed and bondo applied. I am almost finished sanding it now and looks like only a couple small spots need filling. I think I will wait on that and get some spot putty to fix them with. I will add more pictures of it after sanding tonight.


- 418
- 0
- 0
- Location
- Joseph, OR
Sure wish I could get to GA and take some lessons on paint from y'all!
- 7,744
- 155
- 63
- Location
- Columbus Georgia
We must be in the same time zone - I ran out of .035 wire as well yesterday.
Thanks for taking time to post the pics on the paints - yup - that is the real deal there buddy. But in the end it will look like it
and last like it as well. Cab is looking really Cherry - great job on the body work.
I was shooting the 72 Chevelle and I really like how that epoxy hardens up after 24 hrs - its like a frickin ROCK surface and smooth as a babies butt.
I know how smooth that is cause I have 5 grandsons and have had to do that dirty deed when grandma decided to step out.
It was awesome weather out there today - I think I read 69 by the garage on the gauge - door was wide open as well tinkering away - I know
your enjoying it with this project & weather.
Thanks again for lining up all them cans to take a pic.
- 1,180
- 164
- 63
- Location
- Marietta, Georgia
So we can safely assume that Little Truck will have a similar sized playmate at SSGR13. right. . . . . . .
poppop
Well-known member
- 2,316
- 39
- 48
- Location
- Brooklet, Ga
Squirt truck that idea is in my head. I can't decide if I can leave the Duece home though because it looks forward to seeing all its Friends once a year. I need another driver.
poppop
Well-known member
- 2,316
- 39
- 48
- Location
- Brooklet, Ga
I spent most of the afternoon working on the truck. I finished sanding the cab and it only needs a couple scraches filled and the drivers door stop bracket is missing. I will fab one up and weld it in. I sanded the doors down to bare metal with the DA sander on the outside. The first door came right off but the second one did not want to give up it paint easily. The doors are in good shape so I hand sanded the edges and inside panals for smoothness and also for paint addhesion. I am not real happy with the second door and may wind up blasting it. Both doors have some miner blemishes that will require a touch of bondo.
I had pressure washed the engine and transmission unit several days ago and the paint came off the trans and spots on the engine. Rust had developed on them so I treated them with a coat of Ospho today. That will kill the rust and provide a sound surface for paint. I did not want to blast this unit because sand gets in places it does not belong. I also osphoed the master cylinder because it had no paint on it and I did not want to blast it. The following pictures show todays work.
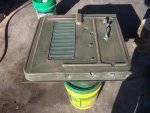
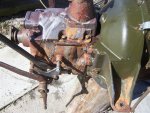
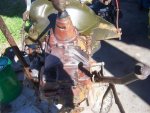
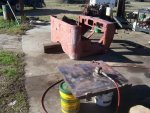
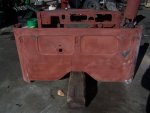
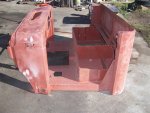
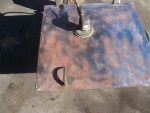
I had pressure washed the engine and transmission unit several days ago and the paint came off the trans and spots on the engine. Rust had developed on them so I treated them with a coat of Ospho today. That will kill the rust and provide a sound surface for paint. I did not want to blast this unit because sand gets in places it does not belong. I also osphoed the master cylinder because it had no paint on it and I did not want to blast it. The following pictures show todays work.


poppop
Well-known member
- 2,316
- 39
- 48
- Location
- Brooklet, Ga
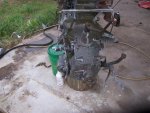
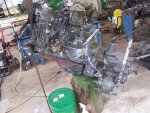
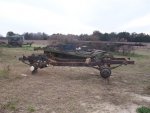
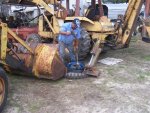
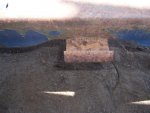
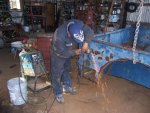
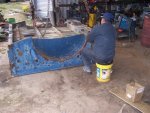
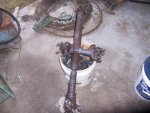 Its real wet here so have had time to progress on the truck. I had a couple areas on the cab I was not happy with and have gone back and fixed them. The cab is ready for paint. Today we worked on the bed. There were some welds that must have held something on in its past and I ground them down. Removed the rear fenders to sandblast and install new welting. Straitened some bent places and some of these required the torch to heat and work back into place. Had to weld a couple spots. The tool box had some rot so we put on some external patches and then realized all that unbolts and can be removed. It is now laying on the trailer ready for the blaster. Yesterday we demounted the tires and they did not want to leave the spot they had been in many years. Two backhoes and much pounding by my employee Efrain and the wheels are ready for sand blasting. Some of these pictures show the power pack and the driveshafts after their osfo treatment. I did not want to sand blast these componets because of sand getting into places it does not belong. They were cleaned very well with degreaser and a highpower washer and ospho brushed on. The black color shows the osfo has reacted with the rust and changed it into a harmless substance that can be painted over.
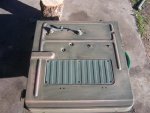
 One picture shows a bracket on the rear of the bed that I thought was welded on to reinforce the badly damaged tailgate. My tailgate had a cutout that matched this bracket and I thought someone had just cut it out. Turns out this bracket is bolted on and looks like it came from the factory that way. I can find no pictures that shows this bracket and my parts book does not show it. Have any of you seen this before??
3dAngus
Well-known member
- 4,719
- 102
- 63
- Location
- Perry, Ga.
In the first set of pictures, it looks like the hood is pretty much OK, but I can't tell. I am not seeing it yet in your work. I picked one up from Ferro last week but it has a lot of broken fiberglass/bondo in it. Might be repairable.
I also got some seats and springs. If you need either your welcome to it. I did not see your interior to see if everything is there or not.
Nice work. You're going to make my restore look like a child's work, but, if I hang on to it, the second go around will be body off full restoration. For now, I'm just hoping to make it look nice and run well, preserving it for the next go around. Just don't have the deep pockets right now to do it full body off, but I can live with that for now. Just happy to have it and get the rust off and clean it up for preservations sake.
DAP
New member
- 169
- 1
- 0
- Location
- Waxhaw, NC
That piece on the tailgate is a hinge and is factory for center support of the tailgate. A lot of them load up with dirt and junk, bind and then bend. They are commonly removed when destroyed. I don't have one and don't miss it but I also don't load the tailgate to the max.
poppop
Well-known member
- 2,316
- 39
- 48
- Location
- Brooklet, Ga
Dap, thanks for your reply. It will not be reinstalled on the truck.
Dell, new seats came with the truck. They will be installed and are not pictured because they are not an issue. The hood is cherry and only needs blasting and paint. This truck was really in great shape and the previous owner had already purchesed most of the parts to restore it. This will be the most extensive restoration i have done but will not be a complete frame off. I do have a Friend that is a perfectionest that comes over ever day to check on my progress. He has already cost me several hours extra work and today when he pointed out some things I missed I told him to go home, I did not have the time to do everything he thought I needed to do. He also thought I should mount the body on a modern frame with power steering and disk brakes with a V 8 engine and paint it candy apple red.
Dell, new seats came with the truck. They will be installed and are not pictured because they are not an issue. The hood is cherry and only needs blasting and paint. This truck was really in great shape and the previous owner had already purchesed most of the parts to restore it. This will be the most extensive restoration i have done but will not be a complete frame off. I do have a Friend that is a perfectionest that comes over ever day to check on my progress. He has already cost me several hours extra work and today when he pointed out some things I missed I told him to go home, I did not have the time to do everything he thought I needed to do. He also thought I should mount the body on a modern frame with power steering and disk brakes with a V 8 engine and paint it candy apple red.
- 114,414members
- 167,299threads
- 2,355,084posts
- 3,460online users
