• Steel Soldiers now has a few new forums, read more about it at: New Munitions Forums!

  • Microsoft MSN, Live, Hotmail, Outlook email users may not be receiving emails. We are working to resolve this issue. Please add support@steelsoldiers.com to your trusted contacts.


Steelsoldiers’ BIG M1152A1 HMMWV Project!!

steelsoldiers

Administrator
Staff member
Administrator
5,246
3,932
113
Location
Charleston, WV
Rain water could have gotten in through the damaged dipstick tube or some other route, it does not take much to taint the color.
Just keep an eye on the new oil.
I’m hoping and praying that’s the case! I left it under pressure for a few hours and there was nothing in the drain pain but oil.
 

steelsoldiers

Administrator
Staff member
Administrator
5,246
3,932
113
Location
Charleston, WV
Happy Veterans Day, everyone! I’ve been getting lots of exciting parts deliveries over the last few weeks, but today’s delivery was extra exciting! My doors arrived from Georgia!! Can’t wait to get these babies mounted up! Probably going to be a couple of weeks because I want to get my soft top installed first to make sure they line up as good as possible with it.
 

Attachments

TOBASH

Father, Surgeon, Cantankerous Grouch
Steel Soldiers Supporter
3,269
3,009
113
Location
Brooklyn, NY
Happy Veterans Day, everyone! I’ve been getting lots of exciting parts deliveries over the last few weeks, but today’s delivery was extra exciting! My doors arrived from Georgia!! Can’t wait to get these babies mounted up! Probably going to be a couple of weeks because I want to get my soft top installed first to make sure they line up as good as possible with it.
Maybe don’t place the doors on concrete without cardboard or wood beneath them??? They look too nice to ruin.
 

steelsoldiers

Administrator
Staff member
Administrator
5,246
3,932
113
Location
Charleston, WV
Got some more work done today. Fixed the loose/leaky dipstick tube first. I swaged the end with a drift to improve the interference fit, put on a new seal, and tapped the tube in place using a box end wrench and hammer. After that, I changed the oil/filter. Then, I installed the CDR valve and attached the hoses. Finally, I topped off the hydroboost reservoir.

After knocking out those projects, I started it and let it run for about 20 minutes to get it up to normal operating temperature. The good news is all of the oil, coolant, and hydroboost leaks were gone. The bad news is the injection pump has a steady leak coming from underneath the back of the pump. I really don’t relish the idea of having to replace the IP. I’ve done that job before and it sucks.

Here’s a quick update video from today:


Attachments

steelsoldiers

Administrator
Staff member
Administrator
5,246
3,932
113
Location
Charleston, WV
The guy I bought my truck from was nice enough to send me a spare turbo after hearing that mine was locked up. I tore the engine down to remove the turbo this afternoon. It wasn’t too bad of a job except for getting to the bolts that hold the exhaust onto the wastegate housing. Once I got the turbo out, I was able to unclog the valley drain and clean out an inch or more of mud, sand, leaves, and various bolts and bits of hose. It was nasty! I also washed down the whole valley and turbo with brake clean. It looks so much better.

Before I put the new used turbo in I am going to replace the rubber line that hooks to the IP. It’s cracked and frayed on both ends, so that may be part of my fuel leak problem. Can’t wait to see how it runs with a fully functional turbo!
 

Attachments

TOBASH

Father, Surgeon, Cantankerous Grouch
Steel Soldiers Supporter
3,269
3,009
113
Location
Brooklyn, NY
On my rig, the oil pressure sender hose was the older generation, and it was rotted and rusted. This would be a perfect time to check your oil pressure sender and replace it with the turbo out. Otherwise you will have a frustrating job ahead of you.

The newer units are built with either stainless steel or brass, I can’t remember, however, they do not rust. The older units have a hose that will rust and will be very frustrating for you.
 
Last edited:

steelsoldiers

Administrator
Staff member
Administrator
5,246
3,932
113
Location
Charleston, WV
Yep, you guessed it! Brake work!

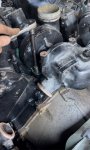
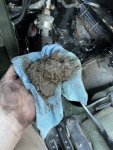
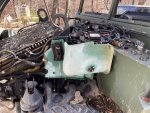
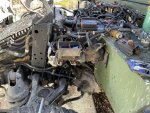
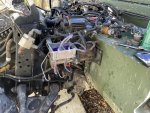
This truck has had a dead pedal since it rolled off of the rollback wrecker. When I say dead, I mean it would go straight to the floor with no resistance. Zip, zilch, nada. I suspected the master cylinder because one of the bails was bent and the reservoir cover was loose. Everything else had water and dirt all over/in it, so I figured the master cylinder did too.

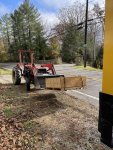
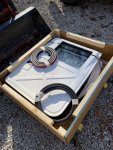
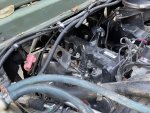
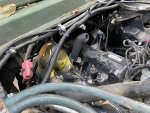
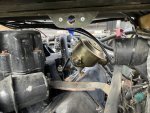
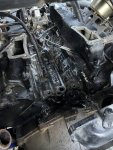
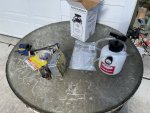
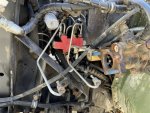
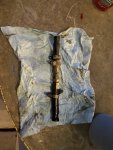
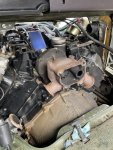
I pulled the old master cylinder off, installed my Dorman bench bleed kit on the new master, installed the new master, filled it with fresh DOT 5, slowly pumped the brake pedal until no more bubbles were visible in the hoses or reservoir, took off the bleed lines, and reinstalled the brake lines. I tried the pedal a few times and was pleasantly surprised at how firm it was!

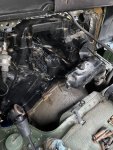
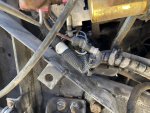
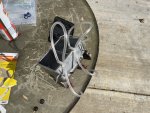
Next, I installed the Motive Power Bleeder. I like it a lot, but the big rectangular cover is a pain to get sealed sometimes especially if the top of the reservoir casting is a little irregular. Once I got it to hold pressure, I worked my way around the truck flushing out the lines and calipers. Shockingly, the fluid was clean and there wasn’t much air in it at all.

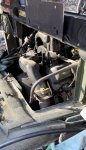
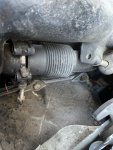
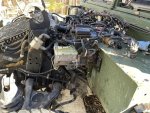
After I cleaned up all of the tools and mess, I reinstalled the intake and fired it up to go for its maiden voyage! It ran, shifted, and stopped well. The only issue with the brakes is the right rear parking brake is stuck on. I hit the pivot with some Kroil and will try to loosen it up tomorrow.

Here’s a little YouTube short of its first trip down the driveway:


Attachments

steelsoldiers

Administrator
Staff member
Administrator
5,246
3,932
113
Location
Charleston, WV
More progress this afternoon! I tapped gently on the parking brake lever with a large screwdriver and a hammer, and it gradually moved into the off position. Kroil did the trick! After that, I fired it up for another test run. I was amazed by how quick the truck was off the line this time. That brake was really dragging!

Next, it was time to tackle the stuck check valve in the fuel supply line. Thankfully, it has rubber lines on either side of it, so I was able to cut the ends and remove the whole section. The check valves are known to cause low or no fuel flow problems, so I replaced it with a straight section of 3/8” fuel line. Good news is I got diesel in my beard and down my arm lol. Bad news is it’s really tight in there and I scraped the heck out of both hands.

Once that was done, I went to work on the rubber line between the fuel pump and the stainless line on the frame rail. Thankfully, it wasn’t too bad of a job and the truck fired right up afterwards. It feels good to be running off of the fuel tank instead of a jerry can!
 

Attachments

TNDRIVER

Well-known member
Steel Soldiers Supporter
279
392
63
Location
Cleveland,TN
More progress this afternoon! I tapped gently on the parking brake lever with a large screwdriver and a hammer, and it gradually moved into the off position. Kroil did the trick! After that, I fired it up for another test run. I was amazed by how quick the truck was off the line this time. That brake was really dragging!

Next, it was time to tackle the stuck check valve in the fuel supply line. Thankfully, it has rubber lines on either side of it, so I was able to cut the ends and remove the whole section. The check valves are known to cause low or no fuel flow problems, so I replaced it with a straight section of 3/8” fuel line. Good news is I got diesel in my beard and down my arm lol. Bad news is it’s really tight in there and I scraped the heck out of both hands.

Once that was done, I went to work on the rubber line between the fuel pump and the stainless line on the frame rail. Thankfully, it wasn’t too bad of a job and the truck fired right up afterwards. It feels good to be running off of the fuel tank instead of a jerry can!
Had to replace both vinyl covered brake cables on the back of the '95 , just saying................. the c clips up on the body end are fun also!
 

steelsoldiers

Administrator
Staff member
Administrator
5,246
3,932
113
Location
Charleston, WV
Got some good news today! I’ve been trying to figure out where this knocking sound was coming from. I found it hard to believe that a recently rebuilt engine with good oil pressure could have a bad main or wrist pin, but sometimes crap happens with a rebuild.

I thought it might be a loose flex plate bolt, so I pulled the exhaust crossover and the inspection cover today to get a look at them. They were all pretty snug, but I did manage to tighten two of them a little bit. I put the cover back on and started the engine again. Same knocking as before SMH.

Next, I stuck a rubber hose in my ear and started listening to the engine with it. The crank damper and pulley were quiet and the valve train was okay too. The knocking noise seemed to be coming from the back of the oil pan, so I started to worry about the crank. It kept getting louder as I went further back, and seemed to get really loud at the inspection cover. Then it hit me… I wondered if the cover could be bent and was hitting the crank. I pulled the cover off again and discovered a spot where the crank had been grinding into the back of the cover! I started the engine without the cover and the knock was gone! Hallelujah!

Next up, it’s time to replace the injection pump because it has a serious fuel leak on the bottom. That should be fun!
 

Attachments

TOBASH

Father, Surgeon, Cantankerous Grouch
Steel Soldiers Supporter
3,269
3,009
113
Location
Brooklyn, NY
Change your oil ASAP. There is a strong risk that the fuel pump has spashed Diesel fuel into your oil, killing the viscosity. Don’t run your engine until the oil is changed and the pump is swapped out.

IMHO
 

steelsoldiers

Administrator
Staff member
Administrator
5,246
3,932
113
Location
Charleston, WV
Change your oil ASAP. There is a strong risk that the fuel pump has spashed Diesel fuel into your oil, killing the viscosity. Don’t run your engine until the oil is changed and the pump is swapped out.

IMHO
I’ve changed the oil a couple of times already, but how does the injection pump leaking fuel into the valley affect the oil?
 

TOBASH

Father, Surgeon, Cantankerous Grouch
Steel Soldiers Supporter
3,269
3,009
113
Location
Brooklyn, NY
I’ve changed the oil a couple of times already, but how does the injection pump leaking fuel into the valley affect the oil?
IP leaking or lift pump leaking?... Lift pump will contaminate oil.

Maybe my wires are crossed?

Sorry, I misread. I thought this was a lift pump problem.

1700940284023.png
 
Last edited:

cwc

Active member
Steel Soldiers Supporter
302
142
43
Location
Sweeden, KY
Can you tell what is leaking on the IP? Could be the front seal weep hole, advance plunger seal, injector line fitting or other place? A leaking injector line fitting or the advance plunger seal might be correctable without removing the pump.

Sent from my motorola one 5G UW ace using Tapatalk
 

steelsoldiers

Administrator
Staff member
Administrator
5,246
3,932
113
Location
Charleston, WV
Can you tell what is leaking on the IP? Could be the front seal weep hole, advance plunger seal, injector line fitting or other place? A leaking injector line fitting or the advance plunger seal might be correctable without removing the pump.

Sent from my motorola one 5G UW ace using Tapatalk
So I took a video of the pump while it was running and it looks like the fuel is spraying from the #4 injector line fitting. It is the same one that I discovered was a little loose when I was working on the turbo. I tightened it up a little, but it still kept leaking. That nut could have been cross threaded or they left it loose and the threads were fouled by all of the dirt and water in the valley, which prevented it from being properly tightened.

Here’s the video: https://youtube.com/shorts/x7xhfSg6Eho?si=t5FH9bHTlIuQMMeG

It’s upside down, so it’s the fitting in the top left corner of the video that’s leaking.

Before removing the pump, I am going to take the turbo off and remove the #4 line nut completely to inspect the threads on the pump. I might get lucky and be able to clean them and get it snugged down. If it was cross threaded, then I can try replacing the pump fitting and the line.

I will let y’all know what I discover.
 

steelsoldiers

Administrator
Staff member
Administrator
5,246
3,932
113
Location
Charleston, WV
This afternoon, I removed the turbo to take another look at the leaking injection pump. Once it was out of the way, I used my 5/8” crow’s foot socket to back the leaking nut off so I could inspect the threads on the IP. They looked very crusty, so used a wire brush to clean them up some. After that, I washed everything off with brake clean and tried reinstalling the injector line. It still didn’t want to go on all the way.

I took the line completely off again to get another look at the fitting on the IP. With a really bright light, I was able to see a little shine on the threads, which probably meant that it had been cross threaded. I used a 1/2” deep socket with a 3/8 to 1/4” drive adapter in the first attempt. It didn’t budge with a lot of force and I ended up snapping the adapter. Next, I tried a 1/2” deep socket on my 1/2” drive wrench and finally it broke loose! Once I removed the fitting, I could clearly see that the threads were mangled. Thankfully, I had another pump in the garage with some good fittings on it. I removed one of them and installed it on the pump in the truck. After that, I reinstalled the injector line and the nut threaded all the way on and tightened down just like it should.

I had a pretty good feeling about it, so I reinstalled the turbo and all of the associated intake plumbing. When I fired it up, it started on 7 cylinders, but smoothed out once the air worked out of injector #4. It sounded great running on 8 and there was no fuel leak!! Then, it was time for a test drive. The engine was very smooth with lots of power, and it didn’t leak! Wooooo!!

Here’s a video of the test drive:

https://youtube.com/shorts/T_IyU8OCqFg?si=RKhhKCXWsZvHO3Fw

Next, it’s time to reinstall the exhaust crossover and double check all of the fluids before taking it on a longer test drive!
 

Attachments

Top
AdBlock Detected

We get it, advertisements are annoying!

Sure, ad-blocking software does a great job at blocking ads, but it also blocks useful features of our website like our supporting vendors. Their ads help keep Steel Soldiers going. Please consider disabling your ad blockers for the site. Thanks!

I've Disabled AdBlock
No Thanks