1) Installed new exhaust elbow with welded fittings for future post-turbo temperature and pressure and drilled and tapped the exhaust manifold for future and current pre-turbo temperature and pressure. I removed the turbo to do this because I’m not about to risk any damage to my baby. As it turns out, getting the turbo in and out is a bit of chore and there were times I questioned this logic. Either way, I got it done. The fittings for the exhaust include the VDO thermocouples with ¼ NPT fittings, ¼ male NPT to 1/8 female 304 SST adapters, Swagelok SS-200-1-2 1/8 M NPT to 1/8 tube adapter fittings, and Swagelok SS-200-P plugs for spots with nothing hooked up just now. I put anti-size on all thread joints. I tightened the tapered threads in the exhaust just snug to avoid the potential for cracking the exhaust manifold. Pics below.
View attachment 438973View attachment 438974
2) I’ve got some crud on the engine in a couple spots, the IP, frame rails, transmission, transfer case, etc. So I sprayed some GUNK and pressure washed to clean up. Eeeks! I need more GUNK and need to do it again as it was more than my leftover cans of GUNK could handle. Went to the parts store to get 2 more. I need a 45 and/or 90 degree elbow for the wand on my pressure washer to get those tough spots.
3) In interest of stopping leaks, I snugged up a few of the IP fittings.
4) I got a new air filter ordered from realcustomtrucks on eBay. They shipped it right away and had a good price considering many of the surplus places out there. My air filter is dirty, browned, and has spots where it seems to have gotten wet a bit, but I don’t know if it needs replacing. I’m leaving the old filter in for now while I noodle on this.
5) Did some quick touch-up paint. Fortunately my onhand rattle cans that match made this very short work.
6) I took a pic of a “strange drop of oil” that repeatedly appears on top of the head stud close to the back of the engine. I do not have a plausible explanation for this just now. Suggestions most appreciated. Pic attached.
View attachment 438975
7) I aired up the front tires again. I’ve been concerned about cupping on the front tires and recently increased air pressure from 40psi when I got the truck to 50psi. It seemed to help with both ease of steering and cupping wear. My cupping is on the outboard side of both front tires and the extra wear is on the rear side of each NDT lug. Today I checked the shocks after driving for a few minutes and they were definitely warm at the top, so I doubt they are bad. So, I increased air pressure in the front tires to 55psi to see what effect is has.
View attachment 438976
")
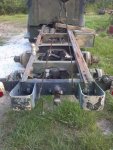
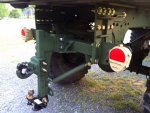
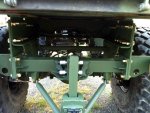
Fought Murphy with a vengeance. As I pulled out the drive I heard a clanging that concerned me so I immediately shut the engine off. I poked around and could not find anything out of order, so I opened the hood and restarted the engine. The belt for the compressor had a strange piece of sheet metal rubbing on it so I ran back to shut the engine back off. Sure enough, there was a bracket that broke off and fell there. WTF! And it just happens as I pull out of the drive? While I wish it never happened, the timing is good enough to thank Divine Grace. It dug a little groove in the balancer in seconds, so I’m certain it would have left me stranded if it had been allowed to chew into a hose, cut the compressor belt, etc. I do not know where this bracket came from but it seems to be a radiator mount bracket or something. Pics attached.
View attachment 438977View attachment 438978
9) Went for a test drive. Having an EGT gage and boost gage really helps with understanding what the engine is doing. I’m monitoring pre-turbo temps. I’ve noticed that while climbing hills in 4[SUP]th[/SUP] I see up to about 850°F while limited to 2000 RPM or less while not trying to push it real hard (being patient while climbing a grade). I see temps up to 950°F in OD on the freeway. It seems like the combination of high RPM and trying to push it hard makes the EGT’s rise quickly. They cool off relatively quickly also and seem to bottom out at 400°F or so for some time while cooling down.
10) In getting back I did a quick inspection and found grease blowing out from the passenger side again. I’m not sure what to think of this happening repeatedly so will remove the axle housing vents and clean them just to be sure. Any help appreciated.
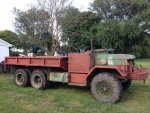
View attachment 438972View attachment 438979

 76.9 KB Views: 48
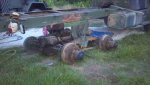 49.7 KB Views: 47
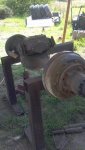 47.6 KB Views: 46
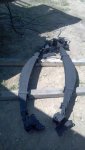 47.4 KB Views: 46
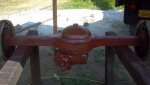 36.8 KB Views: 47
 39.7 KB Views: 54
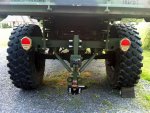


")