• Steel Soldiers now has a few new forums, read more about it at: New Munitions Forums!

  • Microsoft MSN, Live, Hotmail, Outlook email users may not be receiving emails. We are working to resolve this issue. Please add support@steelsoldiers.com to your trusted contacts.


What did you do to your deuce this week?

red

Active member
1,988
22
38
Location
Eagle Mountain/Utah
One does not want it to leak OUT or to LEAK ANYTHING IN!
I take the liberty of all caps as that is how important it is.
My apologies to the powers that be.
It MUST BE vented to atmosphere at some point.
Seal off the vent and you get to replace the MC.

View attachment 555381
The threads on the new external reservoir cap allow enough venting for the hydraulic part of the brake system
 

Valence

Well-known member
Steel Soldiers Supporter
2,131
605
113
Location
Davis County, UT
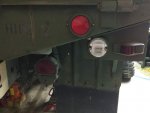
I finished wiring the rear marker lights (old A3 brackets, new paint and lights) to the "21" circuit (look for the wire end on the tail light/rear harness with the little metal tag crimped to the wire with a "21" stamped in it - probably will be covered in dirt and paint like mine was). The red marker lights come on when ever the tail lights are on, but do not flash with the turn signal/4-way, and of course, don't get brighter when the brakes are applied.

image.jpg

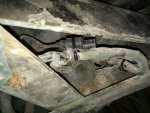
I also connected the reverse lights to a 'Y' splitter in preparation for a line run to a switch in the cab. Modifying that shaft on the transmission for automatic reverse lights is too much for me right now, so a manual switch it is! I'm still a bit crazy though, did go to the trouble of undoing a couple bolts on the rear wire harness right beside the pintle so I could route the new reverse light wire through the same hold-down points. The 'Y' splitter is on the driver's side so I can follow the harness forward.
image.jpg
 
Last edited:

Woodsplinter

Member
723
6
18
Location
Phoenix/AZ
I finished wiring the rear marker lights (old A3 brackets, new paint and lights) to the "21" circuit (look for the wire end on the tail light/rear harness with the little metal tag crimped to the wire with a "21" stamped in it - probably will be covered in dirt and paint like mine was). The red marker lights come on when ever the tail lights are on, but do not flash with the turn signal/4-way, and of course, don't get brighter when the brakes are applied.

View attachment 555687

I also connected the reverse lights to a 'Y' splitter in preparation for a line run to a switch in the cab. Modifying that shaft on the transmission for automatic reverse lights is too much for me right now, so a manual switch it is! I'm still a bit crazy though, did go to the trouble of undoing a couple bolts on the rear wire harness right beside the pintle so I could route the new reverse light wire through the same hold-down points. The 'Y' splitter is on the driver's side so I can follow the harness forward.
View attachment 555684
I decided to connect my reverse lights to a switch on the dash also- that way I can use them as work lights.
Also, if I want to sneak around or be covert, the backup lights won't come on in reverse.

(Sneak around in a deuce? Dudes crazy.)
 

Valence

Well-known member
Steel Soldiers Supporter
2,131
605
113
Location
Davis County, UT
I decided to connect my reverse lights to a switch on the dash also- that way I can use them as work lights.
Also, if I want to sneak around or be covert, the backup lights won't come on in reverse.

(Sneak around in a deuce? Dudes crazy.)
:funny:

Hey, I totally agree! There's a part of me that wants to maintain the original functions - that includes blackout.

I hadnt thought about the ability of using them as work lights. Nice think'n!
 

TGP (IL)

Active member
511
33
28
Location
Metro East IL
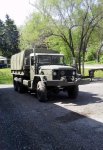
Well Truck is coming along Nicely.
Spent $$$ from several different Vendors to get what needed/wanted.
Of course were still not done!
I like to spread it around to these folks.

Anyway Brakes squared away except for steel lines. Not bad but should be replaced.
Installed front bumper folding step kit.
Remote Master Cylinder reservoir in the inside cab corner.
Took doors apart and cleaned, Lubed mechanisms, and undercoated inside.
All fluids/filters taken care of, Complete Chassis Greased etc.
Lights, Tires, Lug wrench, jack etc. checked
Keyed Master Battery Disconnect Switch at Battery box.
Licensed and insured.

Still need low air buzzer, buzzer on the way. few other odds'n'ends!
Should be getting close!

Thanks
Tom
 

Attachments

Last edited:

Rmtaunton

Well-known member
1,510
31
48
Location
Smyrna, ga
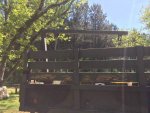
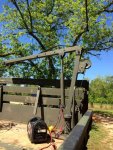
32x 18 1/2 inch plate on top going to 3' 5/16 in the ribs of the bed , 3 of them , a little overkill but what I had with 12 5/8 grade bolts
 
Top
AdBlock Detected

We get it, advertisements are annoying!

Sure, ad-blocking software does a great job at blocking ads, but it also blocks useful features of our website like our supporting vendors. Their ads help keep Steel Soldiers going. Please consider disabling your ad blockers for the site. Thanks!

I've Disabled AdBlock
No Thanks