• Steel Soldiers now has a few new forums, read more about it at: New Munitions Forums!

  • Microsoft MSN, Live, Hotmail, Outlook email users may not be receiving emails. We are working to resolve this issue. Please add support@steelsoldiers.com to your trusted contacts.


What have you done to your CUCV today/lately - Part 2

Mainsail

Well-known member
Steel Soldiers Supporter
1,420
1,420
113
Location
Puget Sound, WA
I finally gathered all the parts I needed to install the big antenna on the CUCV.

I'm not really sure what this was used for, but I think it was a training antenna for triggering or jamming IEDs? Not sure. Anyway, there was a 315MHz whip antenna mounted in a plexiglass strip that is screwed into the lid of the antenna tube. Below the antenna is a 40db attenuator (why?) then a long bit of thin coax down the otherwise empty tube to the PL-259 in the base.

I picked up a Comet SBB-5NMO for a couple reasons- it's the tallest that can fit inside the tube, and and it doesn't need a ground plane. I also got a 10" bulkhead connector and an adapter to make it NMO. This was a bit of a mistake. My plan was to screw a nut underneath, and another inside the tube at the base- but that would have prevented the spring from bending. :neutral: Instead I have the nuts on each side of the tube base. This will work for now and let the spring move some, but I'll noodle the mount set-up.

Once the antenna was inside the tube, I found another problem; the antenna flexes and will bang around inside the tube- not ideal. Remember that plexiglass piece that's screwed into the tube lid? I put a rubber grommet in the hole (where the whip was mounted) and fed the Comet antenna up through. This keeps the upper part of the antenna centered in the tube and not slapping around.

For giggles I sat the tube on top of the riser- easily gets the whole antenna above the roof-line but between the weight of the antenna assembly and the wind load I expect, I think the bracket will crack over time. I pulled the riser off and bolted the antenna to the bracket and connected the antenna feed line from the radio.

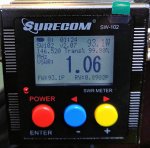
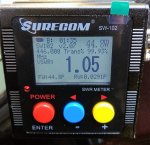
The results are very good. I'm hitting repeaters loud-&-clear I usually can't hit from my driveway. The signal is getting in and out of the tube just fine. The Sheriffs' and fire freqs are coming in better than the previous as well.
Some follow-up to my Duke antenna install. I picked up a pretty good SWR meter and here are the results. Much better than I was expecting, especially given it's a pre-tuned antenna and it's inside that thick tube.
 

Attachments

emeralcove

Member
Steel Soldiers Supporter
134
14
18
Location
Battle Ground/WA
Like any of us thinks that engine will ever be anything but clean................................when you are "carried away" that far there is no coming back, LOL. Beautiful attention to detail is what makes it so special, really a joy to follow your progress.
 

rustystud

Well-known member
9,071
2,387
113
Location
Woodinville, Washington
Like any of us thinks that engine will ever be anything but clean................................when you are "carried away" that far there is no coming back, LOL. Beautiful attention to detail is what makes it so special, really a joy to follow your progress.
Yes, it is the attention to detail that catches the eye. Very well done !
 

rustystud

Well-known member
9,071
2,387
113
Location
Woodinville, Washington
Plastic tank arrived. Got it all mounted up. I will probably get a plastic welder to move the filler neck.

View attachment 775827 View attachment 775828 View attachment 775829 View attachment 775830
Buy a quality plastic welder and lots of extra plastic rod to practice with. I bought a medium quality one which worked OK, but for quality work I needed a better welder. Also you will need lots of practice to get a good weld. I spent a lot of time with mine to finally get the quality and look I was after.
 

cucvmule

collector of stuff
1,129
552
113
Location
Crystal City Mo
Yep for sure, I use Permatex copper anti seize on anything that I know will need thread protection, taken apart at a later time. I also use it on shock eye, rubber bushings, swaybar bushings, leaf spring bushings, sway bar bushings. You get the idea that I have a lot of uses for the stuff.

I buy it in 8oz bottles and will last me for a looong time.

Maybe not!
 

Rutjes

Well-known member
Steel Soldiers Supporter
359
272
63
Location
Amersfoort, The Netherlands
Buy a quality plastic welder and lots of extra plastic rod to practice with. I bought a medium quality one which worked OK, but for quality work I needed a better welder. Also you will need lots of practice to get a good weld. I spent a lot of time with mine to finally get the quality and look I was after.
I have thought about this before. I do own a DeWalt heat gun that can be used for plastic welding. For this one time need, I think I'll let a pro handle it.

Before you button that all up, get some anti-seize on all the bolts in case it ever needs to come apart again.
Good idea. I already tried to use as short as possible bolts where I can. Some of the original bolts (all over the truck) where way too long. Made removing the rusty bolts even harder then it already was.
 

rustystud

Well-known member
9,071
2,387
113
Location
Woodinville, Washington
I have thought about this before. I do own a DeWalt heat gun that can be used for plastic welding. For this one time need, I think I'll let a pro handle it.


Good idea. I already tried to use as short as possible bolts where I can. Some of the original bolts (all over the truck) where way too long. Made removing the rusty bolts even harder then it already was.
I think that is the best idea letting a pro handle it. That is what I would do on such a sensitive area. The last thing you need is fuel leaking all over the place ! Mine was a bumper and who cares if it leaks.
 

Swfb

Member
77
97
18
Location
Netherlands
My m1008 has problems whit the blinkers in combintion with the regular lights.
When the lights are on, and the blinkers are used all the lights are flashing. Verry lightely but they are flashing.

I cleaned the 2 grounds above the headlights. Also the ground on top of the frame at the battery side. The grounds connected to the battery.
The ground on top of the frame close to the rear bumper.
The 2 grounds located behind the taillights. And even swapped the complete taillights and wiring.

Changed the 2 front blinker bulbs and non of this solves the problem.

Not sure where to look next I hope one of you can advise me what would be the next point to check
 

Mainsail

Well-known member
Steel Soldiers Supporter
1,420
1,420
113
Location
Puget Sound, WA
My m1008 has problems whit the blinkers in combintion with the regular lights.
When the lights are on, and the blinkers are used all the lights are flashing. Verry lightely but they are flashing.

I cleaned the 2 grounds above the headlights. Also the ground on top of the frame at the battery side. The grounds connected to the battery.
The ground on top of the frame close to the rear bumper.
The 2 grounds located behind the taillights. And even swapped the complete taillights and wiring.

Changed the 2 front blinker bulbs and non of this solves the problem.

Not sure where to look next I hope one of you can advise me what would be the next point to check
Take your ohm meter around to all the bulb sockets- make sure the outer part of each socket is demonstrating a good ground.
 

emeralcove

Member
Steel Soldiers Supporter
134
14
18
Location
Battle Ground/WA
Swfb, also check the lamp sockets, pieces of the metal contacts break off in the socket and short across the pins on the lamp and make weird things happen.
 

Swfb

Member
77
97
18
Location
Netherlands
Thanks for the tips. I'm going to search for loose parts and check the grounds with the meter next weekend.

I'll update this thread next weekend. Hopefully with good results!
 

Keith_J

Well-known member
3,657
1,313
113
Location
Schertz TX
Glow plugs..wait light was on too long so I finally had time after work on Sunday morning. I had Bosch DTs on hand, trimmed the spades down and got my tools..stock GPs are 3/8", have the deep socket. But Bosch are 10mm so I had to use a combination wrench.

Fixed the starting problem immediately. 6 of 8 were open. Thinking of making a glow plug voltage indicator lamp using multicolored LED. 12 volts and under yellow, over 12 red. Put this in the wait light socket to keep cascade failure minimum.
 
Top
AdBlock Detected

We get it, advertisements are annoying!

Sure, ad-blocking software does a great job at blocking ads, but it also blocks useful features of our website like our supporting vendors. Their ads help keep Steel Soldiers going. Please consider disabling your ad blockers for the site. Thanks!

I've Disabled AdBlock
No Thanks