- 10,893
- 7,493
- 113
- Location
- Camp Wood/LC, TX
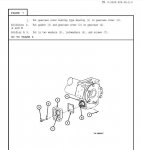
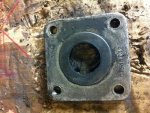
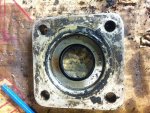
Make a through cut inside the bore with a long metal cutting blade in your Sawzall. Then you can easily pull it out. A slide hammer bearing puller similar to a dent puller will work too.
Steel Soldiers now has a few new forums, read more about it at: New Munitions Forums!


I already ordered these from White Owl but thanks for the heads up. Hey I heard somebody got a 5-ton!jckife give crush bearings down by the main post office a try for bearings,bushings an seals. call me if you need directions. we get a lot of odd bearings and seals from them. good bunch to work with.

This was great advice, worked like a charm--thank you. The new bearing sleeve is in.Make a through cut inside the bore with a long metal cutting blade in your Sawzall. Then you can easily pull it out. A slide hammer bearing puller similar to a dent puller will work too.
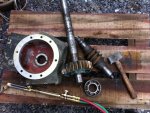
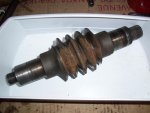
Keeping the worm gear in the bearing it was already in, I pressed both out and inserted the drive shaft / big gear. Then pressed the worm gear / rear bearing assembly back in and pressed the other side bearing on. Like butter. Used old bearings of the same size as spacers for the arbor press.Which method did you use to reassemble?
That's correct.........It's looking to me like they are 5/16-18 thread.....
Wow, someone has switched mine over to shorter ones, then--they measure .60 inches! But I'll go ahead and order 5/8 with new star washers--thanks!That's correct.
Exact length is 5/8" minus 0.03" (for the assembled external star lock washer)
G.
Hey, every M35W/winch-owner could respond that Q... they are just a bit lazy...!
We get it, advertisements are annoying!
Sure, ad-blocking software does a great job at blocking ads, but it also blocks useful features of our website like our supporting vendors. Their ads help keep Steel Soldiers going. Please consider disabling your ad blockers for the site. Thanks!
