Cdub
New member
- 1,082
- 2
- 0
- Location
- New Milford, NJ
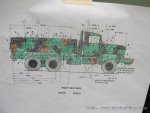
After doing the research on the Woodland from the TM's and comparing that to what is painted on my Marine Corp. ISO cargo cover. I found that there were very slight differences. I would have to say that the Marine and Army woodland paint scheme are just about the same. Even from all the pictures I’ve saved. There are differences but basically follow the TM’s.
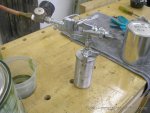
I've been working on doing the woodland on the five ton. I'm just looking to do the pattern on what I've done in the green so far. Which is about 75 percent. I tried using some spray cans in the black and the brown........but it just DIDN'T work out......!!! I found myself figuring out that the spray can thing was for the birds and went and ordered a gallon of the black and brown from Rapco. I even went out and got myself a little touch up spray gun. I used the touch up gun for some small parts and it worked out really well.
I don't think I'll go that route with masking off each of the patterns. I think I have the skills for doing a real nice job similar to the Military and I like the blending of the colors when doing it free hand. The patterns worked out really nice but the Spray Cans keep messing me up big time. I have more control with the touch up spray gun such as Air Pressure, Fan Width, and Amount of Material being sprayed........We'll see what happens. I’ve now wet sanded all that I've done on the woodland on the right side of the cab for the do over. Now I just need to touch up the green and make it nice like it was and get it ready for the Black and Brown again.............I hate doing stuff twice.....!!! Hahahaha......but if that's what’s going to keep me happy then I guess I must other wise I won't be able to stand myself......
So now.........
I'm ready for the green touch up again.....and just waiting for the shipment of black and brown gallons in the meantime.........
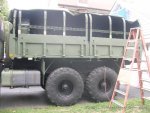
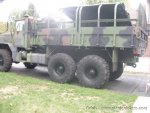
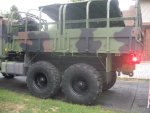
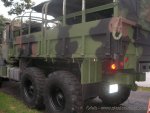
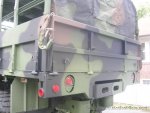
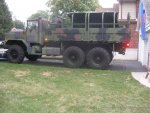
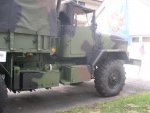
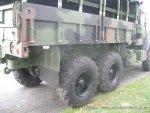
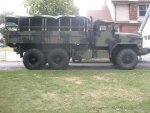
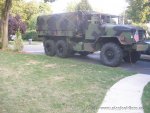
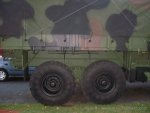
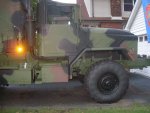
The paint came in and this was the results of my FIRST woodland paint job on a Five Ton Cargo……
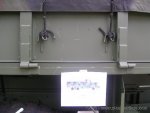
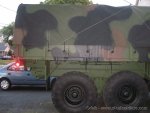
When it was time for the rear tailgate, I noticed that I have the wrong end curtain on the back. That’s why you’ll see most of the cargo cover removed even in the front when I had to switch end curtains.
seya,
C’dub
I've been working on doing the woodland on the five ton. I'm just looking to do the pattern on what I've done in the green so far. Which is about 75 percent. I tried using some spray cans in the black and the brown........but it just DIDN'T work out......!!! I found myself figuring out that the spray can thing was for the birds and went and ordered a gallon of the black and brown from Rapco. I even went out and got myself a little touch up spray gun. I used the touch up gun for some small parts and it worked out really well.
I don't think I'll go that route with masking off each of the patterns. I think I have the skills for doing a real nice job similar to the Military and I like the blending of the colors when doing it free hand. The patterns worked out really nice but the Spray Cans keep messing me up big time. I have more control with the touch up spray gun such as Air Pressure, Fan Width, and Amount of Material being sprayed........We'll see what happens. I’ve now wet sanded all that I've done on the woodland on the right side of the cab for the do over. Now I just need to touch up the green and make it nice like it was and get it ready for the Black and Brown again.............I hate doing stuff twice.....!!! Hahahaha......but if that's what’s going to keep me happy then I guess I must other wise I won't be able to stand myself......
So now.........
I'm ready for the green touch up again.....and just waiting for the shipment of black and brown gallons in the meantime.........
The paint came in and this was the results of my FIRST woodland paint job on a Five Ton Cargo……
When it was time for the rear tailgate, I noticed that I have the wrong end curtain on the back. That’s why you’ll see most of the cargo cover removed even in the front when I had to switch end curtains.
seya,
C’dub
Attachments
-
 150.3 KB Views: 851
 -
 148.7 KB Views: 848
 -
 147.3 KB Views: 848
 -
 159 KB Views: 844
 -
 132.8 KB Views: 846
 -
 128.7 KB Views: 851
 -
 130.9 KB Views: 854
 -
 156.5 KB Views: 849
 -
 158.2 KB Views: 844
 -
 164.4 KB Views: 845