• Steel Soldiers now has a few new forums, read more about it at: New Munitions Forums!

  • Microsoft MSN, Live, Hotmail, Outlook email users may not be receiving emails. We are working to resolve this issue. Please add support@steelsoldiers.com to your trusted contacts.


Working On The M923A2

M813rc

Well-known member
Steel Soldiers Supporter
4,060
2,726
113
Location
Near Austin, Texas
One of my M931s has a smurf blue cover too. Were they installed that way, or did all the yellow fade out of someones green?

Cheers
 

mkcoen

Well-known member
Steel Soldiers Supporter
5,637
380
83
Location
Spring Branch, TX
One of my M931s has a smurf blue cover too. Were they installed that way, or did all the yellow fade out of someones green?

Cheers
Faded. There's a nice green stripe at the back where the upper blocked the sun. Another reason I need to get a shed built to park everything under. You'd think I'd learn to buy smaller stuff so it'd fit in the shop.
 

mkcoen

Well-known member
Steel Soldiers Supporter
5,637
380
83
Location
Spring Branch, TX
I decided to go ahead and replace (or add) the large filter. Not really sure why it was removed but I noticed the petcock was clogged so figured I might as well clean or replace it while I was at it. After I got the filter housing fully removed and emptied I notice quite a bit of gunk in the bottom. It almost appears to be blast media. There's definitely paint chips in it and some sand. Keith_J was by and pulled the petcock out and got it cleaned up and swabbed the inside of the canister. Nasty stuff that would have been nastier if it'd gotten through to the injectors.

Unfortunately NAPA can't get the filter until Monday so it'll be sitting the weekend while I wait for them.

The 1st pic is inside the canister and the second is looking through the hole where the petcock goes. It was plugged pretty much solid. Good indication for all you guys buying trucks that no matter how good they look on the outside you still need to do maintenance on them like it'd never been done before. Don't assume they were put away in the manner that they should have been.


002.jpg003.jpg
 
Last edited:

davo727

New member
742
2
0
Location
Cleveland, TX , Spring , TX
Did you look at the fuel hose from that filter to the engine? Mine was kinked in half shortly after it goes over the frame in a place you cant hardly see it. Mark in the woodlands A2 was also.
 

mkcoen

Well-known member
Steel Soldiers Supporter
5,637
380
83
Location
Spring Branch, TX
Did you look at the fuel hose from that filter to the engine? Mine was kinked in half shortly after it goes over the frame in a place you cant hardly see it. Mark in the woodlands A2 was also.
Thanks. I'll check it in the morning.

How's yours running?
 

davo727

New member
742
2
0
Location
Cleveland, TX , Spring , TX
It ran great home from sanmarcos even with that kinked fuel hose. Havent driven it since, I want to go over it good first.

Mark in woodlands had a new fuel hose made for his at the Parker Hose store in Conroe called Huffco. I will be going over there to get one made next week.

I will be bringing home another 923 next week from Ft Hood.
 

mkcoen

Well-known member
Steel Soldiers Supporter
5,637
380
83
Location
Spring Branch, TX
I got the new fuel filter this morning and installed it. The first thing I did was put the new canister gasket into the lid that's mounted under the fender and added the o-ring to the bolt. Then I put the new filter in the canister, compressed it, and started it on the bolt. I spun it up until there was about 1/2" between the top of the canister and the lid. With a small hose I siphoned diesel into the canister until it was just a hair under the lip, spun the canister the rest of the way up forcing the filter down into the diesel, then tightened the bolt. The reason I did it that way was to try and avoid trapping air in the top of the canister and needing a lot of priming. It apparently worked. I started it and was running smooth and then started to cough like it was sucking air. I shut it down real quick, opened the banjo fitting, primed it a couple of pumps, and it started right up.

After I let it warm up good I did the pre-flight inspect and took it for about a 3 mile road trip to the local Shell for $99 worth of diesel. She ran great there and back and should be ready for her 1st show at Camp Mabry Apr 26 and 27th.

Here's a pic of the correct NAPA filter. It comes with the right gasket and o-ring and hopefully works the way it should. Again, this is the large canister filter and not the spin on fuel/water separator.

003.jpg
 
Last edited:

Keith_J

Well-known member
3,657
1,314
113
Location
Schertz TX
Yes, that canister is both a filter and water sep. The spring in the bottom is a positive clue. I don't understand NAPA stocking, other than to say they are independently owned franchises with some ability to view inventory at other stores. They do have quality parts, often OEM. Far cheaper than dealer too.
 

mkcoen

Well-known member
Steel Soldiers Supporter
5,637
380
83
Location
Spring Branch, TX
Well I didn't work on mine but went to help a friend recover one from N. Ft Hood yesterday. It was a long day and went mostly good but did have a minor hiccup on the way home. The truck was advertised as "runs" which means they slaved it and it started - once. Of course the batts were deader than anything so while he pulled the 4 6TMFs out I gave the truck a quick once over. Everything looked pretty good except for 1 serious flat on the left middle axle. That was what had me worried the most.

While I hooked the 2 new Series 31 batts up he checked all of the fluids then I made sure we had plenty of fuel at the IP and we were ready to try and start it. Fired before it sounded like the crankshaft turned 1/2 way around! The air started building pressure, only the HWY light blinking on the CTIS, and no funny noises that shouldn't be there. We then started airing up all of the tires. He had brought a small portable generator and air compressor and went to work with those while I started on the other side with the gladhand. The bad tire didn't look any better but at least it was holding air and we got them all up enough to get moved off post so we didn't keep the GL guy hanging around.

I drove it out the gate and stopped under some trees just across the street. We left it running just in case our luck didn't hold with the starting thing. After some more time airing up the tires we hit the road with me following in the chase vehicle.

We made it about halfway between Lampasas and Leander when that questionable tire answered the question about whether it would make it home. So here we were on the side of the road, oh and did I mention the spare tire block and tackle was missing? We wound up rolling the spare off the truck and were able to manhandle the flat into the back of the pickup. The changing itself went pretty smooth and we made it back on the road and to his house with no further incidents. All told a 12 hour day for me between driving to meet him, the trip to Hood, and driving home. Now I just need to think of something for him to spend 12 hours helping me with :)

001.jpg
 

mkcoen

Well-known member
Steel Soldiers Supporter
5,637
380
83
Location
Spring Branch, TX
One of the problems I noticed on picking my truck up originally is that the front CTIS shield makes it really difficult to use my gladhand hose to air the tires up. There's just not enough space for the angled neck to fit in there and make good contact. The easy fix would be to just put a stem extension on it and be done. However since I do a lot of living history events I like to keep things as close to "in service" as possible so, while it might not be noticeable to the average person it'd bug the heck out of me. Still, taking the shield off every time I want to check the tire pressure isn't an option either so I compromised. I picked up an extension at NAPA and I'll just keep it in the tool bag and put it on when I need it. It'll also be handy in case a deuce driver is around who is missing one of theirs and would like to make it easier airing their own tires up.

I also got all of my tools together. I went beyond the basic "BII" tools and added a 3/4" Robotool, slave cable, upped the lifting capacity to a 12ton jack (plus a piece of 2x10 and several 2x6s for firmer footing), and, of course, the gladhand air hose. When I'm actually on the road I'll probably grab my 3/8" drive folding tool kit I keep in the F250 for smaller things like battery terminals. I also added some safety items in way of a couple of batches of flares and a military triangle kit from a former vehicle plus a little PLL in a gallon of 30wt and a quart of power steering fluid. I'm sure glad they have 2 tool boxes on the truck or I might have run out of room.

001.jpg002.jpg003.jpg
 

Attachments

Last edited:

mkcoen

Well-known member
Steel Soldiers Supporter
5,637
380
83
Location
Spring Branch, TX
I did a little touch up painting today. The 1st spot was the left front inner fender. It was obviously tan CARC at one point and appears that the area wasn't prepped real well before they resprayed the camo. I took a scraper and got all of the loose stuff off and then reapplied some flat black and a little Rapco 383 green from a rattle can.

The second area has a bit more in the way of damage. This is the rear area of the left front fender where 2 pieces are joined together. I was hoping it was a real "2 pieces" that I could just unbolt and fix but it is spot welded in a couple of places. I have a spot cutter and could have taken it apart to fix it correctly but I have a few events coming up this month, including tomorrow, and didn't want it out of commission too long. Once I get past the 1st weekend in May I'll take it completely apart and do it right. The problem is some serious rust right where the 2 parts come together. Each piece is going to have to be ground down and some welding of holes to get it right. For now I ground what rust I could out of the area then hit it with the flat black. It looks good enough to pass but I don't want to have to be replacing the fender a couple of years down the road so will do it right (next month).

004.jpg007.jpg005.jpg008.jpg006.jpg010.jpg
 

mkcoen

Well-known member
Steel Soldiers Supporter
5,637
380
83
Location
Spring Branch, TX
This weekend I was able to pickup a set of, mostly, fiberglass troop seats, bows, and a cover for the truck. All-in-all everything looked pretty good except for some peeling paint on the part of the troop seats that isn't fiberglass, the top rails, and the wood on the bows.

Yesterday I took the bows apart and sanded down the wood. There are a couple with ends that are splitting so I picked up some Gorilla Glue epoxy, coated the split part and worked it down into the cracks, then clamped it for about an hour to let it cure real good.

Keith_J came over today and helped me wrestle the troop seats around and get the wood scrapped and sanded then we went over those and the bows with some Behr Marque 383 green. While they were drying we painted the fiberglass uprights and the bow corners with some Rapco rattle cans. Everything dried in an amazingly short time due to the warm temperature and abundant sunshine reflecting off my concrete driveway. Once the troop seats were back on the truck Keith touched up the camo colors on the newly painted wood sections and we reinstalled the bows.

We had pressure washed the cover earlier in the day and it was well dried now so we wallowed it into place for the most part. I'm waiting on some super rope from McMaster-Carr (hopefully be in tomorrow) so we can get the tiedowns in place and button it up. For now we've got some bungee cords holding it down in case we get any thunderstorms through before the rope arrives.

The reason I was in such a hurry to get this on is that we have a big event at Camp Mabry in Austin this weekend: http://www.heroes-airshow.com/austin/2014/14.1 TX Flyer Pax.pdf

Anyone in the TX area should try and make this as it's a great event. We've got 30 vehicles registered so far and then there's the WW II armor re-enactment both days. Something particularly special is the award ceremony for a 108 year old WW II veteran (oldest living WW II vet) taking place on Saturday.

I still need to pressure wash the truck and do all the PMCS before Saturday but hopefully I'll have some place dry to sleep this weekend with the new top.
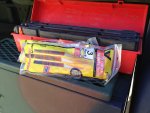
Pics:
1: On the way home
2: Troop seats being sanded
3: Troop seats after paint
4: Bows before
5: Bows after paint
6: Back on the truck and camo'd up
7: Cover sort of in place
8: Behr 383 Green Home Depot code

007.jpg010.jpg013.jpg009.jpg012.jpg014.jpg015.jpg011.jpg
 

mkcoen

Well-known member
Steel Soldiers Supporter
5,637
380
83
Location
Spring Branch, TX
Got the super rope in today and on the truck. Finally looking like it should. A little too hot out this afternoon so I'll need to wait until tomorrow and scrub the cover down one more time. Now that it's stretched out it'll be a lot easier than it was laying on the ground.

001.jpg
 

mkcoen

Well-known member
Steel Soldiers Supporter
5,637
380
83
Location
Spring Branch, TX
Well 5 months later and I let the truck go. Too hard with my MS to get the Class B license so I'll try a LMTV if they start selling cheaply enough again. A member from AL bought it and just rolled out of the drive. Sad to say I really "EFF'd" up just before he got here though and made myself look pretty stupid. I wanted to prep it to make sure everything was just right for his long drive and the last thing I attempted to do, with the truck running (that's the "EFF'd" up part), was drain the water from the large filter. I was doing that and not paying attention and sucked up a bunch of air and killed the engine. "No problem" says I, not knowing what was to come next.

Cracked the banjo fitting at the IP and pumped, and pumped, and pumped, and pumped until there was a steady stream. No start. Pumped, and pumped, and pumped, and pumped. Still no start. Started cracking injector lines and no fuel. Pumped, and pumped, and pumped, and pumped. No start. By now the new owner had showed up and saw that the truck I had told him had NO problems whatsoever, wouldn't start. Then Keith_J showed up and tightened the lines I had loosened back up and the truck fired and took off. But NOW there was a leak at the IP and it wasn't the line. After about an hour we finally figured out it was the nut under the line nut that had come loose when breaking the line nut loose. Now the truck was running, no leak, and 2 hours after they should have headed back toward AL the new buyer was finally on the road.

I'm going to miss that truck. It was probably the best thing I've gotten from GL yet and it was really a joy to drive. I'm not holding out much hope that any LMTV I wind up with will be as nice or trouble free (excluding today) as this truck was.

Best of luck to the new owners and I hope he has as much fun with it as I have.
 

bertsbases

New member
5
0
1
Location
cedar creek texas
I let mine go too that I got at the same sale. I ended up having $5000 in it after the purchase, title, inspection, & parts. I had installed an additional electric fuel pump, headlights, license plate light, wiper blades, & a regulator assembly on the alternator. I cheated on the filters & never took them off. I was kinda glad to see it go because a four wheeler scared the heck out of me as I was driving out of Austin after dark. We had taken it watch to the ROT rally parade and made it almost to the airport heading towards Bastrop. A parked mini van came from the right shoulder & made a u turn directly in front of me as I was going about 45 - 50. I jammed the brake pedal & it locked all the tires & began to slide sideways a little. I barley missed those clowns, & after they made it around me, they saw headlights in their face, & whipped it off into the grass. BTW, those air brakes don't immediately release when you get off the pedal. In the end the buyer paid $8000, so all is good. Maybe I need a deuce so I will be legal with my existing license - but I sure like that automatic transmission. LOL
 

Keith_J

Well-known member
3,657
1,314
113
Location
Schertz TX
Yeah, I was a bit perplexed at that leak. Once the line clamps were loose, the line was free to swing away and a deep well 15mm socket easily tightened the loose tube adapter, apparently the anti rotation lock didn't work.

I donated a gallon of sweat to the project. Still stinging in the eyes as I had promised to fix another vehicle at 1600 today. I need a good pressure washing.
 

mkcoen

Well-known member
Steel Soldiers Supporter
5,637
380
83
Location
Spring Branch, TX
Got an update from the buyer outside of Houston. Apparently the steering assist ram is leaking now. Not a lot more than seepage and he knows to keep an eye on it. He was actually making good time and said it was holding steady at 65MPH on I-10.
 
Top
AdBlock Detected

We get it, advertisements are annoying!

Sure, ad-blocking software does a great job at blocking ads, but it also blocks useful features of our website like our supporting vendors. Their ads help keep Steel Soldiers going. Please consider disabling your ad blockers for the site. Thanks!

I've Disabled AdBlock
No Thanks