- 2,048
- 246
- 63
- Location
- North West Arkansas
3.5 inch lift and 37s

 Before and after a 3.5 inch lift and added Baja 37s
Before and after a 3.5 inch lift and added Baja 37sSteel Soldiers now has a few new forums, read more about it at: New Munitions Forums!

 Before and after a 3.5 inch lift and added Baja 37s
Looks good. Like the MKT.View attachment 497884View attachment 497885 Before and after a 3.5 inch lift and added Baja 37s
I really like what that did for your truck! What lift kit did you use? Any pics from the side (90deg) to give us a real perspective? Thanks...View attachment 497884View attachment 497885 Before and after a 3.5 inch lift and added Baja 37s


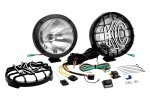
What's grounding the lights? I see a single wire going in for the power, but I don't see any ground.I installed a set of KC HiLites 851 HID Driving Lights.


..so yeah in reality I did nothing but open a box lately


Getting ready to replace terminals and cables also,going with 1/0 gauge wire and terminals from KnuKonceptz.com ,the terminals are really cool and cable super flexable. multi ports on terminals..New battery clamps and cables imagine it in your head cause for some reason I can't get a picture on here


Reach over the top and yank the shifter back. Even when you go all the way to 4XLow the handle is only straight up.how do you shift it into 4x4???
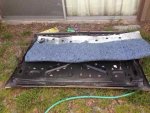
I'll start putting it back together in the AM. Paint is a new(er) version of Imron, just 2 coats and clean the gun, I like it!