• Steel Soldiers now has a few new forums, read more about it at: New Munitions Forums!

  • Microsoft MSN, Live, Hotmail, Outlook email users may not be receiving emails. We are working to resolve this issue. Please add support@steelsoldiers.com to your trusted contacts.

1st Deuce Project Begins

StoneMill

New member
174
6
0
Location
Elizabethtown, PA
Stonemill, I was gonna ask if I could get a weekend job like yours!

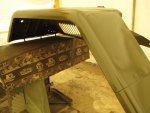
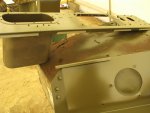
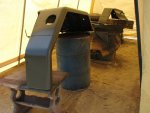
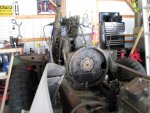
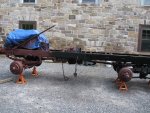
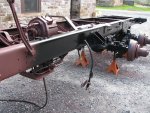
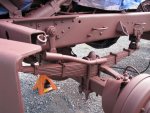
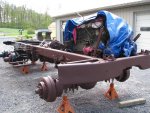
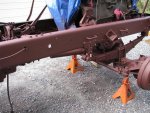
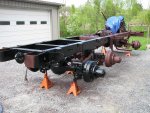
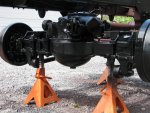
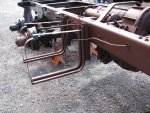
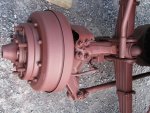
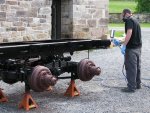
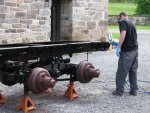
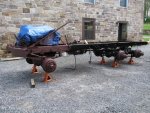
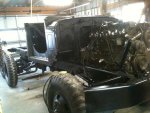
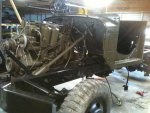
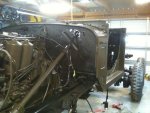
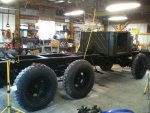
I'm just asking, but shoulen't there be some cribbing under the frame or a hoist backing up the jack stands in case something struck or bumped it hard enough to move it off the stands? I'd hate to see you or anyone else get hurt or killed. Maybe I'm being overly cautious. :?:

Anyway, Godspeed on your project! :-D
The weekend jobs are out there. Just gotta spend 3-4 years in RN school.;-) Definitely the hardest schooling I've ever gone through. But well worth it when it's all done.

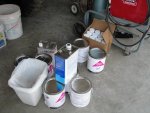
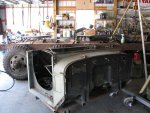
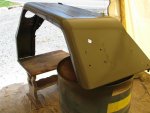
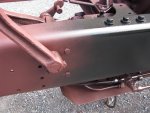
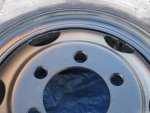
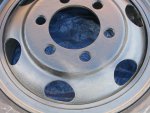
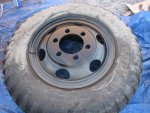
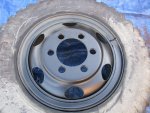
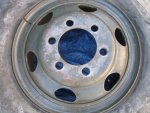
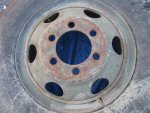
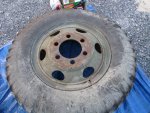
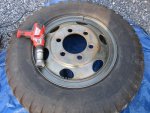
I definitely should have some cribbing under the frame or axles. I was just at a local shop that has some railroad ties. Waiting for them to let me know what they want for a couple. The truck is rock solid on the stands but your right, I definitely need a safety measure with what this thing weighs.:!:
 

StoneMill

New member
174
6
0
Location
Elizabethtown, PA
I need to figure out what color this thing is going to be. Its USMC Lusterless Forest Green or Semi Gloss OD 24087. I can't find many good pics of a deuce in USMC Lusterless Forest Green. I like the idea of being able to touch up the flat pain but I'm worried it'll stain easy and look like crap in a short time after painting.
 

StoneMill

New member
174
6
0
Location
Elizabethtown, PA
Even though I'm putting in all the time redoing my deuce it isn't going to just sit in the garage. I plan to 4 wheel it hard and there are a bunch of hauling tasks it's going to be used for. That's the main reason I'm thinking flat paint over semi gloss.
 

StoneMill

New member
174
6
0
Location
Elizabethtown, PA
Removed the dash gauge panel and pulled the wire harness out of the cab tonight. Labeled all the wires as I disconnected them. Got to work three 12 hour shifts starting Friday night. Might have the cab off Monday or Tuesday. Will be sure to post pics as it comes off. Still not sure about pulling the engine. Is it worth pulling it to clean and paint or should I just spray it while it's in place?:?::?::?:
 

Unforgiven

New member
675
17
0
Location
Las Vegas, NV
Going to relocate the batteries to under the passenger seat with a custom box, add a second fuel tank (need to locate a tank asap)
Be careful with this idea. Batteries give off hydrogen & hydrogen sulfide gas when charging. Both are flammable and poisonous. If you do this make sure you seal it from the cab & provide adequate venting underneath with good airflow. Not to mention if, God forbid, you end up in some kind of accident. You certainly don't want sulfuric acid pouring into the cab after a wreck.

I suspect you are moving the batteries to make room for the second tank. Might I suggest moving the spare tire instead? Or even better, place both tanks on the driver's side.

Just today I finished welding up a new battery box. It squeezes 4 large deep-cycle RV batteries into the original box. 2 are for 24 volt & 2 are for 12 volt. All I have to do is drill holes for the J bolts & paint it.

In a few months I'm going to do a Crew Cab. I'm also going with two fuel tanks. But I'm going to put them both on the driver's side. I don't like pulling up to gas pumps on the passenger side. It makes me nervous. I feel more comfortable pulling up to pumps when I can see out the window. And when I'm going camping or 6 wheeling or whatever, I want to be able to fill both tanks from one side. Filling one tank then driving around to fill the other seems annoying to me. To make it more user-friendly to enter the truck I'm planning to use center-step tanks from a big rig. I'll paint them to match the truck.

I'm envious of the space you have to work on your truck. I'll upload pics of my unfinished battery box in a bit.
 

Keith_J

Well-known member
3,657
1,315
113
Location
Schertz TX
Well, since you have the wheels off, a simple bearing/seal service will be easy. Hub/drum will be heavy, still so be careful.

From the looks of it, you have leaky wheel cylinders and possibly bearing seals.


On review of the photos, you have issues. Either with wheel cylinders or seals. I admire your skills with the needle scaler but pulling the hubs and blasting in a cabinet with walnut media would have been easier.
 
Last edited:

Unforgiven

New member
675
17
0
Location
Las Vegas, NV
Here's the battery box straight out of the truck.

box1.jpg

The small end angles were grinded off & my own larger angle added, forming the box.

box2.jpg

I added a bottom to keep dust & twigs out.

box3.jpg

Plasticoat was sprayed liberally to avoid direct metal/battery case contact

box4.jpg

I used a small piece of angle welded to a small piece of flat to form a T separator between the batteries. These hold-downs will also be liberally Plasticoated.

box5.jpg

There's just enough room for a second set of batteries to the right (use your imagination). The near side now has a cross brace. I've made an identical hold-down for the other 2 batteries.

box6.jpg

That's all I have for now. I know the box fits because I test fitted it a few times. The inside dimensions are 27.5" x 12". If I could have squeezed an extra half inch out of it I would have. 28x12 might be possible with thinner metal. I'll finish this weekend. I'm doing all this for a 12v windshield wiper install. That's for a future post in a couple of weeks.

But seriously, I would urge you to NOT place the batteries inside the cab.
 

StoneMill

New member
174
6
0
Location
Elizabethtown, PA
Haven't posted in awhile, but things have progressed a little. I bought another jeep and had to work on that a bit to get it offroad worthy. Here are some pics.
 

Attachments

Kohburn

New member
655
6
0
Location
SOMD
I'd love to be able to strip mine down that far and ensure it lives longer than I do. Doubt it will happen any time soon, but man that is impressive.
 

StoneMill

New member
174
6
0
Location
Elizabethtown, PA
The cab is back on and the new wire harness is beginning to get hooked up. Going to be slow since I have to paint all these little pieces as they go on and figuring out what new bolts I need to buy.
 

MWMULES

Well-known member
Steel Soldiers Supporter
In Memorial
5,580
344
83
Location
DESOTO, KANSAS
Keep up the great work. It is always good to see someone who has the patience to do a rebuild/restore on a big hunk of iron.
 

StoneMill

New member
174
6
0
Location
Elizabethtown, PA
Here are a couple shots with my iphone from today. Not the best quality I know. Started putting the new wire harness on, running what air lines I can and connecting things in the engine compartment. I herculined the whole inside of the cab yesterday. Going to paint seat frames, air filter canister and the gas tank tomorrow. I'm hoping to have everything completed with this by July. Kept some parts silver but most everything is getting od or black. I'm pretty happy with it so far but painting everything and running for new bolts all the time is getting tiring.
I'm getting married in Key West on June 15th and we just found out we will be having a baby before the end of the year. So, I want to get this finished as soon as possible since it's going to be a busy year. Hoping to take it to the York PA Jeep Show July 17th along with the wranglers.
 

Attachments

Top
AdBlock Detected

We get it, advertisements are annoying!

Sure, ad-blocking software does a great job at blocking ads, but it also blocks useful features of our website like our supporting vendors. Their ads help keep Steel Soldiers going. Please consider disabling your ad blockers for the site. Thanks!

I've Disabled AdBlock
No Thanks