• Steel Soldiers now has a few new forums, read more about it at: New Munitions Forums!

  • Microsoft MSN, Live, Hotmail, Outlook email users may not be receiving emails. We are working to resolve this issue. Please add support@steelsoldiers.com to your trusted contacts.


Allison M916 + Mk48 Cab = 6x6 "FEMTT"

M920

Member
892
24
18
Location
chama/nm
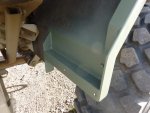
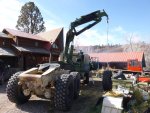
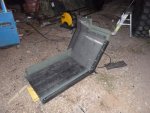
So, how's the handling?
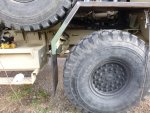
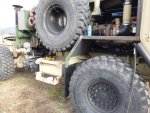
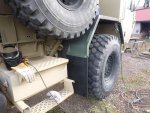
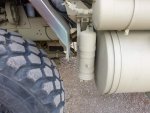
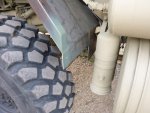
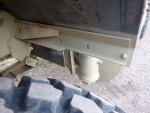
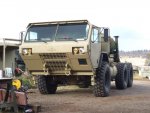
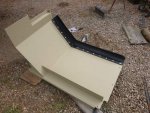
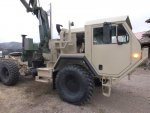
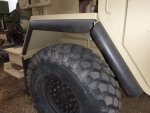
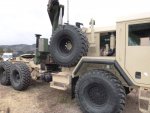
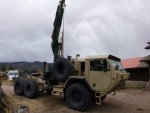
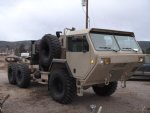
So far so good, I had the truck up to about 70 mph on the highway and it handles great! The steering is very tight and the truck drives down the road nicley without having to do much to keep it in it's lane.
The ride seems a bit rougher then before, but I think that it will improve with some weight on the rear tandems. I'm also going to install a pair of the Bostrom air ride seat bases I have, to replace the Seat Inc. spring ride ones, that are currently in the Mk48 cab.
 

HASSON1911

Member
748
24
18
Location
roseau/mn
Very nice! Green with envy... would you be willing to trade, say a M923A1 and part of a liver?

Grade A work, just like all your projects I've seen!
 

M920

Member
892
24
18
Location
chama/nm
Very nice! Green with envy... would you be willing to trade, say a M923A1 and part of a liver?

Grade A work, just like all your projects I've seen!
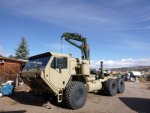
Thanks for the kind words and offer.....can you maybe make that the WHOLE liver though?...... LOL
 

M920

Member
892
24
18
Location
chama/nm
Fenders and Mud Flaps....

With most of the electrical system complete and the truck drivable, I need to finish the front fenders and install my 'fancy' Oshkosh mud flaps.

So since nothing on this project ever seems to be simple, I'm happy to report that this trend continues with the mud flaps!
aua

The rears of my fenders are mounted to the original M916 rear fender bracket and so I assumed that the mudflaps would work like they did before. Well I must have not realized that the 16.00 R 20's actually rubbed on the mud flaps, when at full steering lock.

So I had to fabricate this somewhat elaborate extension on the rear of the fenders, to give it more clearance and to hold the mud flaps away from the tires.

It was a bit of extra work, but I like the way they turned out.

Here are some pics....for comparison, the last three pics show the 'before modification look' on the left hand side of the truck....

Soni
 

Attachments

Last edited:

M920

Member
892
24
18
Location
chama/nm
Right Side Rear Engine Access Panel

Today was a pretty good day.....I decided that I really needed to finish the right side of the dog house.
Unlike on the left side, on the right side the side panels will have to be made as a bolt on rear section and a hinged front section that matches the left side. One of the criteria that I set for myself, was that I wanted to be able to check the engine and tranny oil without having to open the hood.

I started by fabricating the right side rear engine access cover. It will be bolted on, since there is not much to access behind it. In addition to that, the spare tire carrier and davit's close proximaty to the dog house would not permit the use of a folding hood anyway.

I solved the accessability problem for the dip sticks by building a wedge shaped protrusion in to the side of the panel. The top has a hinged cover and will allow me access to the dip sticks without opening the hood.

Here are a few pics of the finished rear panel......
 

Attachments

M920

Member
892
24
18
Location
chama/nm
More Fender Work and Fender Flares

Since I worked on the FEMTT until almost midnight last nite, I was to tired to do an update, but here it is:

So I was going to remove the passenger side fender, only to find out that it would no longer come off! I guess in my excitment I overlooked, that the gusset I welded to the rear of the fender, would not clear the base of the ROPS, when trying to slide it out! :popcorn:

Thank god for plasma cutters! It was still a tricky situation though, since all the vital air lines and the electrical harness are running right behind where I had to make the relieve cut.

I needed the spare tire off, to remove the fender and paint some areas I had previously missed. To test the feasabillity, I used the boom instead of the davit to lower the spare to the ground.
It works ok, as long as I use a really long chain. The chain is needed to be able to get close enough to the truck, with the boom straight up, to be able to pick the spare off of it's mount.

While I had the fender off again, I also drilled and tapped all the holes needed to attach the fender flares and made backing plates for it.

Hopefully I get it painted and back on today before the forcasted snow hits here......:grd:
 

Attachments

M920

Member
892
24
18
Location
chama/nm
One Fender Done....One To Go....

Got the passenger side on the FEMTT almost buttoned up! :D

I painted the fender, bolted the fender flares back on and installed it all back on to the truck.
So the only thing left to do on the passenger side, is fabricating the hinged engine hood to match the one on the driver side.

Here are some pics of the fender, mounted on the truck and putting the spare back on to the bracket....

Soni
 

Attachments

Last edited:
Top
AdBlock Detected

We get it, advertisements are annoying!

Sure, ad-blocking software does a great job at blocking ads, but it also blocks useful features of our website like our supporting vendors. Their ads help keep Steel Soldiers going. Please consider disabling your ad blockers for the site. Thanks!

I've Disabled AdBlock
No Thanks