cucvrus
Well-known member
- 11,478
- 10,507
- 113
- Location
- Jonestown Pennsylvania
Steel Soldiers now has a few new forums, read more about it at: New Munitions Forums!

.Europe 1945 View attachment 844341 Very sad.
.View attachment 844597
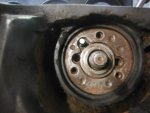
Has anyone else had the red warning light on the front wheel hub come on. Nothing showing on the dash panel so wondering what it could possibly be.
It's not covered in the sticky notes or the TM. The flat tire is an easy fix. I'll check the wheel bearing once I get home. Take Care. Be Safe.

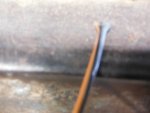
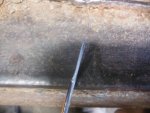 I placed the hammered end in the hole of the hinge and tapped the bushing in place.
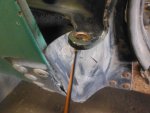 Nice and tight. These are the correct hinge pin/bushing kits from NAPA.
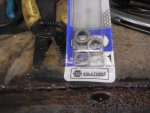
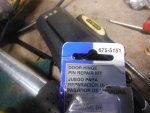 This had 1 pin and several bushings. The smaller un splined bushings fit the CUCV hinges. I hammered in the new pins and greased the new pins and bushings with real grease and motor oil. I will install the door later. For now the hinges are tight and ready for years of use and abuse. Good Luck.
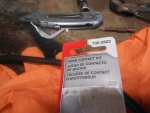
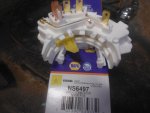 This is the new NAPA switch. I show NAPA because if I show Autozone I always get flak about junk. News Flash. Autozone is the same part differnt box. Both China made. Mainland China.
 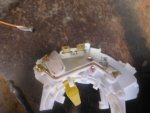 I taped the3 terminal shut that the CUCV does not use. The only purpose for my taping is so you know those terminals are there on the switch but do nothing for a CUCV. No need to worry the un taped 2 terminals are the ones that are needed to operate the B/U lamps.
  Old switch
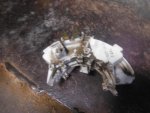 Old switch apart
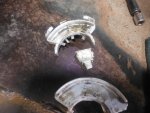
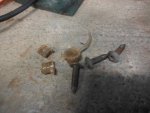
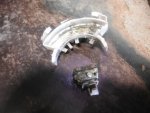 Showing the brass contacts that are badly worn and prevented the B/U from working.
 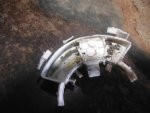 Contact in place where the B/U should operate. they didn't.
 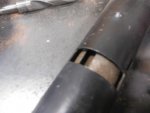 Donor column for pictures.
 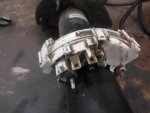 Old switch snapped onto top of donor column for demonstration
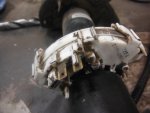 instructions only. The switch ratchets back and forth for fine tuning the B/U lamps that they come on when the vehicle is shifted to reverse. That was Easy. I have this picture so you can see how the switch snaps fast to the column.
 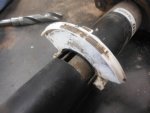 This the part of the switch that snaps fast the other part moves inside the 2 halves of the switch housing. I hope this is helpful.
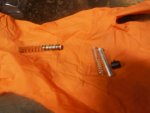 Some genius had stretched the spring out to make up for the lost spring contact lock.
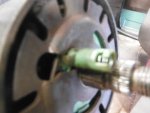
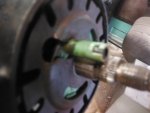 the contact that comes with the new kit is wrong so I reused the OEM one.
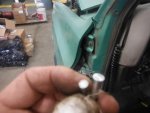
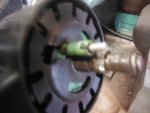 I reinstalled the steering wheel and made sure it was clocked correctly. Aligning the notch on the shaft with the notch on the steering wheel flange. See that. Perfect.
  This is the NAPA kit for the lock and new spring.
  This is the new lock spring and contact installed. Be careful or Boing it will be lost somewhere and you will be up the creek. It is a $5. kit and is worth the $5. to do the job right the first time. The horn inner ring ground are scrap I will be getting a new one.
  Riddle me this why is there always time to do the job right the second time when the first half fast job fails? Do it right the first time and drive on. I had a wise guy come in teh shop and ask if I was restoring it. I said No I am fixing it right after you guys screwed it up and it wouldn't go no more, He said it was junk that is why it won't go. I laughed and said its 38 yera old junk that needs constant minor repairs and they need done right. Take care and again I hope this helps at least 1 guy. then my efforts were worth the writeup.
.i also worked on the replacement horn contact. View attachment 844771Some genius had stretched the spring out to make up for the lost spring contact lock.View attachment 844772View attachment 844773 the contact that comes with the new kit is wrong so I reused the OEM one. View attachment 844774View attachment 844775 I reinstalled the steering wheel and made sure it was clocked correctly. Aligning the notch on the shaft with the notch on the steering wheel flange. See that. Perfect. View attachment 844776 This is the NAPA kit for the lock and new spring. View attachment 844777 This is the new lock spring and contact installed. Be careful or Boing it will be lost somewhere and you will be up the creek. It is a $5. kit and is worth the $5. to do the job right the first time. The horn inner ring ground are scrap I will be getting a new one. View attachment 844778 Riddle me this why is there always time to do the job right the second time when the first half fast job fails? Do it right the first time and drive on. I had a wise guy come in teh shop and ask if I was restoring it. I said No I am fixing it right after you guys screwed it up and it wouldn't go no more, He said it was junk that is why it won't go. I laughed and said its 38 yera old junk that needs constant minor repairs and they need done right. Take care and again I hope this helps at least 1 guy. then my efforts were worth the writeup.
You are the man cucvrus!! I really wish we were neighbors!!i also worked on the replacement horn contact. View attachment 844771Some genius had stretched the spring out to make up for the lost spring contact lock.View attachment 844772View attachment 844773 the contact that comes with the new kit is wrong so I reused the OEM one. View attachment 844774View attachment 844775 I reinstalled the steering wheel and made sure it was clocked correctly. Aligning the notch on the shaft with the notch on the steering wheel flange. See that. Perfect. View attachment 844776 This is the NAPA kit for the lock and new spring. View attachment 844777 This is the new lock spring and contact installed. Be careful or Boing it will be lost somewhere and you will be up the creek. It is a $5. kit and is worth the $5. to do the job right the first time. The horn inner ring ground are scrap I will be getting a new one. View attachment 844778 Riddle me this why is there always time to do the job right the second time when the first half fast job fails? Do it right the first time and drive on. I had a wise guy come in teh shop and ask if I was restoring it. I said No I am fixing it right after you guys screwed it up and it wouldn't go no more, He said it was junk that is why it won't go. I laughed and said its 38 yera old junk that needs constant minor repairs and they need done right. Take care and again I hope this helps at least 1 guy. then my efforts were worth the writeup.
I've had the same problem in years past and had good luck putting a bushing in the hole and welding the worn out part of the hole up. The bushing is trashed but keeps the weld in 'place' so no drilling is required (if done right) usually a small round rat tail file to make a second bushing fit and minute of time and it's done.I have been very busy lately at home and at work. I have an M1009 torn apart at work for several parts to be replaced. I did manage to get the door pin bushings in the hinges today, the neutral safety switch to repair the B/U lamps and the horn spring contact. OK so the door pin bushings were in need of replacement a few years ago and the hinges were badly whittled out and the bushings and pin would just sit in loosely. I thought about how to tighten them up quickly and permanently. I could weld and drill that takes to long and the truck is not warranting that much work. I went and got weed whacker string. Heavy nylon and hammered it flat.View attachment 844755 View attachment 844756 I placed the hammered end in the hole of the hinge and tapped the bushing in place.View attachment 844754 Nice and tight. These are the correct hinge pin/bushing kits from NAPA.View attachment 844757 View attachment 844758 This had 1 pin and several bushings. The smaller un splined bushings fit the CUCV hinges. I hammered in the new pins and greased the new pins and bushings with real grease and motor oil. I will install the door later. For now the hinges are tight and ready for years of use and abuse. Good Luck.

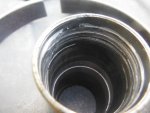 This piece was all scored and needed replaced. The clutches were burnt.
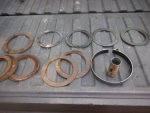
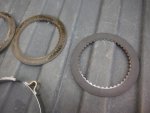
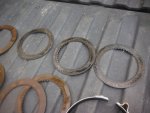 I am not a transmission guy and never wanted to be. I took the M1009 for a ride it shifted perfect and ran smooth. No more clunking and grinding in the rear and the transmission works smoothly. Now I have other things to do. I almost fell victim to a scam deal on my Trail Boss. The dealer that sold it to me 2 1/2 years ago offered me what I paid for it if I traded it on a new truck. I was in the dealership for service and he approached me. The new truck had the 6.2 gas engine The 6.2L with DFM — the largest and most powerful gas V-8 in the segment — is SAE-certified at 420 horsepower (313 kW) and 460 lb-ft of torque (623 Nm) and is paired with a Hydra-Matic 10-speed automatic transmission. I took it for a ride while they appraised my truck. I was really not impressed with the power. My Trail Boss has a 5.3 5.3L EcoTec3 V8 (L84) EQUIPPED WITH DYNAMIC FUEL MANAGEMENT 355 horsepower and 383 lb.-ft. of torque 8-speed automatic transmission. I could barely tell the difference when climbing the same mountain pedal to the metal. They wanted 25K out and I went home with my Trail Boss. I guess they kept their word giving me what I paid for it on a fully loaded truck they had in stock. No Deal. I only have 21K on my Trail Boss. Not even broken in yet.

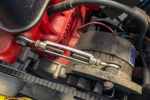
 That is about as easy as it gets and is reliable. Have a Great Evening.
.
I just took one for a ride yesterday afternoon. I thought I was reentering the earths atmosphere in an empty tin can. Scary. I did not buy it. It had more problems then I was willing to take care of. I think it had back axle halves or cupped tires. The tires were like new but old age wise. Have a Great Day.
