• Steel Soldiers now has a few new forums, read more about it at: New Munitions Forums!

  • Microsoft MSN, Live, Hotmail, Outlook email users may not be receiving emails. We are working to resolve this issue. Please add support@steelsoldiers.com to your trusted contacts.


GovPlanet Humvee Arrival and Inspection

jake20

Well-known member
431
839
93
Location
Illinois
Short update for the curious on what's happened over the last few weeks:

- Still waiting on the SF97, been about 30 days since they started the process, "supposedly" it's 30-60 days of waiting at the moment

- I have a headliner ready to install that I ordered from 800-nonoise. Excellent customer service and timely shipping, you can request a free sample box to peruse as well, I went with 1/2" perforated vinyl absorption foam, I'm about 95% sure that it's what was originally in my truck anyway: https://800nonoise.com/product/perforated-vinyl-faced-foams-2/
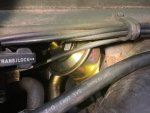
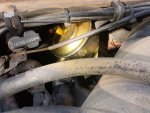
- Added CDR valve

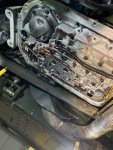
- Changed transmission filter and fluid (it looked extremely clean under the pan)

- Ordered a bunch of random odds and ends from Kascar, also amazing support, call them if you need help finding anything

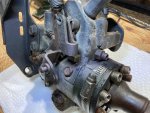
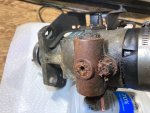
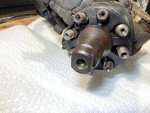
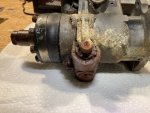
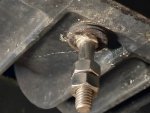
- My front differential drain plug is completely rounded. I tried a few things to get it out (such as dremeling a bolt head into a custom allen key), but at this point I'll have to find someone to either weld a nut to it, or drill it and use an ez-out bit

- Replaced all broken gauges

- Had a knocking sound show up, conclusion is that it was possibly a contaminated lifter, in a nutshell, change ALL your fluids as soon as you get your truck. Other thread with more details: https://www.steelsoldiers.com/threa...king-yes-its-actual-knocking-probably.210306/

- I have a turret hatch, left/right b-pillar tubes, and lock ring coming in to cover up the hole on the roof, but it's unlikely I'll be able to source a support ring. Going to see what I can fab up to at least statically mount it. I just want it to be able to open, doesn't need to rotate

- My AC condenser lines on the red dot system are cracked. If anyone knows the type of tubing / crimping tools needed to make new hoses, would be great

- Working on this is addictive

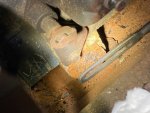
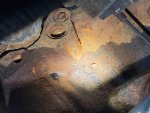
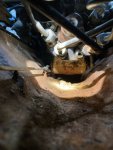
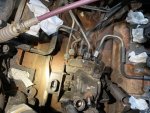
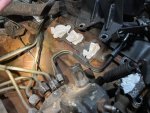
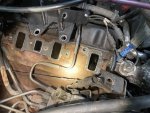
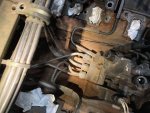
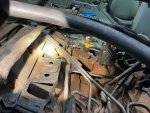
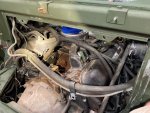
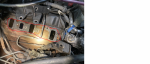
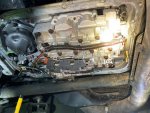
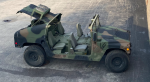
Some random pictures attached.
 

Attachments

Maxjeep1

Well-known member
Steel Soldiers Supporter
1,339
1,912
113
Location
Las Vegas Nevada
Nice work! I was looking at aluminum duct flanges and I will probably go that route when I get that far. I can put that ring against that hole and weld in my steel to make it permanent. Still need to fab something to tie into the b- pillars
 

jake20

Well-known member
431
839
93
Location
Illinois
Nice work! I was looking at aluminum duct flanges and I will probably go that route when I get that far. I can put that ring against that hole and weld in my steel to make it permanent. Still need to fab something to tie into the b- pillars
Yea I definitely want the B-pillars to be secured somewhat decently for the seatbelts, don't need to be whacking a steering wheel with my face if it came to that situation. Overall, I need to finish the following and it should be pretty ready for driving around:

- SF97 to get it titled and plated
- Changing hub spindle nuts to the bluehummer ones (I've got em and will be doing them soon)
- New tires
- Fresh brake fluid
- Adding headliner and turret to roof and putting it back on
- Scrounging some x-doors, this is also proving to be a fun task
- 12V buck converter and some sort of audio system

And onwards the journey continues...
 

Maxjeep1

Well-known member
Steel Soldiers Supporter
1,339
1,912
113
Location
Las Vegas Nevada
Yea I definitely want the B-pillars to be secured somewhat decently for the seatbelts, don't need to be whacking a steering wheel with my face if it came to that situation. Overall, I need to finish the following and it should be pretty ready for driving around:

- SF97 to get it titled and plated
- Changing hub spindle nuts to the bluehummer ones (I've got em and will be doing them soon)
- New tires
- Fresh brake fluid
- Adding headliner and turret to roof and putting it back on
- Scrounging some x-doors, this is also proving to be a fun task
- 12V buck converter and some sort of audio system

And onwards the journey continues...
It’s crazy. I started with a really nice m1123 that I was going to do everything to it. After having it and driving it I realized that I wanted ac and a hardtop. Cheaper to buy a new truck and that’s what I did. I have one brand new rear passenger x-door that still has the plastic on the glass. I don’t know what I’m going to do with it yet but keep it in mind when you search. I ended up with 5 doors trying to put a set together
 

Coug

Well-known member
Steel Soldiers Supporter
2,849
4,079
113
Location
Olympia/WA
*snip*

- My AC condenser lines on the red dot system are cracked. If anyone knows the type of tubing / crimping tools needed to make new hoses, would be great

*snip*
Red dot uses 3 sized of eaton aeroquip ez-clip hose and associated clamps.

Hose sizes are -6, -8, and -12. Might also be labeled as # 6, # 8, # 12, or NO6, NO 8, NO 12.
You can usually find someone selling cut sections on ebay. Also sold in lots of refrigeration/aircon websites, but the -12 is harder to find since it seems to be mostly industrial or military use? Doing a search for "EZ-CLIP HOSE" and the size usually brings up a lot of results.

The fittings are reusable. It IS recommended you get new O-rings for all of the fittings, and use the SP-15 oil on them before install to minimize any chance of damaging them. (SP-15 is the Sanden specific oil for our compressors)
Don't be stupid though and use a knife straight down the hose at the end to try to separate it from the fitting. That's a good way to scratch up the fitting and then have to replace it.... Trust me on that one, the fittings aren't the cheapest (though sometimes you get lucky on ebay)


The only fitting I had to replace due to failure was the low side port hose fitting on the evaporator. Leaked due to some corrosion in the schrader valve. Part number for that fitting is RD-5-10574-1P .


The clamping bands are recommended to be replaced and not reused, but if you are careful during removal then it's possible to reuse. I personally used a pair of CV boot pliers and had no issues. Not all are the same, so here is a link to the type I used. The 10 98 I220 would work just as well.


Parts catalog (does not include military contract specific parts, but can find you fittings and other related specific part numbers)
Instructions for how to replace fittings and hose are on page 504, fitting part numbers immediately after that


Red Dot generic service manual. Once again, nothing military specific but lots of good information
 
Last edited:

jake20

Well-known member
431
839
93
Location
Illinois
Wow that's a lot of good info @Coug thank you!

Going to do some digging around and see what I can find in that case. The only lines seemingly broken are between the condenser and main unit, hopefully that's all. I plan on mounting my unit sideways against the left wheel well in the trunk area, and then running flex duct to each seat. Not a fan of blocking all my usable space with the big unit.
 

Coug

Well-known member
Steel Soldiers Supporter
2,849
4,079
113
Location
Olympia/WA
Wow that's a lot of good info @Coug thank you!

Going to do some digging around and see what I can find in that case. The only lines seemingly broken are between the condenser and main unit, hopefully that's all. I plan on mounting my unit sideways against the left wheel well in the trunk area, and then running flex duct to each seat. Not a fan of blocking all my usable space with the big unit.
I didn't want to lose my cargo space so that's why I did a fender mount condenser. Also lets me play around with what my configuration is, as I tend to switch things up a couple times a year.

This was my thread on that conversion
 

jake20

Well-known member
431
839
93
Location
Illinois
I didn't want to lose my cargo space so that's why I did a fender mount condenser. Also lets me play around with what my configuration is, as I tend to switch things up a couple times a year.

This was my thread on that conversion
Yea I'm glad that my condenser just mounts right onto the slantback hatch, I think it looks pretty neat and out of the way. Probably also great for airflow through the radiator. I'll post some pics once I actually get to doing this. For now, I'm just cranking through the mechanical fixes.
 

Gcelevator

Well-known member
Steel Soldiers Supporter
408
536
93
Location
Florida USA
Yea I definitely want the B-pillars to be secured somewhat decently for the seatbelts, don't need to be whacking a steering wheel with my face if it came to that situation. Overall, I need to finish the following and it should be pretty ready for driving around:

- SF97 to get it titled and plated
- Changing hub spindle nuts to the bluehummer ones (I've got em and will be doing them soon)
- New tires
- Fresh brake fluid
- Adding headliner and turret to roof and putting it back on
- Scrounging some x-doors, this is also proving to be a fun task
- 12V buck converter and some sort of audio system

And onwards the journey continues...
What audio system you have in mind? I am using the Ecoxgear Sound Extreme SE26 and i am very happy with it. I installed under the B pillar with 2 stainless steel brackets.
 

jake20

Well-known member
431
839
93
Location
Illinois
What audio system you have in mind? I am using the Ecoxgear Sound Extreme SE26 and i am very happy with it. I installed under the B pillar with 2 stainless steel brackets.
I actually have no idea yet. I was planning on fabricating an assembly for a double-din head unit to mount onto the radio tray, then the audio would feed off that. That's a little ways off though, that Sound Extreme box actually looks pretty good if I wanted to just get audio going now lol.

The head unit was going to be some sort of Pioneer brand system, and the speakers/sub likely some sort of marine audio grade stuff as I expect it to get wet.
 

jake20

Well-known member
431
839
93
Location
Illinois
On another note, I started the wonderful process of removing the injection pump last night. Will hopefully have it done today so I can finally send it off (honestly not sure if the housing is even still rebuildable).


Basic steps I've taken so far:

1: Remove the main air intake tubes
2: Remove the power steering reservoir and put it off to the side
3: Unbolt the manifold bolts/studs/nuts (had to twist a bracket up pretty bad to get one of them out)
4: Very slowly and tediously unbolt the injector lines from the pump. The bottom ones are an absolute pain and you will 100% want a crows-foot 5/8 wrench
5: Unbolt oil filler tube
6: Unplug all other tangential items from the pump

Remaining steps (I think):

1: Remove belt to remove oil filler
2: Fashion a toilet paper roll to fit into the hole so that bolts can be removed and not fall into the timing cover abyss
3: Remove the 3 bolts holding the pump from within the hole, I'll be rotating the crank off the pulley on the bottom, I tried it earlier and it seems to turn slowly but smoothly
4: Remove the 3 bolts on the exterior of the pump
5: Pump comes out? Hopefully?


A few notes / questions:

- Everyone mentions a drain hole that should be present in the engine's top valley. I've attached a photo of where I think it should be, but I'm either blind or rust has covered mine up

- Any tips on how to remove the old gasket material from the headers? I was planning on damping the paper with rubbing alcohol and then using a razor blade

- Is there a torque pattern for when you put the manifold back on? I ask because it's an odd-shape that you wouldn't want to accidentally crack or mis-align

- I'll be sending the pump to either DCP (https://dieselcare.store/) or Huckstorf (https://www.hdiesel.com/) for the rebuild

- I likely will leave the pump stock for now, and not have it turned up at all

- Now that there's some space in the engine bay, it's probably the best time to do some other things while I wait. I plan on re-soldering my chewed up glow-plug cables, and cleaning up the area in general. The #5 injector line is also getting replaced as it's completely rusted.

- The intake gaskets I removed seemed to have the EGR holes covered up. I believe this isn't something we want open, right? The gaskets that were on there allowed for easily punching out that hole. That hole specifically is covered in soot, as I'd expect I guess.
 

Attachments

Last edited:

Maxjeep1

Well-known member
Steel Soldiers Supporter
1,339
1,912
113
Location
Las Vegas Nevada
You have to remove the exhaust manifolds? That hole is center of the valley in a little pocket. I’m digging out sealer or jb weld or whatever Melton used to plug it.
 

jake20

Well-known member
431
839
93
Location
Illinois
You have to remove the exhaust manifolds? That hole is center of the valley in a little pocket. I’m digging out sealer or jb weld or whatever Melton used to plug it.
The manifold I yanked was the intake manifold that sits on top, otherwise you can't remove the pump. My engine is in fact a Melton re-man, so I will dig around with a pick and see what if I can find it. Thanks for the pointer :p
 

Maxjeep1

Well-known member
Steel Soldiers Supporter
1,339
1,912
113
Location
Las Vegas Nevada
The manifold I yanked was the intake manifold that sits on top, otherwise you can't remove the pump. My engine is in fact a Melton re-man, so I will dig around with a pick and see what if I can find it. Thanks for the pointer :p
I seen you asked how to remove gasket from headers
 

juanprado

Well-known member
Steel Soldiers Supporter
5,508
2,709
113
Location
Metairie/La (N'awlins)
Erm that may be the wrong term on my part. I'm talking about the face of the intake ports where the gasket sits between intake manifold and engine. Basically there's still paper baked onto there, pic attached.
Automotive 3m roloc surface conditioning disc ( look like sponges) are great for removing gasket residue and small enough to use on a cordless drill. YMMV
 

Maxjeep1

Well-known member
Steel Soldiers Supporter
1,339
1,912
113
Location
Las Vegas Nevada
Erm that may be the wrong term on my part. I'm talking about the face of the intake ports where the gasket sits between intake manifold and engine. Basically there's still paper baked onto there, pic attached.
I have to do this same job. I have to take that 400 amp generator off and I’m not looking forward to it. I have everything off the back of the engine.
 

jake20

Well-known member
431
839
93
Location
Illinois
I've actually seen those discs, I think I have one somewhere. My only concern is getting small particulates inside the intake holes, I've got them plugged up with shop towels at least. Will try a few things and see how they go.

Going to try to get as much done in this area while everything is taken apart at least.
 

jake20

Well-known member
431
839
93
Location
Illinois
Got the pump out yesterday, looks pretty nasty. Going with DCP for the rebuild, will let everyone know how it goes. Pics attached.

When I pulled the pump out, the little plunger looking thing with the spring on it fell on the floor. Picture named "IMG_6814". I don't know if that's the only thing that fell out of the front, but I looked around and couldn't see anything else.
 

Attachments

Retiredwarhorses

Well-known member
Steel Soldiers Supporter
4,261
3,874
113
Location
Brentwood, Calif
Got the pump out yesterday, looks pretty nasty. Going with DCP for the rebuild, will let everyone know how it goes. Pics attached.

When I pulled the pump out, the little plunger looking thing with the spring on it fell on the floor. Picture named "IMG_6814". I don't know if that's the only thing that fell out of the front, but I looked around and couldn't see anything else.
I highly suggest you steer clear of DCP…you’ve been warned, unless you want to install that pump a few more times.
 
Top
AdBlock Detected

We get it, advertisements are annoying!

Sure, ad-blocking software does a great job at blocking ads, but it also blocks useful features of our website like our supporting vendors. Their ads help keep Steel Soldiers going. Please consider disabling your ad blockers for the site. Thanks!

I've Disabled AdBlock
No Thanks