- 5,779
- 3,237
- 113
- Location
- Metairie/La (N'awlins)
I would use copper coat hi temp antisieze
Steel Soldiers now has a few new forums, read more about it at: New Munitions Forums!

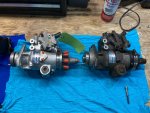
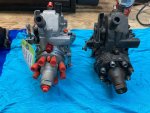
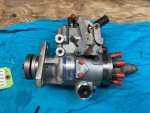
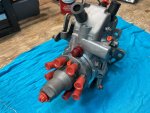
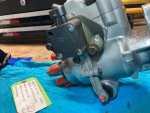
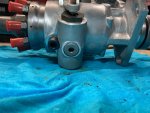


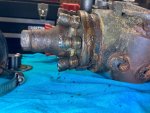
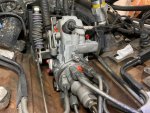
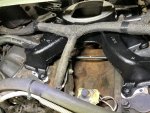
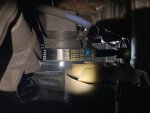
you need to move the plunger and spring over to the new pumpNew pump came in from Mac Motors, looks phenomenal. Pretty pics attached.
I’m still trying to scrape off as much old gasket from the intakes as possible, although it’s a real pain to do some of the tight spots. I’ve read that as long as it’s mostly flat, it should be fine as the gasket will form around it anyway. Will still try to get off as much as possible
Will be reinstalling the throttle cable bracket and TPS on the new pump soon as well, need to check the TMs for the TPS alignment it seems. I checked the position from the old pump and I “might” just be able to plop it at the same angle.
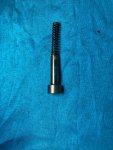
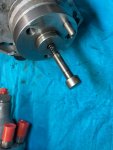
I also still have that plunger/spring from the front of the pump that I’m not quite sure about. I noted in an earlier post that it fell out when I removed the old pump. I’m not really sure as to what its purpose is but I’ll try to dig around the TMs to see if I can find any mentions of it. The new pump didn’t come with one either.


Did you need anything special to get the 3 nuts off of the block section? I seen some s wrenches but I don’t know if they are necessary or not. I can’t find a 16mm or 5/8 fuel line socket or sensor socket. I seen blackdog has one but I hate to pay 64.00 plus shipping for hopefully a one time use.Status Update:
She runs and growls!
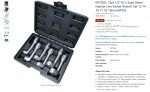
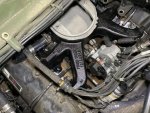
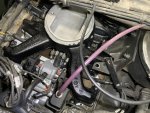
- I put the pump back in, I have to thank @HoveringHMMWV for the injector line socket recommendation. Putting the lines back was a breeze compared to taking them off with crows foot wrenches. NOTE: I had a hard time finding a 5/8 injector line socket, use a 16MM 12-point and you'll be fine. Part of this was replacing the #5 injector line as well, was super easy to deal with
- Another note with the pump. I timed it in between where my original mark was and dead center. It is currently slightly offset towards the driver's side, but less than previously
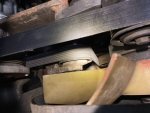
- I didn't put the rubber boot around the pump, and haven't quite found the specific reason for its existence. I took it off the old pump it was more of a rust retention seal than anything as I expected. Unless I dig around and find a compelling reason to do so, I'll likely leave it off
- Hooked up all my glow plugs finally, since I got them all soldered back together properly a while ago
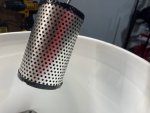
- Changed the fuel filter and strainer, mine was incredibly clean actually, but there was definitely a little bit of sediment at the bottom of the canister. I flushed the canister and cleaned it completely of any particulates. I then filled it back up with diesel before fully re-mounting it again. Didn't want to have to crank the starter for a decade to get it full of fuel again
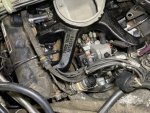
- Removed all the towels shoved into the intakes and vacuumed the area very well. The first test start was going to be without the intake manifold for obvious reasons, so we don't want anything falling in there
- Loosened the injector line closest to the driver's side to let it bleed air during the first start
- Hooked up the battery and gave it a go, it took about 25 seconds of cranking across 2 attempts to get it started. The first attempt I could see smoke coming out of the EGR outlets on the heads within the first few seconds, and I continued to crank it for about 15 seconds total. The second crank attempt started to develop some darker/thicker smoke coming from the EGR outlets, and then 10 seconds in it growled to life. I tightened up the loose injector, and it ran smooth as can be. I let it run for a minute and then jabbed the throttle a few times, good and quick responses
- Going to deal with the intake manifold and remaining fun stuff later
Video of the 2nd startup:
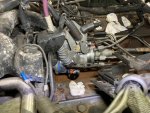
Pics attached as well
Thanks everyone for the help thus far
Did you need anything special to get the 3 nuts off of the block section? I seen some s wrenches but I don’t know if they are necessary or not. I can’t find a 16mm or 5/8 fuel line socket or sensor socket. I seen blackdog has one but I hate to pay 64.00 plus shipping for hopefully a one time use.
You used that set in your pics? It worked out ok?
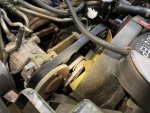
I have the turbo intake and the center is opened up better than n/a engines.I put the manifold in a few hours ago actually, will be bolting it and dealing with all the tangential stuff another day. It sticks out like a sore thumb with the new paint job heh.
You may be able to get an idea of the clearance from these pics, but I’d have to confirm once it’s permanently bolted.

Thanks!I have the turbo intake and the center is opened up better than n/a engines.
I’m glad you have a running truck! View attachment 876016
I have ground my flywheel trying to turn the headlights on.. hahahaha stupid. I had my m1123 that’s perfect but after driving it I wanted a turbo truck with all the bells and whistles. If injection pump fixes mine I will be looking really good! I have the turret hole and connect the b-pillar together. I will keep both as long as I can afford to maintain them. I really like these trucks. I think manifolds have to come off to get fuel lines off. I want to clean and paint my valley alsoThanks!
Now that’s interesting, do you even have to yank the manifolds to pull the pump on a turbo truck? Or just the turbo assembly in the center?
Was considering a turbo as my next truck down the road, there’s a lot of non-runners on govplanet going for decent prices it seems.
My next hurdle might actually be a chipped flexplate, long story short I didn’t explain the start switch properly and it was attempted to be put back into “start” after the truck was already running. My fault, it happens.
The only symptom I’ve noticed is that sometimes it feels like the starter doesn’t fully grab, no grinding sounds though. Going to see if it gets worse and then start my next research phase if so.
I have ground my flywheel trying to turn the headlights on.. hahahaha stupid. I had my m1123 that’s perfect but after driving it I wanted a turbo truck with all the bells and whistles. If injection pump fixes mine I will be looking really good! I have the turret hole and connect the b-pillar together. I will keep both as long as I can afford to maintain them. I really like these trucks.
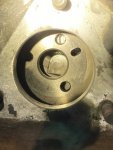
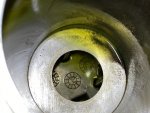
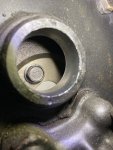
Really after my question’s and my research my only concern is the timing mark. I see it on my new pump but I can’t see it on the old pump or the block. I only looked at it for a minute and I think once I get in there I will understand. I will turn my pump up before I install it also. I have opened up the exhaust and the air intake so I think it can handle more fuel. Thank you for your helpLet me know if you need any specific pictures or details from my process, I always take a metric ton, more than happy to share my mistakes
A soft brass wire brush may be able to clean up the timing marks for you to better read them. It seems the general consensus for these trucks is to set them either dead center or very very minimally towards the driver's side, in all my research I've never seen anyone adjust it towards the passenger side on a humvee. 1MM of movement in terms of the marks is 2 degrees worth of timing.Really after my question’s and my research my only concern is the timing mark. I see it on my new pump but I can’t see it on the old pump or the block. I only looked at it for a minute and I think once I get in there I will understand. I will turn my pump up before I install it also. I have opened up the exhaust and the air intake so I think it can handle more fuel. Thank you for your help
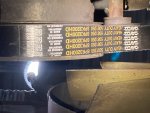
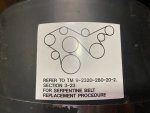

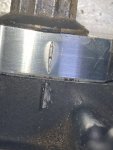
Hahahaha I tried the ratchet and Jack handle and I never could get it in the right spot and have a hand free to work the belt on. That took I made worked so good and I can reach it from the other side. I could have done with just a little helpOh wow, yea I just used a 3/8 ratchet with the tube from a hydraulic jack for leverage. I definitely had plenty of clearance, minimal flex on one of the fan blades.
To get the belt off was a little more interesting, but nothing too hard either at least. I used a 15/16 wrench on the alternator pulley to slowly move the fan blades out of the way till I could get to the tensioner with a ratchet.
We get it, advertisements are annoying!
Sure, ad-blocking software does a great job at blocking ads, but it also blocks useful features of our website like our supporting vendors. Their ads help keep Steel Soldiers going. Please consider disabling your ad blockers for the site. Thanks!