• Steel Soldiers now has a few new forums, read more about it at: New Munitions Forums!

  • Microsoft MSN, Live, Hotmail, Outlook email users may not be receiving emails. We are working to resolve this issue. Please add support@steelsoldiers.com to your trusted contacts.


M416-A1 rebuild in progress!!!

2ndchance

New member
55
1
0
Location
Glendale, AZ
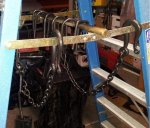
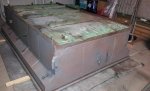
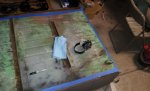
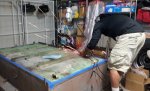
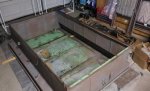
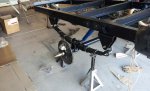
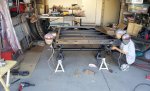
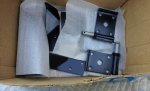
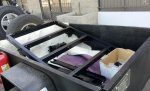
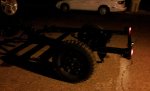
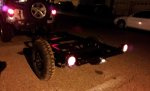
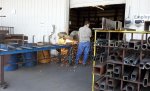
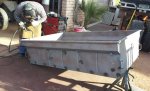
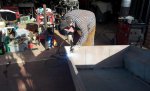
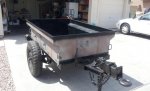
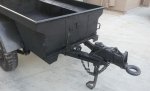
Tuesday 2/28: Had a slow start. Was still recovering from a hard weekend hunting trip. I finished off the final breakdown of the trailer, loaded up all the pieces and took them down to Glendale Powdercoating.

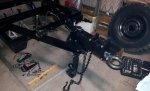
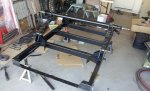
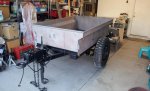
The estimated cost to get all the work done is around $135. That's the entire frame, axle, shock towers, surge assembly, less the lunette. The turnaround is about 10 days. That's perfect, as it gives me time to prep the tub for sandblasting and order in the new steel for the tub bottom.

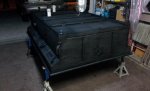
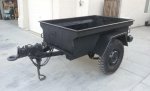
I chose a textured black finish. It's close to traditional OEM chassis color, but textured to hide road rash and to give it some added strength.

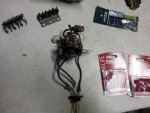
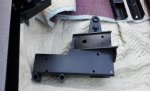
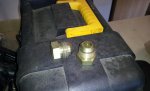
The rest of the frame parts have been ordered. Some have arrived, while others are in transit.

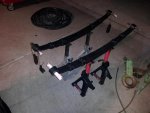
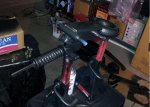
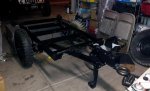
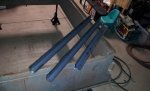
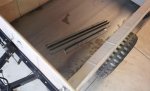
I took the leaf springs to Glendale Springs. I had hoped he can separate all the leaves so I can inspect for rust, wire brush, paint, and reassemble. He told me that there WAS rust in between the leaves and that they are ruined. Huh... they are still stiff and I was not about to drop $300 for new ones. I'm either going to just pressure wash, then paint and keep using them. If/they fail, I will buy new ones at that time. Personally, I think the guy was full of crap.

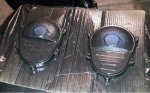
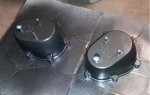
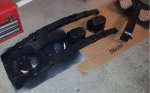
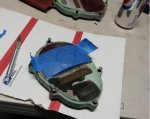
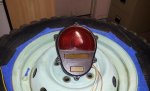
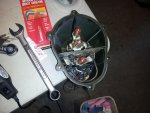
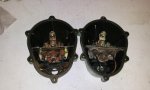
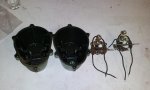
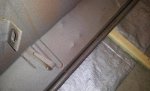
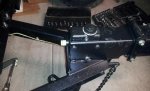
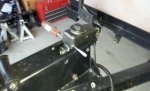
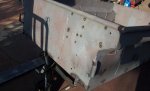
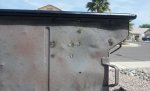
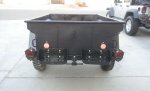
The rest of the day was spent wire brushing the back plate, drum, and manual brake lines in preparation for paint.
 
Last edited:

2ndchance

New member
55
1
0
Location
Glendale, AZ
Wednesday: 2/29: Well, ain't that just dandy.

As my research deepened, I noticed I screwed up on the bearings, races, & seal. Apparently, the M416 and M416-A1 w/ surge brake, uses different axles. Whoops!

WHOA! Stop this train! What did I miss????

Did I screw up here? Bearings and Race. Is my M416A1 not the same as the M416?

The M416 uses 4 of the same bearings for both wheels. I purchased two of the SET45 kits from Timken.

I just read on G503.com's forum that the M416A1 has two different sizes. The internal one is smaller than the external one???

The post reads:

The 416 has a non-tapered shaft and uses the same bearing on both inner and outer aspects of the drum (bearing #8762093 & race #7536132). The inner seal is #516992.

The m4161A uses two different bearing sets. The larger,inner one is bearing #L68149 and race #L68111. The smaller, outer set uses bearing #L44610 and race #L44649.
The inner seal is #15529.


I would have seen it eventually, I guess as I am reading the manual from cover to cover. Glad I ran into it now, as the bearings I ordered just arrived. Had I found it later, I would have been past my 30 day return policy.
 
Last edited:

2ndchance

New member
55
1
0
Location
Glendale, AZ
Sunday 3/5: I've spent the last couple of days organizing parts and trying to figure out what to do with the issue of the bearings for the axle. I was able to find a nice resource, Arizona Axle Products. They are located at 5323 W. Montebello Ave in Glendale. The owner is pretty old school. He doesn't even have internet or email. LOL. He was a wealth of knowledge and gave me two options.

1. He had the bearings/race/seals to rebuild my hubs. I can continue using my existing tires/rims and replace the tires when they finally wear out. Cost will be around $50.

2. For $90 each, he can fully replace my drum (including hardware) and give me one with a 5x5 bolt pattern. This will allow me to add a 2" spacer (which I already have) and use matching Jeep rims/tires (which I also already have).

I had a 3rd option. I could go with his option 1, then get 2" adapters to space out the drum and adapt the 5x5.5 to 5x5, then add my Jeep rims/tires. Those adapter will run about $120.

Geez. for now I think I will choose option 1 and continue to use the original military tires. This will cut my costs down and, who knows. By the time the tires wear out, I may just buy new rims for the trailer AND my Jeep. So, I will save the $$$ for a future upgrade.

All my parts came in. The Willy master cylinder was an exact replacement for the surge brake cylinder. Woot! Saved me $100! I ended up ordering the Toledo shock dampener, as this was my only option. The standard 10" drum Dexter trailer wheel cylinders seem to be correct so I'm glad I ordered those, instead of trying to rebuild the original ones. The replacement flex brake line is questionable. One end attaches through the frame, and is held in by a snap ring. The gap is rather large.. maybe too large. I can probably fab up a spacer or find some washers that can fill the gap. I'll figure it out.

I went to Home Depot and purchased some wire connectors, wire looms, and two rattle cans of Rustoleum Hammered Black. This isn't a perfect match to the textured powder coat, but it's close and will add a bit of contrast to the frame.

So, tonight the project was paint. I had wire-brushed all of the parts and removed as much paint as I could. Other than that, I just textured and smoothed out the imperfections and degreased everything. Time to spray.

Tomorrow, I'm going to wire up the modified tail lights within the housing. I can't do much more until the frame gets back from Glendale Powdercoat. If time permits, I may make a trip to Harbor Freight and look their tumbling media. I would love to find a coarse media that can take off all the old paint off the nuts, bolts, and washers. This will save me from having to inventory all of them then hunt down replacements.

Until the frame comes back, I will turn my focus to the tub. The tub is something that I will need help with. I need a plasma cutter, a welder, and someone who knows what the heck he's doing with them. Geoff came to mind.

Dude's got some MAD skills and he's less than a few miles from my house. Geoff is a super guy. We're going to schedule a time for him to come by (soon) and take a look at the tub, give me some suggestions, and hopefully, he can find time to help me put it together.


Another decision will have to be made soon and I'm open to suggestion.

What color for the tub? I'm going to rattle-can the fenders to match the lights. I'm also going to use rattle-can bed liner inside of the tub and do it in black. Should I just sand blast it and rattle can it Hammered Black, like the accent pieces? How about make it silver to match my Jeep?


Attachments

Last edited:

2ndchance

New member
55
1
0
Location
Glendale, AZ
Monday 3/6: Worked til 4am on Sunday and crashed til 10am. There was a few more items to be painted. I got to the last three pieces, the tire rims, and ran out of paint.

The electrical was a bit easier. The trailer wire connector I purchased from eTrailer.com (#A35W42B) was set up for easy wiring. It's a standard 4-wire, but they added a 2nd brown, which is for driving/accessory lights. Normally, the brown goes to one side of the trailer, then you tap off to go to the other side. This cool little setup saves you from having to tap off.

Normally, the white wire of the 4-wire set is the chassis ground. Commonly, the white wire is secured near the hitch. The lights are grounded to the frame, and the circuit is completed by the frame.

Since my M416 lights have 4-bulbs, it has 4-wires that come out of the back. The wires pass through a rubber insulator and it protects it from shock, cuts, and moisture. The ground for the bulbs is inside and attaches to the frame via the mounting bolts.

I wanted to retain the use of the rubber insulator and look of the original 4-wire. I was only using 3 bulbs, so I wired each bulb separately and wired the ground to come out with the other wires.

The original bulbs are 24v. I found a 12v replacement that "seems" to work well. I'm only using the top 3 bulbs. The 4th bulb is for the Black-out lights, which I am not configured for, nor was the 4th bulb connector is good physical shape.

I digressed. From top to bottom, I'm using bulb 1 and 3 as driving lights. Bulb 2 as the brake and turn signal. Bulb 1 and 3 are smaller bulbs. I found #7007 fit well, but they are only 5w bulbs. Bulb 2 is larger and I found #7506 to be perfect. It's a 21.5w bulb is bright.

I covered the bulbs and socket with dielectric silicone grease and buttoned it all up.


Attachments

Last edited:

2ndchance

New member
55
1
0
Location
Glendale, AZ
Wednesday 3/7: My friend Geoff stopped by and gave me some good suggestions about replacing the tub floor. At the same time my buddy Richard asked me to haul the tub to his place. He's taking it in for sandblasting. Other than painting a few more items, there isn't much to do. The frame should be back soon, and the assembly work will begin.

CRUCIAL ERROR! The original data plate was still on the tub when I brought it over to Richard's place. To save the data plate from the scouring of a sandblaster, I ground off the rivets and removed the data plate. This was BAD. Later I found out that it's a FELONY to remove a VIN... even on a trailer. This has proven to be a difficult thing to overcome. An enforcement officer threatened to seize and crush this trailer!

What I probably should have done was reinstall the tub back on the rolling frame, drive it to DMV and get a Level II inspection, get my new title (as I didn't have on with the trailer, just a Bill of Sale), and get it plated and registered. Then, continue with the restoration. To date, I still have not registered it yet. I am meeting with DMV Enforcement, a detective, and a DMV agent, to try to resolve this. The meeting is a few weeks away.


Thursday 3/8: Picked up the tub. Man, sandblasting brings out all the uglies and imperfections. Now, I can see all the dents and dings. It will take a little time to straighten some of them out, but it shouldn't be bad. There were some "extra" holes when it came back. LOL. Just goes to show how thin some of the metal is.


My neighbor (a FAB guy) said the can fill in the holes.

Now, just need to mask of 3/4" off the side of the floor, then cut the sucker out.

Frame, axle, ancillary parts, and repacked hubs should all be back on Tuesday 3/13.
 

Attachments

Last edited:

2ndchance

New member
55
1
0
Location
Glendale, AZ
Sunday 3/11: It's time to cut the floor out of the bed.

Per Geoff's instructions, I taped off 3/4" border and used the tape as a cutting guide. I used an angle grinder airtool but the 30gal compressor struggled to keep up. After 20mins of cutting, I only got 7" of cut. This was pretty sad. Luckily, I had an electric one and prayed that I can get it finished with only 5 cut-off wheels. So, here I went...

An hour later it was evident that 5 cut-off wheels were not enough. I managed to get 80% done. Plus, there were areas where I could not get the electric unit into. Especially near the drain plugs and the mounting tabs. I ended having to finish off with the air tool. In the process I managed to nick the air hose and it was almost Game Over.

A standard "Man Tool" is the duct tape. LOL. It allowed me to get back to work and limp through the rest of the cuts.

An hour later... Success!

In retrospect, I probably should have taken this over to my FAB guy and have him use his plasma cutter. It would have been faster and I'm sure his skills are better than mine.


Attachments

Last edited:

2ndchance

New member
55
1
0
Location
Glendale, AZ
Tuesday 3/13: Made the run to Glendale Powdercoat and picked up my frame and pieces. I'm still tickled that the total cost was just $135.

Also stopped by Arizona Axle Products and picked up the bearings, seals, and races to rebuild the hubs. I'm planning on using Marine Grade grease, as it suppose to repel water better than the regular stuff.

My dad i started reassembling the frame. The new C-shacles from the 50' series CJ-3A Willy was a perfect fit. I fought with one of the shock towers when I disassembled the frame. Now that it's powercoated, it was impossible to fit in. I compared it with the other one and this one was just a bit big. So, I broke out the angle grinder and took off 1.5cm of metal from the top. Now, it's a perfect fit.

The new NAPA/Monroe shocks were great, but the bushing was thicker than the original. They are held in place by a thick washer and a cotter pin. I ended having to replace the washer with a M16 washer. A bit thinner but still had trouble getting the cotter pin in place. To smoosh everything down, I put an open end wrench against the washer and compressed it with a large C-clamp. This provided me the room to drop the cotter pin in place. Worked like a charm!

I had seen that someone on an Expedition Forum had flipped their axle for better clearance. I decided to do this too, as I may choose to go with matching 17" Jeep JK Moab tires later. This would prove to be a mistake. Once the axle was flipped, I ran into issues with the manual brake cables. They were too short. I could not secure the cable brackets back onto the frame. I could have left the brake cable just dangling, but then it becomes a "snagging" issue down the road.

After all that, we had to take it all apart and start over, putting the axle back to the original spot.

The rest of the night involved reinstalling the manual and hydraulic brakes, the surge system for the lunette, and prepping the drums for the install of the new bearings.

The replacement master cylinder (which is from a 50's series CJ-3A Willy, worked perfectly. So did the flex brake line. The replacement wheel cylinders worked also. One of them needed to be "fitted" so the angle grinder came in handy.
 

Attachments

Last edited:

2ndchance

New member
55
1
0
Location
Glendale, AZ
Wednesday 3/14: We have a rolling frame!

Tonight was suppose to be final electrical, hubs & bearings, and surge brakes. We ended up having to redo the brakes because the hubs were binding. I swapped some parts from each side and it all fit back together.

The surge brake proved to be a challenge. The goal was to bleed the air out of the lines but it was harder than anticipated. With a traditional car all you have to do is loosen the bleed valve, pump the brake pedal and push the air out. Since there was no pedal I was at a bit off a loss. I purchased a brake vacuum pump but it didn't work. After 2 hours of brain-racking ideas and failed attempts I ended up removing the master cylinder and pumped it by hand with a philips screwdriver. It worked.

I didn't get to the electrical but did manage to grease up all the zirks and now all the mechanicals are finally done.

I will try to get to the electrical this weekend. Then, my attention will turn to finishing the tub.
 

Attachments

Last edited:

2ndchance

New member
55
1
0
Location
Glendale, AZ
Thursday 3/15: Today was my son's b-day. Adding a full day at my day job, it made for a short couple of hours of Trailer Restoration.

I was able to get all the wiring done. I reused the original wire harness brackets. I wanted to have them on the trailer, in case I sell it down the road and the new owner wants to restore it back to a full military trailer.

I like things to be neat, so I put extra attention on the wiring loom. I shrunk wrapped all solder jobs, and used insulated wire connectors. It took 2 hours, but it looks sweet, I won't have to worry about it getting wet, and it looks pretty bad-ass!

Once wired, I took the frame out for a drive just to make sure the lights worked and it's rolling straight and smooth.
 

Attachments

Last edited:

2ndchance

New member
55
1
0
Location
Glendale, AZ
Friday 3/16: After work I raced to Southwest Steel on 22201 North 23rd Ave, Phoenix. I purchased a 10ga steel sheet for the bottom tub of the trailer and the angle brackets for the cross member supports.

NOTE: 10ga steel turned out to be REALLY thick. So thick that it made seam welding impossible. The original was probably 16ga. If I had to do it over again, I would choose 16 or 20ga steel.

It was interesting to watch them cut the stuff. He would not let me in the back to watch the big plasma cutter do it's thing on the sheet steel. It was a safety concern, I guess.

When I got home, I finished prepping the tub by removing all the burrs from the cuts, straightening up the sides, cleaning the surfaces that will be welded, and marking any holes that need to be filled in.

Then, I deburred the new steel.

At this point, all work has come to a standstill. Rain is in the forecast and I don't want to risk getting any of the raw metal wet. I already accidentally sprayed the newly sandblasted tub with the garden hose when I was washing my Jeep. My wife opened the garage door and I wasn't paying attention.

Work will continue on Tuesday. The only thing left is to put the tub back on the trailer and wheel it down to my neighbor's FAB shop. He graciously offered to weld it for me.

By putting the tub back on the trailer, the frame will hold the tub "true" and allow the new floor to be seated properly for welding. Thus, eliminating unnecessary flex in the tub. Will it work? Eh, who knows. It's rare to find a M416 tub that is even straight, though. Years of use (or mis-use) kinda funks up the tub.
 

Attachments

Last edited:

2ndchance

New member
55
1
0
Location
Glendale, AZ
Monday 3/19: Lucky me! The weather dried up and when I got home everybody was gone! I had the night to myself so I decided to try to get the tub onto the trailer.

When I wheeled the frame into the garage, I noticed something! RUST. The master cylinder, which I received in a painted condition had surface rust on it! WTF, man!?! So, I pulled it off the frame, cleaned it, and painted it.

The tub was heavier than I remembered. Either that, or I was just feeling tired and sore from the previous days of work and the weather. I had to go ask two of my neighbors for a little muscle and got the tub in place. Some of the mounting ears got a little bent from all the previous moving around so I wailed on it with a hammer and block of wood.

Now that the tub was on tight and the box was as square as it could be, we slid the steel sheet in place. A perfect fit! Almost too perfect. I hope I left enough room for my FAB guy to seam-weld. The cross members are also ready to go, so I placed them in the tub.

All set for Wednesday! Once the welding and hole patching is complete, I will need to pull the tub back off the frame, flip it, and start the painting process. Tomorrow, it's off to Home Depot to pick an exterior color for the tub. I'm thinking of a dark pewter. My thought is, give it some contrast but make it a paint that I can buy and "touch up" when it gets some trail rash.
 

Attachments

Last edited:

2ndchance

New member
55
1
0
Location
Glendale, AZ
Wednesday 3/21: I dropped off the trailer to my fab guy. He's spending the next two days patching rust holes, sandblasting the new tub bottom, and welding the tub back together. During this time I finished painting the fenders in Hammered Black.

I finally decided to go with a Matte Black for the trailer tub. There is enough hammered black to give it contrast and being the frame is also a textured matte black, it should all tie in well.

With luck, I will get the trailer back Friday night and start painting it. I think 4 coats of paint should be good. Going to rattle can it. Will rattle can the bedliner, too. I still have some from my last trailer.

The next pics and post should be of the final project.
 
Last edited:

2ndchance

New member
55
1
0
Location
Glendale, AZ
Tuesday 3/27: Well, I was hoping that this would be my last post and the big "reveal" would happen... but I ran into a few snags.

1. If you think it's all going well, it ain't: I dropped it off on Wednesday. Was suppose to get it back on Friday. Was delayed til Monday. I marked the holes that needed to be filled. I circled it with a Magic Marker. He went a bit nuts and darn near sealed up EVERY hole... even the ones I didn't want him to. LOL.


2. Bigger is not always better: The original tub floor was 16ga steel. I replaced it with 10ga steel. When it came down to welding, we ran into issues. The amount of heat needed to weld the 10ga steel was too hot for the rest of the 16ga tub. It kept blowing holes through it!


3. Double check the the checklist : I did a cursory once-over on the tub, found a few areas that needed some attention. Did a 2nd look and gave it a thumbs up. Got it home and noticed I missed a BIG thing... we forgot to weld back in the drain plug mounts!


4. Both tires now have BIG HUGE cracks on them. They're holding air because of the tube. I need to start shopping for some tires.

5. I ran out of grinding/cut-off wheels. Need to make a run to Harbor Freight.


Well, it's back in my possession. It took a fork lift to install the tub on the frame. It took 4 guys to lift it off the frame and set it back up in my garage. For now, it's going to be 2 days of cleaning up the welds, then Thursday it goes to Tempe DMV for Title and Registration then back home for it's first coat of paint.

Last night, I totaled up my spreadsheet to see how much I spent so far. Everything is on the spreadsheet.

My wife made me include my initial cost of air tools, air hoses, sockets. I told her that those tools will be used for other projects, too! Well, if I back out the tools, my cost so far is only $1,300. Tires will set me back an additional $300. Ug.. may need to revisit the bolt pattern conversion.
 

Attachments

Last edited:

2ndchance

New member
55
1
0
Location
Glendale, AZ
Wednesday 3/28/12: Last night was not good. The die cutter got away from me and got my knuckle. It got through the skin and nicked my knuckle. No nerves or tendons were touched (thank God). Sitting at the doctors office now. I sealed it up good with liquid bandage. My doctor hates that stuff.

Hes going to have to cut through it to examine it. Ouch... Again!

Saturday, 3/30:
Well, the tub is going back to the fab shop. They are going to weld in the drain plugs. I'm out of commission for a week anyways until my hand heals up.
 

Attachments

Last edited:

2ndchance

New member
55
1
0
Location
Glendale, AZ
Monday 4/2/2012: After work this morning I had neighbors help me lift the tub back onto the frame. It's going back to the fab shop so they can put in the drain holes. On the way, I thought I would stop at DMV and get the Level 2 inspection out of the way and get the replacement title. This is where all crap hit the fan.

I had called DMV earlier last month if it would be an issue with removing the VIN tag since I had to get behind it for the rust. The lady at DMV didn't have an issue with it. Earlier last week, I called again and asked if it would be OK for me to bring it in for inspection with the VIN tag being off of it. Again, she said it was OK. Today I stopped in and the inspectors said it would be OK, but there was a 4-hour wait. A DMV enforcement officer was standing nearby and heard our conversation and saw my VIN tag in my hand.

1st Officer: Whoa! You took the VIN off your trailer? Don't you know that is a felony? We could legally confiscate this trailer and crush it.

Me: What?!? No way, man!

2nd Officer: At the least, we can take your original VIN and destroy it, then issue you a new VIN. Much like a home made trailer.

Me: Man, I would REALLY like to keep the original VIN and TAG. There is a historical importance. This is a M416-A1! There were thousands made but you don't find many of these left in existance! Especially one with an intact VIN! Usually these trailers are sitting at the bottom of an ocean or left on foreign soil. I think it's my responsibility as the restoring agent to keep it all intact! Can't you see the importance of that?

1st Officer: You have to see our side of it. VIN theft is huge. (blah, blah, blah.. for 20 mins).

Me: I documented my restoration. I have pics showing this tag as bring on this trailer. It's all over the web.

2nd Officer: Hmm... bring in that documentation. I will see what I can do. You look honest enough of a guy.

Whew! I may have saved my ass after all! LOL.

Well, the hand was feeling better and I was bored so I thought I would get started on some paint and sealer. Adam, my FAB guy installed the drain plugs. I opted for a modern plug because, as nostalgic as it would be to have the originals, I figured one day they will run out of the rubber drain plugs and I would be SOL. I used some paper tubes to plug the drain holes and applyed my sealer to the seam of the tub floor.

It should take 24 hours to fully cure, then I can apply the spray-on bedliner.


Attachments

Last edited:

joshs1ofakindxj

Active member
731
112
43
Location
SW PA
I hate the DMV...

Anyways, looks like you're making some awesome progress!

It took me awhile to get my tub off the trailer frame. I thought I missed bolts, or they had some adhesive holding them together. I even had the entire trailer hanging from a hoist by the tub handles and the frame wouldn't drop off. I ended up attacking it with some pry bars and jerking it off. That old rust had a strong hold on it.
 

2ndchance

New member
55
1
0
Location
Glendale, AZ
Wednesday 4/4/2012: I spent last night spraying on Plastikote bed liner. I used up the 2 cans I had left over from my 1st trailer. The coat was not thick enough so I picked up 3 more cans. Still not enough, so another 3 cans. I think I finally got it... but only time will tell.

Today, I flipped the tub and started painting the exterior. This matte black kinda reminds me of a chalk board. I'm not totally convinced that I like it. Bummer. Well, I'm kinda committed, since I have 6 cans of it and the have already sprayed on 2 coats. Maybe after 5 coats, I can sand it down a bit and make it slightly smoother.


Attachments

2ndchance

New member
55
1
0
Location
Glendale, AZ
Saturday 4/7/2012:

Finally!
The paint has cured and my neighbor and I was able to marry the tub back to the frame. We got the fenders back on, mounted the reflectors and Jerry Can mounts, and touched up the shiny nuts/bolts with a blast of paint.

Almost FINISHED!

Thanks to my buddies Geoff, Daniel and Michael for the technical, mechanical, and inspirational support. Special thanks to my neighbors who put up with me with the 10pm knocks on the door, which usually followed with, "Hey, can you come over and help me lift the tub on/off my frame?"

The only thing missing is some new tires. I have some time, though. The tires have some cracks. Since they are tubed, I don't have to worry that much. They will work long enough for me to figure out which way I want to go with the tires.

1. Buy new 700x16 NCT and reuse the original rims.
2. Find some "modern" rims and get matching Falken Rocky Mountain ATS in LT225/75R 16.
3. Add some spacers and adapters and mount the same tires/rims that are on my 2009 Jeep JK.

Then, it will be trail ready. Until then, my M416A1 is road ready.
 

Attachments

Last edited:
Top
AdBlock Detected

We get it, advertisements are annoying!

Sure, ad-blocking software does a great job at blocking ads, but it also blocks useful features of our website like our supporting vendors. Their ads help keep Steel Soldiers going. Please consider disabling your ad blockers for the site. Thanks!

I've Disabled AdBlock
No Thanks