Howdy,
As you can see in the thread. There are 2 types of gauges used in the MEP-8xx units.
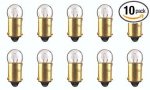
The gauges with a white back cover, has the little bulbs already mounted. You just need to give it a little + connection.
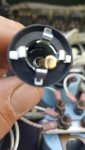
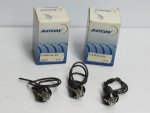
The gauges with the light blue back cover has the hole ready for a light. You can piece some items together to get it working. With all the talk about gauges, I found a nifty little part which works for you.
Datcon - Light Kit, 5/8 inches, 24V - 06294-00

As you can see in the thread. There are 2 types of gauges used in the MEP-8xx units.
The gauges with a white back cover, has the little bulbs already mounted. You just need to give it a little + connection.
The gauges with the light blue back cover has the hole ready for a light. You can piece some items together to get it working. With all the talk about gauges, I found a nifty little part which works for you.
Datcon - Light Kit, 5/8 inches, 24V - 06294-00
.jpg")
.jpg")


") Good times... Good times
Good times... Good times