• Steel Soldiers now has a few new forums, read more about it at: New Munitions Forums!

  • Microsoft MSN, Live, Hotmail, Outlook email users may not be receiving emails. We are working to resolve this issue. Please add support@steelsoldiers.com to your trusted contacts.


My BIG M925A2 Project Truck Is Home

Cucvnut

Well-known member
3,802
51
48
Location
Carver, Oregon
Cool dude !!! when do you get a hood and gril for it ? it looks like its out of a mad max movie right now ( which is not bad either !) cool to see it moving !
 

steelsoldiers

Administrator
Staff member
Administrator
5,246
3,932
113
Location
Charleston, WV
I have the hood and grill for it, but haven't put it on since it's a lot easier to access everything with it off. I will probably get it on this weekend or next. I do love Mad Max though! :)
 

steelsoldiers

Administrator
Staff member
Administrator
5,246
3,932
113
Location
Charleston, WV
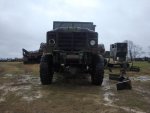
UPDATE: I had a work session at John's today. My plan was to get the good, used treadle valve swapped in and then get the hood mounted.

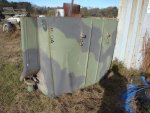
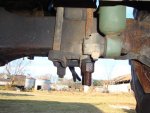
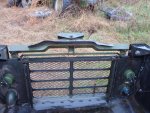
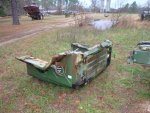
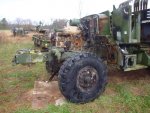
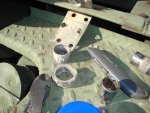
I started out the day pumping gear lube into the front end for about 30 minutes. While I was doing that I discovered that one of the u-bolt ends had been sheared off! I don't know what they hit with this truck, but they really fubar'ed a bunch of stuff! After tiring out both arms, I walked around the truck spraying Kroil on whatever I was going to work on. While that soaked in I went over and scoped out the hood that I was going to use. It had spent a good bit of time laying face down in the yard and actually had quite a bit of grass growing in the insulation. I had flipped it over a few weeks ago to let it drain and dry out. Today, I removed all of the insulation and sprayed oil on all of the fasteners that would need to be removed in order to install the hood.

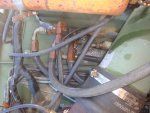
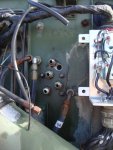
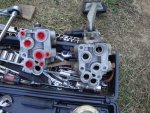
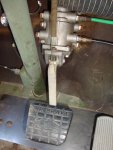
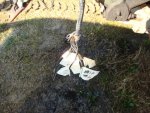
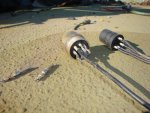
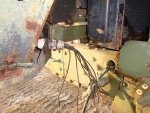
I went back to the treadle valve after that. I labeled all of the lines so there wouldn't be any question about where they went. After that I removed all of the lines, fittings, and mounting bolts from the front of the valve body. Then, I went inside the truck and removed two more lines and the return spring. When I removed the bottom supply line fitting I found a huge mud dobber nest in the hole. No wonder it wasn't working right! I removed the valve and pedal assembly from inside the cab and prepped the "new" valve for installation. I transferred the pedal assembly and fittings from the old valve and then bolted the "new" valve back into the cab. I wrestled the lines back into place and tightened everything down.

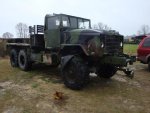
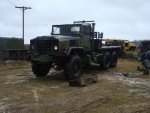
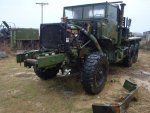
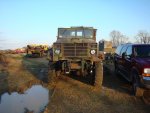
I retrieved a deuce from John's inventory to slave the truck off so I could test the new valve. Once I got it started, the air pressure came up quickly. It reached 120 psi in no time and the expeller valve on the air dryer blew a bunch of nastiness out right on cue. I tried the brake pedal and it seemed to be working ask expected. Time for a test drive!

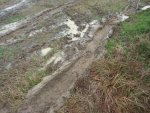
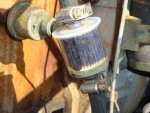
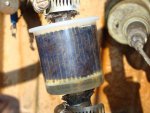
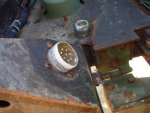
I pulled out onto the gravel road and took it for a spin. I was pulling up a hill next to the county road and all of a sudden the truck lost power and died. Dang, now I have to walk back and get the deuce to jump it again. I pour 5 gallons from a can into the tank just in case it's getting low. I started the truck again and it sounds good. I pulled up to the top of the hill and it died again! Argghhh!! I drove the deuce up and slaved it again. This time it stayed running and I got about 1/4 mile down the road. Uh-oh, losing power and sputtering! Dang it! It died again! I had to call Pete on his cell to come slave the truck. While he was on his way I followed a hunch and removed the inline filter. I tapped it out on a paper towel and it was dumping out black gook all over the place. No wonder it wouldn't run! I cleaned the filter out a couple of times and finally got the truck running smoothly. I managed to get it up the hill and parked without it dying again. I'm guessing there is a little sludge in the bottom of the tank and I stirred it up by driving around the farm. Hopefully a couple of filter changes will take care of it for good.

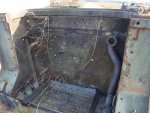
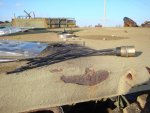
I finished the day by removing a couple of rusty brackets from the hood to get it ready to install. It will have to wait until next time since I ran out of time today. It shouldn't be too bad of a job since I have access to a wrecker. Thanks John!

Overall, it was a good day. I am very pleased with the brakes and the air system in general. I think I am about 2 more big days of work away from a serious road test and maybe even driving it home. Woohoo!!
 

Attachments

steelsoldiers

Administrator
Staff member
Administrator
5,246
3,932
113
Location
Charleston, WV
Thanks John. It was a thrill to drive it even though I was using cribbing for a seat and had the fuel filter issues. I can't wait to get it out on the road. The engine really winds up nicely and I was able to get it all the way to 4th gear on a straight stretch of dirt road. It felt great!
 

Cdub

New member
1,082
2
0
Location
New Milford, NJ
Hey Chris,

Great to hear your making good progress with your A2. I do like reading about all of your up-dates as they unfold as well as checking out the pic........

Cheers,

C'dub
 

Seatyger

Member
138
0
16
Location
Ontario
This is an amazing story of stubborness & stamina. This has been a great read.!! You have definately made my M135 Project look like a mouse! Talk about your 'Go Heavy or Go Home' attitude.

Thanks for taking the time and effort to share this adventure. :grd:

Jim
 

steelsoldiers

Administrator
Staff member
Administrator
5,246
3,932
113
Location
Charleston, WV
Thank you to TigerHawk, Cdub, and Seatyger. It's feedback like this that keeps me going. I won't have a chance to do anything this weekend as I will be in the mountains for a little deer hunting. Hopefully, I'll get the hood installed next week along with some fresh batteries so I can do some more extensive road testing. More updates are a comin'!
 

steelsoldiers

Administrator
Staff member
Administrator
5,246
3,932
113
Location
Charleston, WV
Man, what a nasty day to work on a truck in the middle of a field! It rained on me all day today. I was soaked to the bone by day's end. I thought I was going to have to stick it in 4x4 to get out of the field. Sorry about the ruts. John!

My goal today was to bolt the front clip in place and get it adjusted so it will close easily.

The first thing I had to do was get the pivot mount off of the parts truck. I had to unbolt the 4 mounting bolts and then slide the whole hood unit off onto the ground so I could remove the mount. That was fun to do by myself! As you can see in the first picture, the parts truck is starting to look very picked over now.

Once I got the mount off, I loaded that and a couple of other things up and went up the hill to prepare the good hood for mounting. I had to bolt the pivot mount onto the good hood and then flip it right side up so I could snatch it up with the 816. I had to snake the wrecker in between all of the other dead trucks to get to the hood. Once I pulled in front of it, I let the boom do the rest of the work. I had the hood hanging from the hook in a matter of minutes. Then, I had to slowly make my way back through the trucks on both sides of the road.

I pulled the wrecker in front of my truck and went to the shop to fetch Pete. He ran the wrecker boom while I spotted and pushed the hood into position. Once we had it lowered into place we lined up the holes and bolted in down loosely. We then disconnected the wrecker and lowered the hood down to check alignment. We tightened the bolts down once we got everything lined up.

Pete went back to work on a bob-truck and I finished the hood install by mounting the catch cables that keep the hood from going past the balance point.

It feels so good to have that hood on there. It finally looks like a real truck. I hope to get all of the lights working next time so I can do a real test drive.
 

Attachments

steelsoldiers

Administrator
Staff member
Administrator
5,246
3,932
113
Location
Charleston, WV
Its starting to look like a Truck. When you think you will be done with it?
I'm hoping to be able to drive it up here to VA after a couple more all day work sessions. It won't be done, done for quite some time. I have a good bit of body work to do in the cab, sandblast, paint, CTIS, etc...
 

Nonotagain

New member
1,444
41
0
Location
Parkville, MD
Chris, All I can say is that you must have "VISION" as I would have written that POS off as a basket case prior to your purchase.

Green must flow thru your veins to be able to reincarnate that truck back into a Mean Green Fighting Machine.

Well done sir, well done.
 

steelsoldiers

Administrator
Staff member
Administrator
5,246
3,932
113
Location
Charleston, WV
Chris, All I can say is that you must have "VISION" as I would have written that POS off as a basket case prior to your purchase.

Green must flow thru your veins to be able to reincarnate that truck back into a Mean Green Fighting Machine.

Well done sir, well done.
Thanks! It definitely was a POS when I got it!

Nice progress Chris. Sometimes I think we are in a race.l
Ha! Thanks Jason. I'm pretty sure you're in the lead! :p
 

M920

Member
892
24
18
Location
chama/nm
Man Chris, the weather you have does look as miserable as mine here! I just hope it was not as cold... lol The truck does look awesome thought, with the hood on....what a difference!! I really like the 900 series trucks....can't wait to see it finished....

Soni
 

peecook

New member
342
1
0
Location
Richmond VA
**** Chris, thats awesome work. the hood on there has to make you feel like you got over the hump. dont know how you did it in that rain yesterday.
 

steelsoldiers

Administrator
Staff member
Administrator
5,246
3,932
113
Location
Charleston, WV
Soni, I was almost wishing for some white stuff! The driving rain blowing in the window of the wrecker as I backed into position was really refreshing! ;)

Jason, it definitely feels like I am over the hump.

Now, if I can just get all of the muck out of the fuel system so it quits clogging the filter! I am going to try some biocide to see if that takes care it. It is dark brown/black muck so it is likely a bacteria or fungus growing at the water/fuel interface. I drained the tank completely when I got it and it was running clean, but it sat all summer with less than 10 gallons in it. It probably got some water in it through an open fitting. I think I will let it sit all week, pull the drain plug to drain the bottom couple inches of the tank off, add more fresh fuel and some Power Service BIOKLEEN.
 

steelsoldiers

Administrator
Staff member
Administrator
5,246
3,932
113
Location
Charleston, WV
Well, I had a chance to work on the truck today. It was around 25 at first light with a heavy frost, but thankfully I didn't have 2 feet of snow on the truck like some of our northern members!

The first thing I did was drain the bottom inch of fuel out of the tank. It came out nice and clear. Hmmm... After that I added 20 more gallons of fuel, some Power Service diesel treatment, and some CRC Bio-Con.

I wanted to take it for a spin after that to test everything out before starting on the electrical stuff. The truck was air locked from the last fuel filter change so it took a lot of cranking and some ether to get it going today. It finally started and ran smoothly after a bit. I actually had some good batteries in the truck today so it was the first time it had started without a slave cable. What a milestone!

I pulled out of the mud hole and headed down the farm road. I forgot to latch one of my hoot latches so I pulled over to do that. While I was latching, I took a look at the fuel filter. That sucker was half full of crud already. Uh-oh. I headed down the hill where I could turn around and the drove back up to my parking spot. By the time I drove the 1/4 mile back up the road, the whole filter was black. Dang! I'm guessing there is a bunch of junk hidden behind one of the tank baffles and it doesn't end up in the line until I move the truck and get it sloshing around.

After plugging another one of those dinky inline filters, I decided that I was going to do the field modification where you install a giant fuel filter from the M809-series or M939-series with the NHC-250 in place of the crappy little A2 filter. Winslow had part of a kit on hand. I need to scrounge a few fittings and get a hose made up. I will probably get it installed next week. That should really help with my filtration issues. I'm hoping I don't have to pull and flush the tank. Ack!

After my test drive I went to work on the harness plug for the front clip. I had to take several apart to make one good one since all of the wires had been torn out of the donor connector and the nut was broken in multiple pieces. I salvaged 6 wires and connectors from another plug and then solder 2 more to finish my set. I got it all back together and still had time to get the headlights working and most of the tail lights. Next time I will get the rest of the lights working.
 

Attachments

Top
AdBlock Detected

We get it, advertisements are annoying!

Sure, ad-blocking software does a great job at blocking ads, but it also blocks useful features of our website like our supporting vendors. Their ads help keep Steel Soldiers going. Please consider disabling your ad blockers for the site. Thanks!

I've Disabled AdBlock
No Thanks