• Steel Soldiers now has a few new forums, read more about it at: New Munitions Forums!

  • Microsoft MSN, Live, Hotmail, Outlook email users may not be receiving emails. We are working to resolve this issue. Please add support@steelsoldiers.com to your trusted contacts.


Newbie checking out a deuce today??

SPCWarning

New member
485
11
0
Location
Stonewall, MS
Great truck!

Looks like you got a very straight truck there! Doing nice work on the resto also! Keep us updated.[thumbzup] (I'm jealous too, I could only drool over those trucks on auction)
 

caliber1

New member
995
8
0
Location
Elcho, Wisconsin
Nice job so far Andy. Makes me want to get to work on mine now. Picked it up in Jax as well. Tim up there was awesome to work with. Would like to see a pic of what you did with your hinges. I just put 1/4 inch bolts in mine for now to get the mirrors on.
 

Scrounge41

Member
167
1
16
Location
St. Augustine, Fl
Hi Andy, I'm waiting for my SF-97 to be processed on a M109A3 I won back in the middle of the summer up in Warner-Robins. Got to take it for a little spin on the SS members property who got it off base and is storing it, and am so looking forward to getting it home. I saw you mentioned Vilano Beach and that is where I live. Nice job on the interior. After I get mine down here maybe we can get together.
 

andytk5

Member
356
0
16
Location
florida
Thanks guys!

Nice job so far Andy. Makes me want to get to work on mine now. Picked it up in Jax as well. Tim up there was awesome to work with. Would like to see a pic of what you did with your hinges. I just put 1/4 inch bolts in mine for now to get the mirrors on.

I did that at first too. Uploaded some pics for ya to see how I did it, seems to be workin nicely with the axle grease. Just bent the cotter pins as you can see. Washers to tack up any space/slack.


Hi Andy, I'm waiting for my SF-97 to be processed on a M109A3 I won back in the middle of the summer up in Warner-Robins. Got to take it for a little spin on the SS members property who got it off base and is storing it, and am so looking forward to getting it home. I saw you mentioned Vilano Beach and that is where I live. Nice job on the interior. After I get mine down here maybe we can get together.
Love to man! Be kick ass to meet up at the beach with both the trucks. Talked to the Vilano Beach auth and they said it was all good, couldn't tow a 105 trailer since that would put you over the 35' mark I think. I'd like an S280 shelter, but like the idea of a 109 truck, hmm..:D

Also have a pic of the heater controls moved over. Used shorted bolts as there seemed to be an air line above the lip and didn't want to bolt ends wearing a hole in the pipe.

Anybody had this "haze" around there window edges like mine? Also how about a rubber flap to keep out major splashes in the battery area? Still gotta put in my dash light covers..
 

Attachments

Last edited:

andytk5

Member
356
0
16
Location
florida
Been rollin out and driving around the beach a little more. Haven't really had it up past 30mph much. Lots of noise and rattles up past 30, lol.

Gets lots of thumbs up, literally had a lady hanging out yelling "awesome!!!!"

Greased most of the zerks/u joints/slip joints up front and the rear. Engine oil seemed to be well past the full levels when warmed up. It was into the lettering. Oil pressure was high 20psi to 30psi. Mph gauge bounces all over when driving.
 

andytk5

Member
356
0
16
Location
florida
Here is the start of my exhaust setup. Using a 4" selector valve, with reducers to route out the stack or back to the muffler out the back. The 180 bend will be hacked to create an S bend that wraps around the battery box if I can make all this fit. My shoulder is F'ed up right now so I won't be messin with this for a bit but wanted to put this up for you guys to check out.:beer:
 

Attachments

andytk5

Member
356
0
16
Location
florida
Here are some pics of where I am now. Get the exhaust welded up and plumbed to the rear axle, next part will go up over the rears, possiblt the crossmembers andmay move the muffler back as well for more ground clearance.

Also aired the tires up to 105psi while I was doing the inside in the earlier pics.. they were at about 40psi when I got it. Wow!!! :doh: NOOB alert. Just throwin that out there for anybody seriously about to jump into a power steering mod. Air up your tires and then see what you think. If you are moving at all then its all good, stopped you still can't steer but it is night and day at least with t831 singles. I still have the box and may do it later but it's definitely not a "must have" anymore.
 

Attachments

Last edited:

andytk5

Member
356
0
16
Location
florida
Here are some more includig the painted diverter. Found my heater vent plate for the pull lever under the workbench. Still need a heater fan hi/low plate. Think I found one though.

Also changed the air tank valves with the pull wires to purge air. Added the fat window seals around the windsheilds as well as new OEM windshield seals. The fat seals just fill in the large gaps.

Floormats, hehe...

Also had the top on backwards, flipped it around so the rear would roll, and rolled the sides, kinda cool.
 

Attachments

andytk5

Member
356
0
16
Location
florida
More goodies..

And here is a little collection of parts for projects... Waiting on the rest of the pipe, (2) 4' sections to route exhaust/muffler out to rear. My a/c compressor, hydro steering box, 12v alt brackets, and an old radio from the boat that has a little wired remote that I will run to the drivers side.

Now the "pre/post-lube" setup has firmly bitten my ass.:D
 

Attachments

Last edited:

Clay James

Member
524
4
18
Location
Reno/NV
I like that exhaust setup. I've been thinking about doing something like that on my 109 to make long trips more comfortable.
 

andytk5

Member
356
0
16
Location
florida
I like that exhaust setup. I've been thinking about doing something like that on my 109 to make long trips more comfortable.
Clay - It makes it so much better I can't even tell you. The lady and I can hear each other no prob. Just make sure your welding is better than mine...:shock: I'll move the muffler over the rear axles prob this weekend now that my straight pipe sections arrived. I need to seal up the cab with some silicon and some snap-in marine carpet would go along way to drop noises and reflective surfaces.

I'll add an in-cab cable control soon.
 

andytk5

Member
356
0
16
Location
florida
Thanks guys!

Looks like installing the a/c compressor will be some work but straight forward. Biggest problem I am running into is where to mount the evaporator housing. Most of the ones I am looking at are 12-14' deep 16" wide and 5.5" tall. The firewall also bumps into the cab right in the middle where I want to mount it. The size of the housing and the firewall will push it into the gear lever so I need to come up with something here.
 

andytk5

Member
356
0
16
Location
florida
On the A/C evaporator box, it looks like sliding it over to the pass side will be no prob. I can still reach the controls and it will get everything nice and chill.

Here are some pics of the exhaust. I have welded in my rear hanger that attaches to the turndown. I moved the muffler over the rear to regain my ground clearance. Everything is painted as well. Looks real good and all the sound is to the rear, even 90% of the turbo whine. Also sprayed bedliner under the cab floors today. Going to hit the hood and engine covers/fenders this weekend.
 

Attachments

andytk5

Member
356
0
16
Location
florida
I have an M151 starter and removed the gear set to just a bare shaft. Looking to do a pre/post lube setup like M-35tom's but can't duplicate his 318 oilpump. Anybody have some suggestions for hydro pumps to hook to my 151 motor? Not sure what the specs would need to be or if I could use any of the off the shelf pumps from northern tool, they are high psi stuff though.

Like this?
http://www.northerntool.com/shop/tools/product_200330129_200330129
 
Last edited:

andytk5

Member
356
0
16
Location
florida
Putting on the 12V alt bracket. Prob pull it for paint soon. Picking up my 94amp tommorow.

Looking to install the a/c compressor. Obviously I used the pass side already for the 12V, too easy no to. The driv side is crazy for the compressor, just too much crap. Plus belt routing looks aweful.

Got me thinking why not on top of the motor using the bracket that runs across the front. The 12V alt bracket will be notched to allow a longer air compressor belt to be used while keeping a good amount of coverage on the pulleys. Seems to be the best route if the clearances work.

I will make a small bracket that bolts to the intake manifold bolts and gives the a/c compressor a rear support if needed. The front will be welded/bolted to the bracket in front of the engine. This will have a slot for tensioning.

Some test fitting shots, can trim off ears on compressor but still has about a 1/2" to hood.

New fuel guage installed and pyro waiting for install.
 

Attachments

andytk5

Member
356
0
16
Location
florida
Sorry guys for no updates, not that this is a crazy build thread by any means. Been crazy sick with a wicked chest infection/bronchitis so everything has been on pause..

Even still the brain never stops.

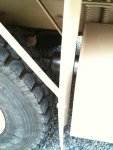
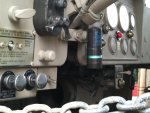
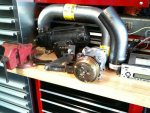
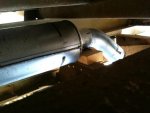
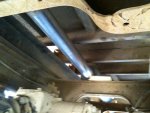
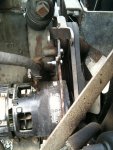
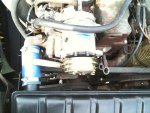
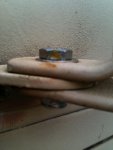
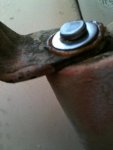
Been thinking about my top mount a/c compressor. The cross mount bracket that runs from side to side right in front of the radiator may need to be removed and used as a mockup to make the same bracket out of a thicker metal then reinstall to use as a welding base for my a/c brackets. The 12v alt bracket will be notched as mentioned for the belt to run down to the crank pulley then up to the trucks air compressor giving all pulleys ample coverage. For the rear a/c compressor bracket mounts i was thinking of using bolts the match the intake threads but instead of getting longer ones just use double ended bolts with a hex center body. Basically a bolt with a threaded end sticking out the top?

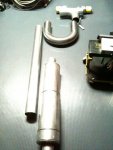
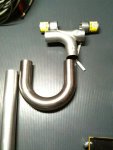
Just need the evap/fan box, hoses, r12.

I have a new 12v bussman 6 position buss fuse block that is replacing the same style in the boat where one of the spade positions (stereo of course) is toast. I will take that buss and drop it in the deuce for at least a 5 position block, 6 if I can fix that last one, to run my r12 a/c, stereo, blender:mrgreen:, etc.. Pop that under the dash and run some 4 guage. From my reading I can use the same grounding as the 24V for the seperate 12V system. Please correct me if I am wrong!

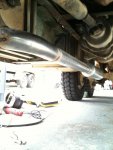
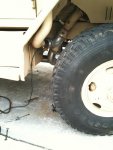
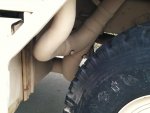
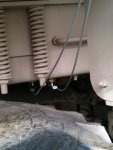
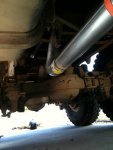
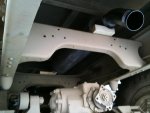
Still have the power steering on the back burner. It's really not an issue anymore though (proper tire air pressure..duh..) a hgher ratio and stopped steering would be nice its just not worth the time and cost ($500 pump, lines etc..) so the box is just chilling.

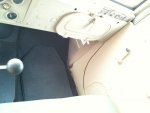
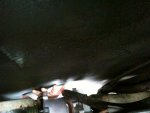
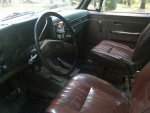
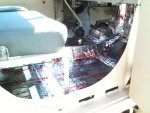
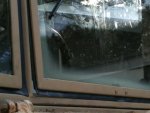
I'm currently laying down some floor sound deadener and will post pics when I am not embarassed of it and have it resprayed with rubber. Seems the most water comes in the gap under the front windsheild frame to body where the window can swing forward. I'm going to rund some silicon in there since my windsheild glass is pretty tight now with the fat HD rubber and new glass rubber.

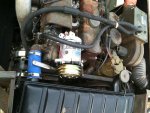
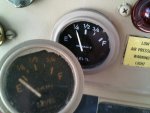
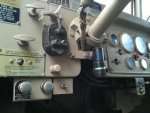
New fuel guage is awesome! Fresh fuel filters are going in asap after draining all the old gasoline oil mixture.. Wow. I can't believe I missed that but a good friend of mine Greg (who is on here) was up and smelled the tank and was like "man, that's gas dude". I wondered why the exhaust almost melted my eyes all the time. So I drained the tank using the elec fuel pump by opening the petcocks on the housings and connecting a small hose to run into gas tanks. Then 2/3 filled the truck with diesel, waiting to mix in some opti lube XPD to fill it the rest of the way, just hope no damage was done. Seems to be more power. Won't have to get lawnmower gas for a while!

Oil filters as soon as I get my rotella.

Next idea is m35A3 front wheels and flip rear hubs in and go dish out for a better look, but that will have to wait just for that fact it will be a major expletive :shock:!!

I found a video showing how to build a wvo collection pump out of a chevy Small block oil pump connected to a elec motor. This will be my blueprint for my pre-lube as well like m35toms great setup, though mine won't be as elaborate. His is pretty sick! The oil pump number is M-55 and is $18.00 new or free otherwise...

[media]http://www.youtube.com/watch?v=8o52BYTEau4[/media]

Guy explains most of the parts and methods, though i lower rpm motor seems better since this seem to be serious volume and pressure but maybe somebody can chime in with a good rpm spec to use as pre-lube?


Hi Andy, I'm waiting for my SF-97 to be processed on a M109A3 I won back in the middle of the summer up in Warner-Robins. Got to take it for a little spin on the SS members property who got it off base and is storing it, and am so looking forward to getting it home. I saw you mentioned Vilano Beach and that is where I live. Nice job on the interior. After I get mine down here maybe we can get together.
Hey buddy any news on your truck? I'd love to meetup or help you anyhow I could. Maybe plan a killer beach party down there and meetup with any local SS guys on the beach for a BBQ or whatever.

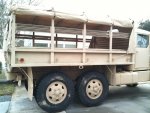
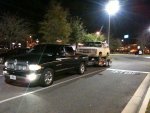
Also here is the deuce's little bro that we picked up the other night. I made myself more sick by doing this but every M1009 I tried to snag was gone almost by the time I emailed anyone.

Build on this M1009 will me mild like the deuce. 2" lift, has 33" tires, already ordered my 686 tan paint, a/c will go in, tint, replaced weater seals, and do the interior like the deuce. Truck is a great runner. Were we busting 65mph around town last night with no plates..hehe. I have another thread for this fella.

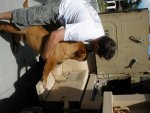
That's my80yr mastercheif neighbor who comes over to tell me about the prostitutes from back in the Navy days and trys his best to pass his welding knowledge on to me.. Dudes like family, and an O.D.B. lol if you dig? Good stories. My dog was trying to get in the truck but after a big $$ left TPL surgery I had to grab em before the right went..
Thanks guys!!
 

Attachments

Last edited:

andytk5

Member
356
0
16
Location
florida
Little more progress. Have the rear exit exhaust painted to match the truck. Have the floor insulation down in the big truck. So far the floor has been primed, rubber coated, then a layer of non-alum backed underlayment then a layer of alum backed peal/seal type stuff. Then it will get coated with durabak if there is any left from the M1009 floors.

Also found this cheap 5/8" thick foil on both sides insulation that was about $20 and was 2'x25' or something? Thought it would be good for the deuce roofs, back walls, firewalls, maybe even under hood stuff? Just thought I would share that.
 

Attachments

Last edited:
Top
AdBlock Detected

We get it, advertisements are annoying!

Sure, ad-blocking software does a great job at blocking ads, but it also blocks useful features of our website like our supporting vendors. Their ads help keep Steel Soldiers going. Please consider disabling your ad blockers for the site. Thanks!

I've Disabled AdBlock
No Thanks