• Steel Soldiers now has a few new forums, read more about it at: New Munitions Forums!

  • Microsoft MSN, Live, Hotmail, Outlook email users may not be receiving emails. We are working to resolve this issue. Please add support@steelsoldiers.com to your trusted contacts.


Red's deuce/camper project

welldigger

Active member
2,602
15
38
Location
Benton LA
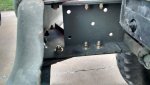
The problem I find is paint makes the imperfections even more noticeable. At least when they are that rough.

Don't use flux cored wire. Too much slag and spatter.
 

VPed

Well-known member
Steel Soldiers Supporter
1,094
276
83
Location
Clint, TX
It's too bad I did not know you wanted to get rid of the paper clips on your bumper. I would have traded you bumpers. I am going to make and install some on my truck.
 

red

Active member
1,988
22
38
Location
Eagle Mountain/Utah
Wish I'd posted it, would have saved some trouble haha.

This is the idea with the setup, mounting an 18k winch behind the bumper without losing too much on the approach angle. Also want to use the areas outside the frame rails as storage.

With the bumper mounted on the last bolt holes I have just enough clearance with the radiator and winch.

uploadfromtaptalk1412124740988.jpg
uploadfromtaptalk1412125019777.jpg
uploadfromtaptalk1412125032217.jpg
uploadfromtaptalk1412125041974.jpg
 

USAFSS-ColdWarrior

Chaplain
Super Moderator
Steel Soldiers Supporter
18,480
5,532
113
Location
San Angelo, Tom Green County, Texas USA
Red,
By sliding your bumper to "the last bolt holes" you've compromised the structural attachment and hence the SAFETY of the bumper for protective purposes. You've also lost the torque moment effect of TWO bolts on each of the Bumper Gussets, effectively creating HINGE POINTS the will allow your bumper to bend in the middle when you put a load on your winch cable.
From the structural perspective, you may have made a big boo-boo here. IMHO.
 

red

Active member
1,988
22
38
Location
Eagle Mountain/Utah
The bumper mods are far from complete. Planning to add a 3/8" thick 34x12" plate to the underside of the frame for the winch mount along with 1/4" plate reinforcement panels.
 

red

Active member
1,988
22
38
Location
Eagle Mountain/Utah
Got the reinforcement brackets built and installed, will try to get pics tomorrow.

Drove it to Odessa (bout 20 miles each way) and started noticing a intermittent vibration throughout the truck at speeds over 40mph (I cruise at 50mph). No feedback through the steering wheel, but would shake the truck for a few seconds then everything would smooth out.

I'll crawl under it tomorrow evening, thinking a wheel bearing might be going bad or a tire issue.
 

rustystud

Well-known member
9,071
2,388
113
Location
Woodinville, Washington
Got the reinforcement brackets built and installed, will try to get pics tomorrow.

Drove it to Odessa (bout 20 miles each way) and started noticing a intermittent vibration throughout the truck at speeds over 40mph (I cruise at 50mph). No feedback through the steering wheel, but would shake the truck for a few seconds then everything would smooth out.

I'll crawl under it tomorrow evening, thinking a wheel bearing might be going bad or a tire issue.
Check your driveline bolts !!! They are notorious for coming loose !!!
 

red

Active member
1,988
22
38
Location
Eagle Mountain/Utah
Found it. Passenger side rear rear axle has a flat tire. Since I'm going to the 395's in a few weeks I'll just remove the inner dual tires before the trip to El Paso.
 

red

Active member
1,988
22
38
Location
Eagle Mountain/Utah
Traveled to El Paso over the weekend to meet up with VPED and purchase some items. Was a good time hanging out with him and his wife and exploring some of the off road areas in the area, thank you.

Should have the seats in this weekend and have the tires mounted in a few weeks.
 

Attachments

red

Active member
1,988
22
38
Location
Eagle Mountain/Utah
Decided to work on the fuel filter upgrade this weekend. The filters were changed right before I bought the truck and it's been spoiled on a straight diesel diet. Going to spin on filters for the better filter ability, ease of maintenance, and standardization of filters between my trucks.

Started off by removing the mounting bracket for the primary filter. A wrench up top to hold backup and a socket with a swivel and 7" extension underneath made it quick. Left the bolts in while I removed the feed line (from the tank) and decided where to disconnect the line leaving towards the second filter. Removed the line where it connects to the bottom of the injection pump (secondary lift pump?).

After that I went to the passenger side and moved the filter mount until it fell to the ground. Didn't think about what brass fuel line would do falling a few feet with weight on it. Gives me an excuse to upgrade to a field serviceable fuel line though.

Definitely trash getting through the filter, could see it floating.
 

Attachments

red

Active member
1,988
22
38
Location
Eagle Mountain/Utah
Looked at the tm's and can't find this info. Which way does the coolant flow in the deuce? Is it from the water pump up towards the intake manifold, or the other way? Going to be pulling the plugs on the intake for the coolant filter plumbing.
 

rustystud

Well-known member
9,071
2,388
113
Location
Woodinville, Washington
The coolant in the intake manifold is going back to the radiator. The plugs at the end by the thermostat are where you should tap into for the pressure side (intake). The plugs on the pump are where you tap into for the suction or return side.
 

red

Active member
1,988
22
38
Location
Eagle Mountain/Utah
For those curious the hose is rubber lined steel braid, with a cloth outer lining. Same stuff we use for low pressure fluids at work. Running reusable JIC fittings on the ends, 1/2".

The cooling system required a 1/2" and a 3/4" pipe thread adapters for the plumbing. Fuel system uses 1/2" pipe thread at the primary filter, and 1/4" at the FDC connection. Was able to use the stock metal fuel line from the tank to the primary fuel filter mount by bending and adjusting the line. Could not use the stock line from the primary to the FDC because I damaged it during the removal of the primary filter mount.
 

red

Active member
1,988
22
38
Location
Eagle Mountain/Utah
Finished faster than expected with the tire install. Converted the left side of the truck to right handed threads with the lug nuts. Flipped the hubs, regreased all the wheel bearings and changed out a leaking wheel cylinder.
 
Top
AdBlock Detected

We get it, advertisements are annoying!

Sure, ad-blocking software does a great job at blocking ads, but it also blocks useful features of our website like our supporting vendors. Their ads help keep Steel Soldiers going. Please consider disabling your ad blockers for the site. Thanks!

I've Disabled AdBlock
No Thanks