• Steel Soldiers now has a few new forums, read more about it at: New Munitions Forums!

  • Microsoft MSN, Live, Hotmail, Outlook email users may not be receiving emails. We are working to resolve this issue. Please add support@steelsoldiers.com to your trusted contacts.


Red's deuce/camper project

VPed

Well-known member
Steel Soldiers Supporter
1,094
276
83
Location
Clint, TX
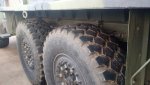
That looks really sweet. I think I forgot to mention that many of us have managed to hang that size spare in the stock location. There are threads on that or let me know if you have questions about it.

Finishing faster than expected is always a good thing.
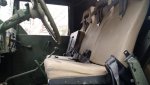
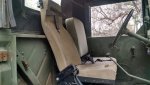
 

red

Active member
1,988
22
38
Location
Eagle Mountain/Utah
Good to know that the spare tire can go there with some modification.

When it warms back up in a few days I'll install the seats and then the spare tire. Getting the tires was the biggest financial hurdle with the truck project. With that out of the way I feel much better.

List is getting shorter (for now, will add more later haha).
Power steering
Winches mounted
Engine performance
Storage setups
Trans upgrade
Disk brakes
 

peashooter

Well-known member
1,039
205
63
Location
Hanover, minnesota
Wheels look good Red! Take lots of pics on your Seat install please:) Once I'm done re-covering my seats (same ones you and Vped have), I'll be installing them and looking for any solutions/advice/hints you may have.
 

red

Active member
1,988
22
38
Location
Eagle Mountain/Utah
Have the passenger seat removed and the new frame installed.

Took the truck for a drive to Odessa (bout 60 miles round trip) on the new tires. Handles great, rolling on 30 psi rears 40psi front. Tires are nice and cool to the touch, cruising at 21-2200 rpm.

Weather permitting will be working on the seats tomorrow.
 

red

Active member
1,988
22
38
Location
Eagle Mountain/Utah
Finished mounting the seats this morning. Pretty simple install with these seats and some help from Vick. His mounting design makes it almost a bolt in. I had to cut a plate out of the upper cab corner on the passenger side but that's because I leaned the seats back for more comfort. More pics to come.
 

Attachments

red

Active member
1,988
22
38
Location
Eagle Mountain/Utah
Started off with the passenger side. Unbolted the 4 bolts holding the seat mount to the floor and pulled it out. Went along the rear wall and unbolted all the seatbelts as well since the MRAP seats have their own harness per seat.

Took the replacement mounting bracket and bolted it to the floor. Adding a piece of angle iron to the original mount spaced 9" from the rear cross member will provide the new mounting holes. You do not need to remove the original front cross member, but it cleans up the appearance and allows easier access under the seats.

With the mount in the middle seat bolts directly in.

The passenger seat required the removal of a bracket from the top corner of the cab. If you angle the seats more upright this is not a problem.
 

Attachments

red

Active member
1,988
22
38
Location
Eagle Mountain/Utah
Thanks for the pics and good info Red! What size plate is needed for the driver's seat adapter?
10" long by 14" wide plate, 1/8" thick.

Took it for a drive to the shooting range with a friend. Between the seats, exhaust work, and the lower rpm's thanks to the new tires this truck cruises very comfortably for what it is.

One other seat mod to do with the driver seat. Because mine are somewhat reclined I will be adding a strip of rubber to the back of the seat. Rocks into the back wall of the cab right now.
 

red

Active member
1,988
22
38
Location
Eagle Mountain/Utah
Nice work. Are you concerned that the spring may hit the exhaust under the bed when you get off pavement? And I suppose you are going to turn the exit out the side and run it past the mudflap so you can smoke out some cyclists?:naner:
This has sort of developed into a concern. I raised the exhaust higher using some rubber hangers which brought it up high enough to clear the suspension movement and flex. However, didn't take into account the weight of the exhaust system, rough ride, and cheap rubber mounts falling apart quickly. Will be upgrading the exhaust hangers to metal chain this weekend.

Got my hands on an EGT gauge with a programmable alarm that I would like to install.

Fuse block for the 12 volt system along with a accessory plug and USB outlets. Was going to place the fuse block behind the seats, but they don't pivot forward which would make it very difficult to access later.
 

red

Active member
1,988
22
38
Location
Eagle Mountain/Utah
Chain hangers for the exhaust are now setup, shouldn't have any more problems now with it.

Mounted my cheater pipe as well on the truck, tired of it rolling around in the bed. Used a pair of 3" exhaust hangers to mount it along the frame under the driver's side bed.
 

Attachments

red

Active member
1,988
22
38
Location
Eagle Mountain/Utah
Nothing crazy this weekend with the truck. Fixed the rear exhaust hanger by modifying a clamp and a short piece of chain to match the other hanger by the muffler. So it's finished.

Fired up the truck and drilled/tapped the port for the EGT sensor. Removed the air filter for easy access, made for a quick job. Ran the wires to the cab but have not mounted the gauge yet.
 

Attachments

Top
AdBlock Detected

We get it, advertisements are annoying!

Sure, ad-blocking software does a great job at blocking ads, but it also blocks useful features of our website like our supporting vendors. Their ads help keep Steel Soldiers going. Please consider disabling your ad blockers for the site. Thanks!

I've Disabled AdBlock
No Thanks