• Steel Soldiers now has a few new forums, read more about it at: New Munitions Forums!

  • Microsoft MSN, Live, Hotmail, Outlook email users may not be receiving emails. We are working to resolve this issue. Please add support@steelsoldiers.com to your trusted contacts.

Ricks Deuce build

bigginstactical

New member
246
1
0
Location
port angeles washington
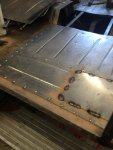
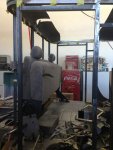
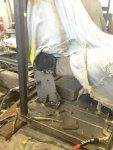
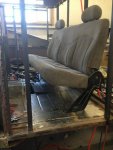
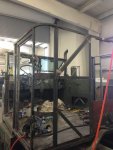
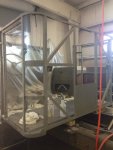
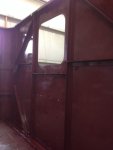
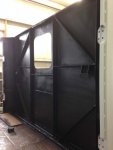
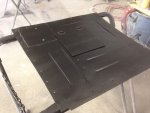
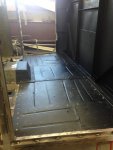
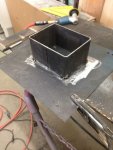
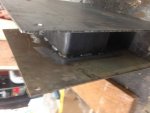
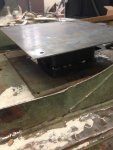
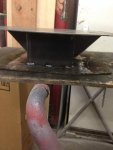
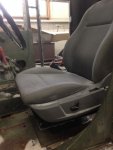
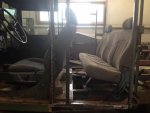
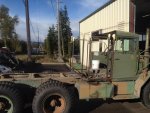
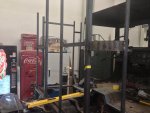
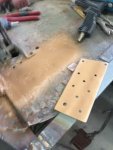
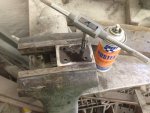
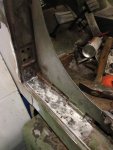
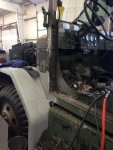
We managed to clear space in our body shop so the beast can stay inside until its finished, thankfully. Now I'll be able to work on it after work and not have to keep moving it. I finished the structure layout with the exception of some bracing, which I will do later. Its all welded solid now and just needing to trim to height. I also mocked up the seats to make sure of the the clearenes since everything has been a theory so far haha! I'm having an 18 gauge cap U channel made to install on the top of the framework so i can install the roof simaler to how it was originally. Thats where I got after a few hours this weekend. more to come......alot more sadly. haha!
 

Attachments

bigginstactical

New member
246
1
0
Location
port angeles washington
Have been so busy I haven't touched the deuce in along time :( 
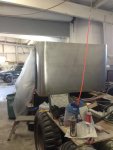
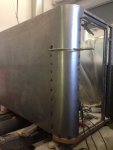
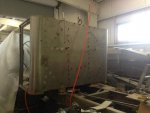
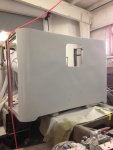
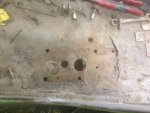
getting back into the swing of things now and will be updating with some pics very soon. I managed to fabricate and install new angel pieces for the gaskets on the doors. I don't like the factory seals on the front doors or how they are mounted so i made my own and will be putting a soft thick rubber there to help with water leakage and wind noise. Im also very close to buying the sheet metal to start wrapping the cab and roof.
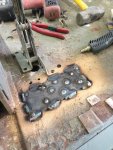
 

bigginstactical

New member
246
1
0
Location
port angeles washington
Managed to sneak a few hours in this weekend and have been trying to concentrate on finishing up all the small projects I can. My thought is do the small ones and the big ones will eventually become small! haha at least I hope. Seems never ending right now. Today I worked on the ebrake mount which was tore. I also plated over the repair for extra insurance. It appears it happened from normal wear and tare since there is quite a bit of force applied to the lever and it broke right at the back of the plate underneath. I also patched a few small holes in the floor while I was at it. More to come this week. Ill also try and get a video on the progress soon. Thanks to all those who have served this great country! GOD BLESS THE USA!
 

Attachments

bigginstactical

New member
246
1
0
Location
port angeles washington
Attempted to remove the drivers door today to no avail. The nuts on the door pin broke off. Long story short broke a hinge trying to get the pins out even with heat, penetrating oil and alot of muscle. All but 2 bolts broke off on the nut plates for the hinges where they mount to the truck :cry: I have to patch some rust near both plates so i plan on cutting a slot out and removing the old plates and making new ones. Hopefully will be able to get a full day on her tomorrow!doorplate.jpgphoto(3).jpg
 

welldigger

Active member
2,602
15
38
Location
Benton LA
I don't know if would have helped in your situation but left handed drill bits are the ****z for removing broken off bolt studs.
 

bigginstactical

New member
246
1
0
Location
port angeles washington
they would probably work but I wanted to open up and remove those plates. Im going to upgrade to grade 8 nuts and bolts and hopefully a bit bigger too. If i where going to keep the OEM stuff i think that would really be my only option haha. Thanks for the input though!
 

bigginstactical

New member
246
1
0
Location
port angeles washington
These stupid plates kicked my butt today. The drill bits i needed where MIA or broke, had to make a few trips around town finding parts which we all know sucks up the time :cry: I ended up being able to keep the upper plate in (didnt have much of a choice it turns out). The bottom plate ate two bits and I had to remove it from the inside. found some bar stock and tacked to the bottom hinge for a template and then drilled and tapped it. Worked out pretty well. Drilled the upper hinge and tapped it with no issues. The door now uses grade 8 5/16 bolts. I also removed some more cancer spots and pour 15 the rusted areas. One good thing today though is I heard about a metal brake for sale down the road so I went and picked that up. Decent little break for 100 bucks. Will hopefully have more work done tomorrow with some more pics. Oh and I did end up trying to use left hand bits and both broke sadly. I did not let it win though! haha
 

Attachments

bigginstactical

New member
246
1
0
Location
port angeles washington
This weekend and today I managed to patch the holes I cut and also fixed the hinge. I will no longer have to purchase one thankfully! Also finished up the new nut plates for the door and all the small little projects that i needed to do in the drivers door jam. I ended up re drilling the hinges and putting in a 5/16 grade 8 bolt for a hinge pin. Should work good. Judging by the weight of the door and years of experience replacing pins and bushings I don't feel that retrofitting a bushing and pin is wise on these hinges. To each their own, but i do feel a grade 8 will last years but may again be tough to get out if needed. Anti seize on the threads and liberal amounts of grease haha. I'm a stickler about keeping things moving and functional so I don't feel I'll have an issue. More work to come...alot more :(
 

Attachments

bigginstactical

New member
246
1
0
Location
port angeles washington
Extended the bracket for the center rear cab mount today. Also Welded in a plate to bolt the mount to the back of the cab. I actually like this set up better then the factory mount because it will be simple to remove if need be. Hope to start putting braces tomorrow for the floor.


duece3.jpgDuece2.jpgDueCe.jpgduece5.jpg
 

bigginstactical

New member
246
1
0
Location
port angeles washington
Today I was able to fab the floor supports and do a few small patches that needed to get done. Hope to fab up the seat brackets and maybe get the sheet metal this week :) Only took a few pics and sorry nothing too sexy to look at!image(5).jpgimage(6).jpg
 

bigginstactical

New member
246
1
0
Location
port angeles washington
So far this weekend I managed to fabricate the floor pieces, upper seat mount, and bolt the seat in place after fabing a bracket for it. At this point the floor is held down with self tappers. I'm not to sure what I want to do yet though.... I may use some j nuts and slightly larger bolts to attach the floor or larger self tappers. It holds fine and I'm positive it would not go anywhere once sealed and installed but I believe in overkill haha! So hope to figure that out in the next few days! I also need to make the small piece to attach to the tunnel so I only have to remove it to access the break if need be.
 

Attachments

hendersond

Well-known member
Steel Soldiers Supporter
1,171
29
48
Location
Galesville, WI
It looks good. Could you just back out the self tappers and plug weld the holes shut? Or do you need to remove the floor for some reason?
 

bigginstactical

New member
246
1
0
Location
port angeles washington
After looking at everything I think I want to be able to remove the floor. It will allow access to things that normally you could slide the bed back to get to..... with the cab on I wont be able to unless I remove the cab or floor. If I do weld it in, I know with my luck, that I'll need to do something that the floor inhibits haha! Better off bolting it in I think.
 

bigginstactical

New member
246
1
0
Location
port angeles washington
Only some minor changes. Nothing to post about. I had two weddings, two mud runs I helped put on (for people not vehicles :-() A sprint boat race, and a 3 day music festival I went to. haha! Have not had much time to do anything sadly. This weekend I plan to hop back on it. Id like to be putting on the sheet metal in the next week or so. Ill keep you posted for sure! Thanks.
 

bigginstactical

New member
246
1
0
Location
port angeles washington
This labor day weekend I was able to make some pretty good progress. I removed the roof, seat and other junk before the real work began. I added some cross bracing on the main framework to beef it up a bit. Cleaned up all the welds, finished up some missed welds, checked and rechecked the frame work. Sunday I fired up the sand blaster and cleaned up all the mil scale, welds and rust. I then cut the sheet metal a little long and hung it up. I temporarily screwed it in place and called it a night. Monday I worked for a few hours just welding. It took longer then I was hoping but I'm still happy with the progress. I still have not figured out if I am going to put in a small window or not yet in the back. I think it would be nice when not running a cargo cover. Any suggestions are welcome!
 

Attachments

bigginstactical

New member
246
1
0
Location
port angeles washington
So I have been slacking on updating this thread, sorry! Since last time I posted I have managed to get quite a bit done. The sheet metal was finished up, ground, bodyworked and primed. On the inside I seem sealed everything I needed to and coated everything with rusty metal primer. I top coated that with Wurth undercoating. I ended up using structural adhesive and screws to attach the floor. The center sections are removable to allow access to emergency brake, and all fittings on the air tanks.
 

Attachments

bigginstactical

New member
246
1
0
Location
port angeles washington
Also been working on the drivers seat mount. I ended up cutting the old springer seat brackets off the bottom plate and attaching log truck reach tubing to it for a riser. I plasma cut another plate for the top of the mount and drilled it out to accept the seat. Pretty easy build and took about 5 hours of messing around and adjusting. I think the Chrysler 300 seats are going to be perfect. The seat has tons of movement to accommodate almost anyone to drive it. Start on the roof next.
 

Attachments

Top
AdBlock Detected

We get it, advertisements are annoying!

Sure, ad-blocking software does a great job at blocking ads, but it also blocks useful features of our website like our supporting vendors. Their ads help keep Steel Soldiers going. Please consider disabling your ad blockers for the site. Thanks!

I've Disabled AdBlock
No Thanks