• Steel Soldiers now has a few new forums, read more about it at: New Munitions Forums!

  • Microsoft MSN, Live, Hotmail, Outlook email users may not be receiving emails. We are working to resolve this issue. Please add support@steelsoldiers.com to your trusted contacts.


Totaled Deuce Gets Rebuilt

Wildchild467

Well-known member
Steel Soldiers Supporter
2,052
56
48
Location
Milford / Michigan
Are the heads cracked between the valve seats?
You had to ask me after i got it all buttoned up! Haha... i didnt specifically look, but i didnt notice anything. I used a flat block and 120 grit sand paper to clean them up before i put them back on... all seemed good with them i guess.
 

Wildchild467

Well-known member
Steel Soldiers Supporter
2,052
56
48
Location
Milford / Michigan
Tonight was a productive night. I was able to get the turbo back on and all the new return lines from the injectors made up. I after s couple cranks (no intank pump), it took right off and ran. Ill post some pictures of other stuff i did when i get to work tomorrow. Im exhausted. :)
 

Wildchild467

Well-known member
Steel Soldiers Supporter
2,052
56
48
Location
Milford / Michigan
last night was a productive night. the attached pictures are of the insert i used in the return lines (eaton part and part number shown on the bag). the other also shows the progress working on the return lines.

the picture of the seal is the PTO shift shaft seal. it had a small leak before and after looking closer, i can see why it leaked. i dont know exactly what was going on, but i think the seal was pushing up against the boot. you can see how it was dented from something up against it for a long time. i attached a picture of how i got the old seal out. i used an awl (pronounced "all"... maybe i didnt spell it right?) and made a small hole in the seal. then i used a small scre and screwed it into the seal a little bit, grabbed it with some visegrips and it came right out. i put a new seal in it and am waiting on the boots to show up from UPS today. im thinking by 1730 hours, i should have the transmission ready to get put in the truck.
 

Attachments

Wildchild467

Well-known member
Steel Soldiers Supporter
2,052
56
48
Location
Milford / Michigan
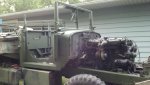
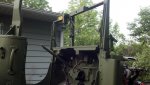
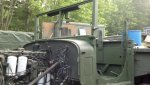
Yea Pat, definately making progress every night. I get out of work and head straight for home. Tonight i got the other PTO shift shaft seal changed and both PTO shift boots on. After that was done, about 5 minutes later the transmission was on the 3 point hitch boom behind our Ford 8N and headding for the Deuce. With the help of my dad (helping me guide the transmission in the truck), mom (holding the brakes on the 8N because the parking brake does not work) and my 86 year old grandma supervising, we got it in and bolted up! :) 
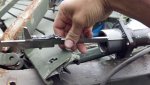
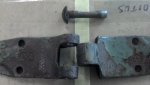
Following that was installing driveshaft and PTO shaft, repaced the hose on the thermostat housing, replaced the tube on the steering column, fixed the cracks in the "new" take off hood i bought, and cleaned up my windshield mounts/hinges. The hinges were frozen up like i would think how 95% of the deuces/800 series trucks are out there. While i had them off i worked them back and forth and kept spraying them with penetrating oil. I finally got them so they would swing back and forth just by holding one part and letting the other part of the hinge dangle. It may be excessive, but at least i know they will be good for another 40 years. Haha. So i cleaned up all the oil on them, wirebrushed them and layed down some primer.
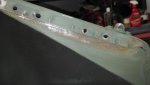
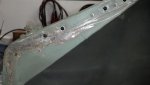
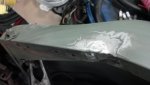
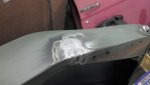
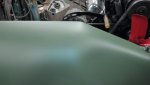
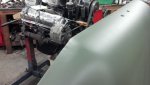
the cracks in the hood were not too bad to fix. Im no body man, but i think i did good on fixing it. I didnt use any plastic filler (aka bondo) and just took my time grinding the welds down carefully. Long story short, it turned out good.
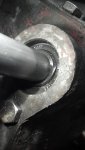
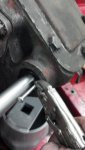
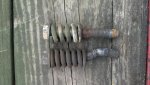
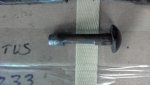
The steering column was not too bad to do (with the cab off). The key here is paying attention to the shims between the column and box when it gets taken apart. The replacement tube i got i measured the distsnce from the bolt flange and the very bottom of that casting. My original column was about 1.674" and the new column was about 1.684 inches. So with the stackup of shims from my original column, i took off .011" of shims. This way i keep the correct pressure on the bearings inside the steering box. I hope i did a good job at explainging that... i didnt get pictures of it, but i can tomorrow after work.
tomorrow's agenda might be putting on the cab. If not tomorrow then i will mix up some paint and throw some color to everything under/around the cab before i put it on. My nieghbor has a contractor doing some digging with an excavator and maybe have him come over and lift it on for us. No matter what, i know some 383 green is getting sprayed tomorrow! Well enough rambling for now, time for bed. Ill post the pictures tomorrow around 0900. :)
 

doghead

4 Star General /Moderator
Staff member
Super Moderator
Steel Soldiers Supporter
26,247
1,168
113
Location
NY
What are you using for fuel return line?

I've been using dot approved airline, it's black.
 

Wildchild467

Well-known member
Steel Soldiers Supporter
2,052
56
48
Location
Milford / Michigan
What are you using for fuel return line?

I've been using dot approved airline, it's black.
i got the fuel return line from cook brothers truck parts in binghamton. i brought in a piece of my old return line (somewhat see through) that was on the truck and told them exactly what it was for. they had a roll of the same stuff for about $6. this new return line hose is a lot easier to see through because it is new. i know a lot of people use the air brake hose, but i have yet to replace line that needs higher pressure. i thought about replacing the bigger lines that go to my filters with the air brake hose, but i have not gotten that far yet. the injector return line is fairly low pressure, correct? I just put that stuff on because i thought the guys at cook brothers know more about it than me, and it looked like the stuff uncle sam put on there, so i did it.... like one of those, "everybody else is doing it so i might as well too" things.

EDIT!

After the installation was complete and the truck ran for quite some time, i noticed the clear fuel return hose i used felt softer than what it was like when i originally put it in. It feels softer now. It will be ok for now as in when i am building the truck, but I am going to swap it over to the air brake hose like Doghead suggested before i put it back on the road.
 
Last edited:

Wildchild467

Well-known member
Steel Soldiers Supporter
2,052
56
48
Location
Milford / Michigan
here are the pictures of the cracks in the hood i fixed. also a picture how i measured my steering column tube to get my bearing preload the same as the original steering column tube.
 

Attachments

Wildchild467

Well-known member
Steel Soldiers Supporter
2,052
56
48
Location
Milford / Michigan
last night was a night of painting. i panted hard to get areas of the frame on my deuce so when i get the cab on it looks better. I also painted some other things like windshield hinges, intake mushroom, dash, etc. I was really happy with how my hood turned out where i welded up the cracks. the right side turned out darn near perfect.. the left side is not bad either... but not as nice as the right. its an MV, i just need to keep reminding myself that. it will still look good. I also had some "overspray" that got on my M105A2. :)
 

Attachments

Wildchild467

Well-known member
Steel Soldiers Supporter
2,052
56
48
Location
Milford / Michigan
thanks pat!... i definately could use your help with some things working on this truck. its not too bad though! :-D

i got a lot more stuff done on the truck last night i got the dash panel in (not the panel that holds the gauges), i have the gauge panel all built up (as shown in the picture) and almost ready to be installed as a sub assembly (just want to add ground wires to all of the gauges), radiator on and filled (with water for now), windshield frame in and mounted and a bunch of other odds and ends. its really starting to come together. i need to get the fenders prepped and painted and mount them on. since SS was down a couple days there, i lost track of my progress because i usually post each day... well it seems like it. an intresting thing i found was the bolt that mounts the cab on the right front corner. the picture shows the 2 bolts, one from an A2 and one from an A3. The A2 bolt is the bent one from my truck. wow. i couldnt even get the spring off the bolt. i thought it looked cool, so i didnt want to cut it since i had an A3 bolt and spring. there was a difference between the A2 and A3 spring that mounts the cab. i dont know if you can see in the picture, but the wire of the A3 spring is bigger than the A2. i did not check part numbers between the A2 and A3 to see if they are the same, but just an observation.

I got another dash panel from an A2 to put in my A3 cab. its a little bit of a pain to put in becasue when they drill some of the holes in the dashes, they go through to the cab also. so some data plate screws do not line up... its a little bit of a pain.

so back to the dash panel. i got that in last night as i said and some of the wiring ran. i need to print off the wire number list so i have that and it will make things easier when figuring out what wires go where. i got the accessory switch all wired and installed, along with the push button starter switch. i was thinking about putting the A3 starter switch in (same as the 900 series i believe) because i just kinda like it. maybe i will, maybe i wont. the plug is different in the back though. Tonight i should have the air cleaner mounted on the firewall and the gauge panel mounted in the truck. When i was building the gauge panel, i noticed that the face of my tachometer was bent. must be when i hit, that something moved in the tach and bent the face with the numbers on it. my dad was able to take it apart and straighten it out though. way to go dad! i was working like heck on the truck so he is good at little project like that.

well i hope all what i said made sence... its been a lot of work and multitasking working on the truck. i plan my evening out so i get the most done. soon as i get home, i might paint so by the time a couple hours go by, it will be dry enough to handle so i can mount the stuff up by the end of the night. its hetic, but good. my goal of having the truck done in 2 weeks went out the window, but at least i can see the finish line now! I still need to find a good solid carbo box and troop seats.
 

Jakelc15

Active member
718
36
28
Location
Hanover Pa
I still have the bed off my wrecked truck if you need one. The tail gate is bent but the rest is straight. Has some surface rust and a couple dents. Not too far away
 

Wildchild467

Well-known member
Steel Soldiers Supporter
2,052
56
48
Location
Milford / Michigan
Last night I did not get a whole lot done. I bought a take-off fender a while back and last night I took it all apart. It had the headlight panel still mounted and the marker light, etc. still on. I got it all apart, used the DA sander to sand some of the stuff down and hand sanded the hard to get spots. I mixed up about 8 ounces of paint and laid on a good heavy coat on them. I guess it is supposed to rain tonight, so I am planning out what I need to get done. I think I will finish my gauge panel getting the ground wires made and installed. I have a tarp over the whole cab and engine, so maybe I can sneak under that and get everything hooked up.

I have all of the glass out to the glass shop getting the glass replaced, so maybe I could also take the door latches out and get those freed/lubed up real good. It’s nice when the doors shut nice and work like they are supposed to. Now would be the time to do that with the glass out.

So that’s the goal tonight. Get the dash in, free up the latches and maybe try and rebuild my hood hinges so they are not so loose... all good inside projects. :-D
 

Wildchild467

Well-known member
Steel Soldiers Supporter
2,052
56
48
Location
Milford / Michigan
Another project was taking the hood hinges from the A3 (same as my A2, but one on my A2 was bent) and making the hinges tighter. I thought there was a thread on here where somebody put small bushings in their hood hinges, but i could not find it. What I am going to do is grind the rivets and pound them out of the hold hinges. After i took my one hinge apart (used the bent hinge from my A2 hood as a test hinge) i saw that the wear item was in fact the rivet. I measured the hole in the hinge and found that that was worn a very little bit but not bad at all. What I am going to do is ream the hood hinges out to about .307” (or whatever the straight portion of the bolt diameter is) and install a 5/16” bolt. I am not going to install just any 5/16” bolt though. I picked through my bolt bin and found a couple where the straight shank of the bolt will span across the entire length of the hinge and then the threads start just as it exits the hinge. This way, the thread part of the bolt will not be acting as any “wear surface” of the hinge. The only thing I will need to do is cut off some of the threaded portion of the bolt off. I do not have any pictures of the hinge yet. I will post them tomorrow when I get the work completed tonight. I know it is just a hood hinge, but at least it will be nice and tight when I get it done. I will just need to make sure I oil it once in a while to make sure to keep the rust worms away. Obviously I open the hood quite a bit to check the oil and fix things that are not broken, so I still shouldn’t have a problem!
 

Attachments

Last edited:
Top
AdBlock Detected

We get it, advertisements are annoying!

Sure, ad-blocking software does a great job at blocking ads, but it also blocks useful features of our website like our supporting vendors. Their ads help keep Steel Soldiers going. Please consider disabling your ad blockers for the site. Thanks!

I've Disabled AdBlock
No Thanks