• Steel Soldiers now has a few new forums, read more about it at: New Munitions Forums!

  • Microsoft MSN, Live, Hotmail, Outlook email users may not be receiving emails. We are working to resolve this issue. Please add support@steelsoldiers.com to your trusted contacts.

Totaled Deuce Gets Rebuilt

Wildchild467

Well-known member
Steel Soldiers Supporter
2,052
56
48
Location
Milford / Michigan
oh, i also took off my brush guard to remove my winch clutch lever. i installed the detent for the winch lever. It works good now! next step i need to get the torches and wrenches out and finish taking off the front pumper. man that thing looks ugly all bent up.
 

Wildchild467

Well-known member
Steel Soldiers Supporter
2,052
56
48
Location
Milford / Michigan
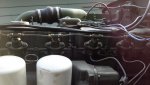
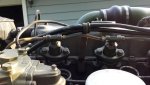
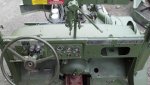
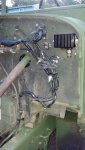
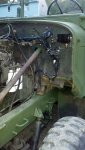
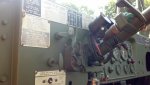
I didnt do anything on the truck this weekend, but i will definately do something on it tonight. I just wanted to update everybody on my Fuel Return Line Hose. See Post #127. I used the clear stuff and it is not what i should be using. Per Dogheads suggestion (and other people i have seen change their return lines on here), the clear plastic is not a good idea. Right after i installed it, the lines were fairly straight from one injector to the next. now they are bent up a little bit and the plastic feels more soft than what it was before. This is not a good thing. I will be changing it over to the black airbrake hose before i put it on the road. Ill have to get a picture of what it looks like now, just to show what it looks like before and after.

I wish i had more to update everybody on, but nothing right now. I just have been thinking a lot about what more to get done tonight. just wish i had more time to get out of work earlier so i could go get parts (air brake line and furrels).
 

Wildchild467

Well-known member
Steel Soldiers Supporter
2,052
56
48
Location
Milford / Michigan
last night i got the speedometer cable in, the high/low range lever, installed the sheet metal cover over the t-case and changed my temperature gauge. I wanted to wash my drivers seat with some mild laundry detergent just to make it nice and clean, but i didnt get that far. it would be a good day to let it dry seeing it is going to be in the 90's today. ill work on that tonight. i want to finish up my stuff under the dash before i put my seats in. im almost all done under the dash.

I still need to get my passanger side fender on and stack installed. i want to get the hood on and then install my windshield glass/frames. lots of work, but i am getting there!

here are pictures of the fuel return lines that need to be replaced. Thanks for the tip Doghead. Im going to call NAPA and see if they have some of the air brake line. that is close to work and i could get that on my way home. [thumbzup]
 

Attachments

Wildchild467

Well-known member
Steel Soldiers Supporter
2,052
56
48
Location
Milford / Michigan
last night, i got the seats in (minus cushons). i am in the process of cleaning the cushons just so that they are clean when i put them in. some had dirt marks on them. Does anybody have experience of what would be a good cleaner. i would think i can get them wet without a problem and they are going to dry fairly quickly in this heat. It is the new type of material that the seats are made out of, not the old canvas. its a lot softer than the original. i was thinking a mild mix of water and laundry detergent and a light brush.
 

Attachments

Warthog

Moderator
Super Moderator
Steel Soldiers Supporter
13,775
227
63
Location
OKC, OK
I like the cab shots. Looking good. [thumbzup][thumbzup]

You only lack finishing up.

I just picked up a winshield frame that has the electric wipers. I think I'm going to like them.
 

Wildchild467

Well-known member
Steel Soldiers Supporter
2,052
56
48
Location
Milford / Michigan
Warthog,

Yes, it seems like I am very close, but yet so far. i still need to put the whole front sheet metal on. it seems to take forever. I need to spend less attention to so much detail maybe. I spend so much time fixing little things to make it near perfect it takes a lot of time. not saying I am restoring it, but paying more attention to form, fit and function. I need to figure out what to use for fender welting. I have some Teflon anti chafing tape, I might use that. to explain it, it is like a double sided tape thickness, but instead of one side being sticky, it is super slick. So I think if I put a layer of that on the cowl, and one on the fender, it should be good.

One thing that has helped me with this project is posting my progress on here and rambling about all the details. It helps focus my mind and formulate a plan to keep moving forward. Thank you to everybody that has read my posts and been supportive to me rebuilding this Deuce. I don’t think I could have done it without of your guys support!

I think I need to name the truck “Christine”:roll::-D
 

Wildchild467

Well-known member
Steel Soldiers Supporter
2,052
56
48
Location
Milford / Michigan
Last night I got the passenger side fender on and bolted down. I just need to get the correct fender brace that goes from the cab down to hold the bottom of the fender I also need to get the exhaust hooked up and get the brace for the inner fender on there. There was some body filler that was originally on the fender that needs some attention. It has a small crack in It and it will drive me nuts if I don’t fix it. It should be a easy fix and won’t take much time. maybe put some duraglass on there and surfboard sand it. straight forward I think. I took a couple more pictures of the inside too. :p
 

Attachments

Wildchild467

Well-known member
Steel Soldiers Supporter
2,052
56
48
Location
Milford / Michigan
Here is the clamp for the J-Pipe that i need to bolt on. I am not sure where this mounts on the fender or body. My M109A3 i think mounts a little different. ill have to figure it out.

EDIT: I figured it out.
 

Attachments

Last edited:

Wildchild467

Well-known member
Steel Soldiers Supporter
2,052
56
48
Location
Milford / Michigan
Looking good. I think you should leave the bumper as is.
yea but its a pain to stand on the fender than step to the downward angle of the bumper. ill slip and smash my nads for sure! I need to find a winch bracket for the right side (the piece that the winch bolts to directly). need that baddd!
 

Wildchild467

Well-known member
Steel Soldiers Supporter
2,052
56
48
Location
Milford / Michigan
ooo, isnt that a pribbs bed? no wonder why it held up so good! that damage would buff out compared to what i had. This weekend was rough... i have a car show in 3 weeks i registered the truck for and need to get it done. its getting to be a pain in the butt and wearing me down working this hard on it.

i got a bunch of little odds and ends done on it this weekend and both front fenders are mounted. the right side fender was a paint to put on as the fender brace on the right side (the one that mounds to the cab and points staight down...hold the back of the fender) holes did not line up with the holes in the fender. they were about 5/8" low. so i justput longer bolts in and drew it up tight, then tightened all the other fender mounting hardware. i dont like it, but its on there.

the exhaust system is all mounted up also.
 

Wildchild467

Well-known member
Steel Soldiers Supporter
2,052
56
48
Location
Milford / Michigan
I don’t have any up to date pictures, sadly. Having my phone handy all the time is good because I am able to take more pictures. right now both fenders are on along with the right side headlight panel. The right side headlight panel is on the pile of waiting to be painted parts. The exhaust is completely done except for the heat shield. I need to get the brush guard on so I can bolt the hood on and adjust it up. Next to do is bolt on my turn signal housings and get them wired up. I am leaving everything masked off when I put them on so after the majority is put together, I can start painting the 3 color camo.

All that stuff covers from the cab forward.

I still need to get the box swapped over and find a new bracket for the winch on the right side and get a new bumper. So anybody that can help me out locate a new winch bracket (stamped style) I would appreciate it. I would feel a lot better to get that bent bumper off the front and have that looking good.

Here are some of the pictures I do have which may not represent the current status of the truck. One is of how I secured the wiring to the firewall and mounted my turnsignal flasher unit. The other picture is of the holes I have to fill in on the floor. These holes were to check transmission fluid on the A3 I guess.
 

Attachments

Wildchild467

Well-known member
Steel Soldiers Supporter
2,052
56
48
Location
Milford / Michigan
Yea, it was pretty wild. Nothing i want to do again. That goes for rebuilding another deuce for a while. Dang its a lot of work if you are nit picky with things. It helps having a place to get parts close by like Kublos... ken is great up there.
 

Wildchild467

Well-known member
Steel Soldiers Supporter
2,052
56
48
Location
Milford / Michigan
Dad and I got a lot of work done last night. As you can see in the pictures there was some good progress and I am very happy about it. More progress will be done tonight.

I thought the hood install would be tougher than what it was with the alignment of the hood hinges. I was concerned because I had the hood hinges reamed out to the 5/16” bolt as I talked about earlier in this thread. One hinge seems tighter than the other, but when they were installed and the hood raised, it did not seem to bind at all. Either I got lucky putting them on, or I just was thinking about it too much and it really didn’t matter. Haha!

One picture is of the mechanical oil pressure gauge i screwed in the block just to see what it was. the gauge read a little past 60 PSI at idle when the engine was only running for about 8 minutes or so. the gauge on the dash read a little less than 60. so it goes to show that the original gauges are not as accurate as a mechanical. It makes me feel good knowing this because I never checked the oil pressure with a mechanical gauge ever. The gauge did act a little funny once, so I am going to swap it out with another one just to make sure. Note: I did attach ground wires to all the gauges so they are all attached to a common ground. I am getting excited now, it is starting to look like a deuce again! :smile:
 

Attachments

Wildchild467

Well-known member
Steel Soldiers Supporter
2,052
56
48
Location
Milford / Michigan
oh the picture of the cat... that is Smitty. the black spot on his head i think came fromt he deuce. he was down by the garage and was "helping me" so i think he nuzzled up to the slobber tube i think. He has been like that for about a week now. the mark wont come out with soap and water. haha!:lol:
 

Wildchild467

Well-known member
Steel Soldiers Supporter
2,052
56
48
Location
Milford / Michigan
Last night we got the top bows on and I installed the Stop and Throttle Cables. Before i got home from work dad got the rest of the front bumper bolts torched off and took off the front bumper. Today’s mission is dad is going up to Kublo’s for me (I have to work… ugh!) and picking up a bumper. I ordered a winch bracket from Memphis, so that should be here maybe Saturday. I Still need to get the doors on and all the window glass in it. After I painted the windshield glass and it was laying on the flat on the front part of the glass, I sprayed a little Teflon lube on the windshield hinge. It goes on somewhat watery, but hardens up to a thick gel that is super slippery. I think this will work good to keep the windshield moving freely. I just did this as a PM/I don’t ever want to hear it squeak or chatter.

An idea on installing the soft top: I was thinking I could use a gun cleaning brush, maybe .30 caliber and wire brush inside the groove the soft top fits in. it seems to me that a little bit of rust build up can be a pain for the top to slide on. Maybe if I clean it up and put a little sil-glide (the stuff you can get from NAPA) that it will slide on easier. Worth a try, can’t hurt anything.

Another couple pictures are of the winch support bracked (as it is called in the TM). It shows how it got "tweeked". Ouch.

The one picture is of grandma "supervising" as she has her feet kicked up on a deuce rim. She wanted to stay by dad sand i working, so i brought a chair over in the shade and put a nice foot rest there for her. :wink: She loves to spend time down in the shop and watch Dad and I work. She helps out some too. Last night she held the 9/16” wrench inside the cab on that special feed through bolt for the throttle cable as I tightened it on the other side. Way to go Grandma! :lol:
 

Attachments

Top
AdBlock Detected

We get it, advertisements are annoying!

Sure, ad-blocking software does a great job at blocking ads, but it also blocks useful features of our website like our supporting vendors. Their ads help keep Steel Soldiers going. Please consider disabling your ad blockers for the site. Thanks!

I've Disabled AdBlock
No Thanks